ASSEMBLY AND ADJUSTMENTS
16
WARNING: Do not turn on the tool until it is fully assembled according to the instructions.
Failure to follow the safety instructions may result in serious personal injury.
WARNING: When handling saw chains, al-
ways wear protective gloves.
Chain for more details - page 15).
2. Lift the worn saw chain out of the fitted slot in the
guide bar.
3. Place the new chain in this position, making sure the
teeth are facing the correct direction and that the edge
of the chain fits into the slot around the guide bar.
4. Replace the cover. Adjust tension before operating.
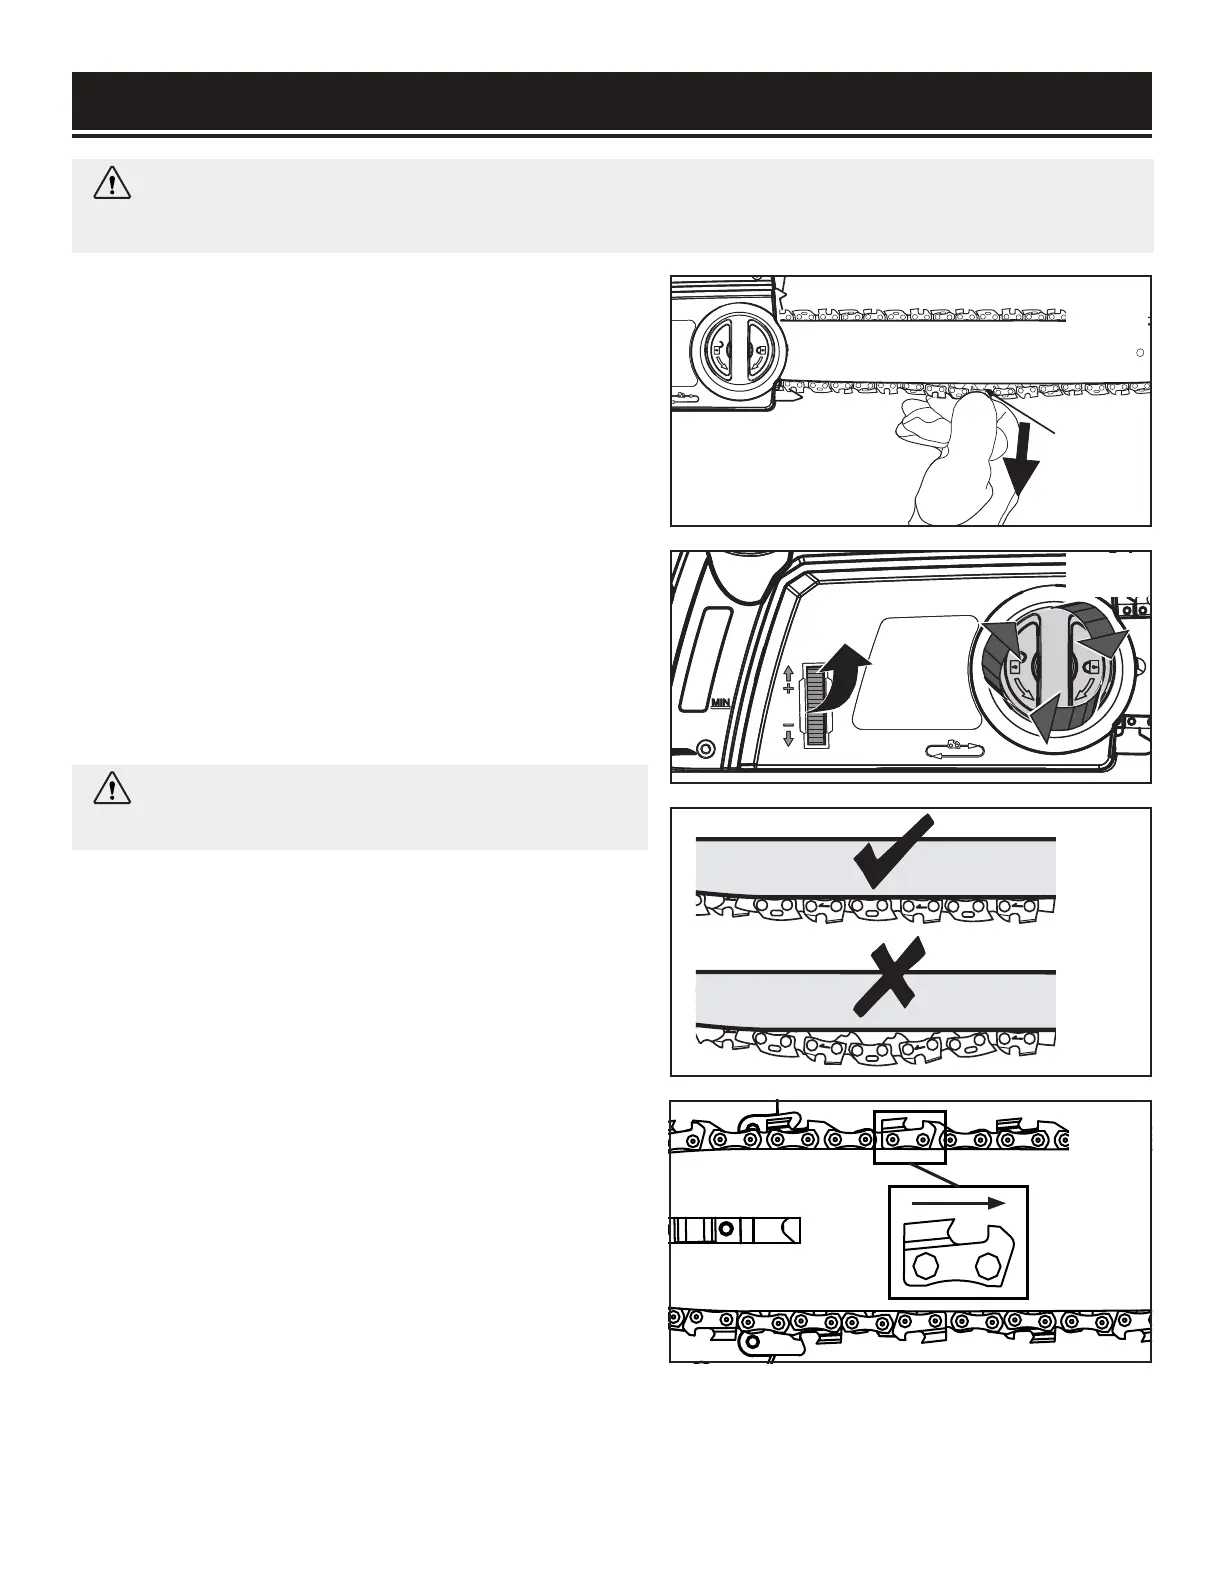
3. To adjust the saw chain tension, rotate the chain
tensioning wheel (Fig. 5). Rotating the wheel upwards
increases the tension while rotating it downwards de-
creases tension. A properly tensioned chain should
have no sag (Fig. 6) and should only be able to be
pulled 1/8 inch (3 mm) away from the guide bar of the
saw.
4. Once the chain is properly tensioned, tighten the
cover locking knob. Do not over-tension the chain: this
will lead to excessive wear and reduces the life of both
the bar and chain.
REPLACING THE CHAIN
1. Rotate the cover locking knob and remove the cov-
er of the saw’s body (see Assembly of Guide Bar and
Fig. 4
Fig. 5
Fig. 6
Fig. 7
1/8"
(3mm)