POSITIONING THE FENCE
The fence can be positioned to plain the wood at any angle from 45 degrees inward to 45 degrees outward. Before
adjusting the fence’s position, make sure the power is turned off and the unit is unplugged. To adjust the fence::
1. Loosen the fence tilting handle. This handle is spring loaded. To loosen the handle, it is necessary to gently pull
the handle away from the fence support release and turn. Continue until loosened.
2. Manually tilt the fence to desired angle inward or outward. As long as you have set up the machine as described
in the assembly section of this manual, then the fence will hit 45 degrees in either direction. However, it is always
advisable to check your angles with a piece of scrap wood before jointing the real deal.
3. Once the desired angle has been achieved, tighten the tilting handle.
4. The fence can be positioned over the blade so that only the desired width of the blade is exposed. Make sure
the exposed width matches that of the workpiece.
5. Slide the fence forward to the desired position and tighten the fence sliding handle, making sure the fence is
tight and secure.
10
OPERATION
Jointing is a surfacing operation in which a small amount of wood is removed from the edges and faces of boards
to smooth and straighten surfaces. This way, the two edges from differing boards can fit together to form a perfect
seamless joint. Of course, you probably already knew all that, otherwise why would you have bought a jointer?
Planing refers to the sizing of lumber to a desired thickness while creating a level surface parallel to the opposite
size of the board. Depth of cut is the term used to indicate how deep the blades will cut into the workpiece.
WARNING: Do not connect the jointer to the power source until all assembly steps have been
completed.
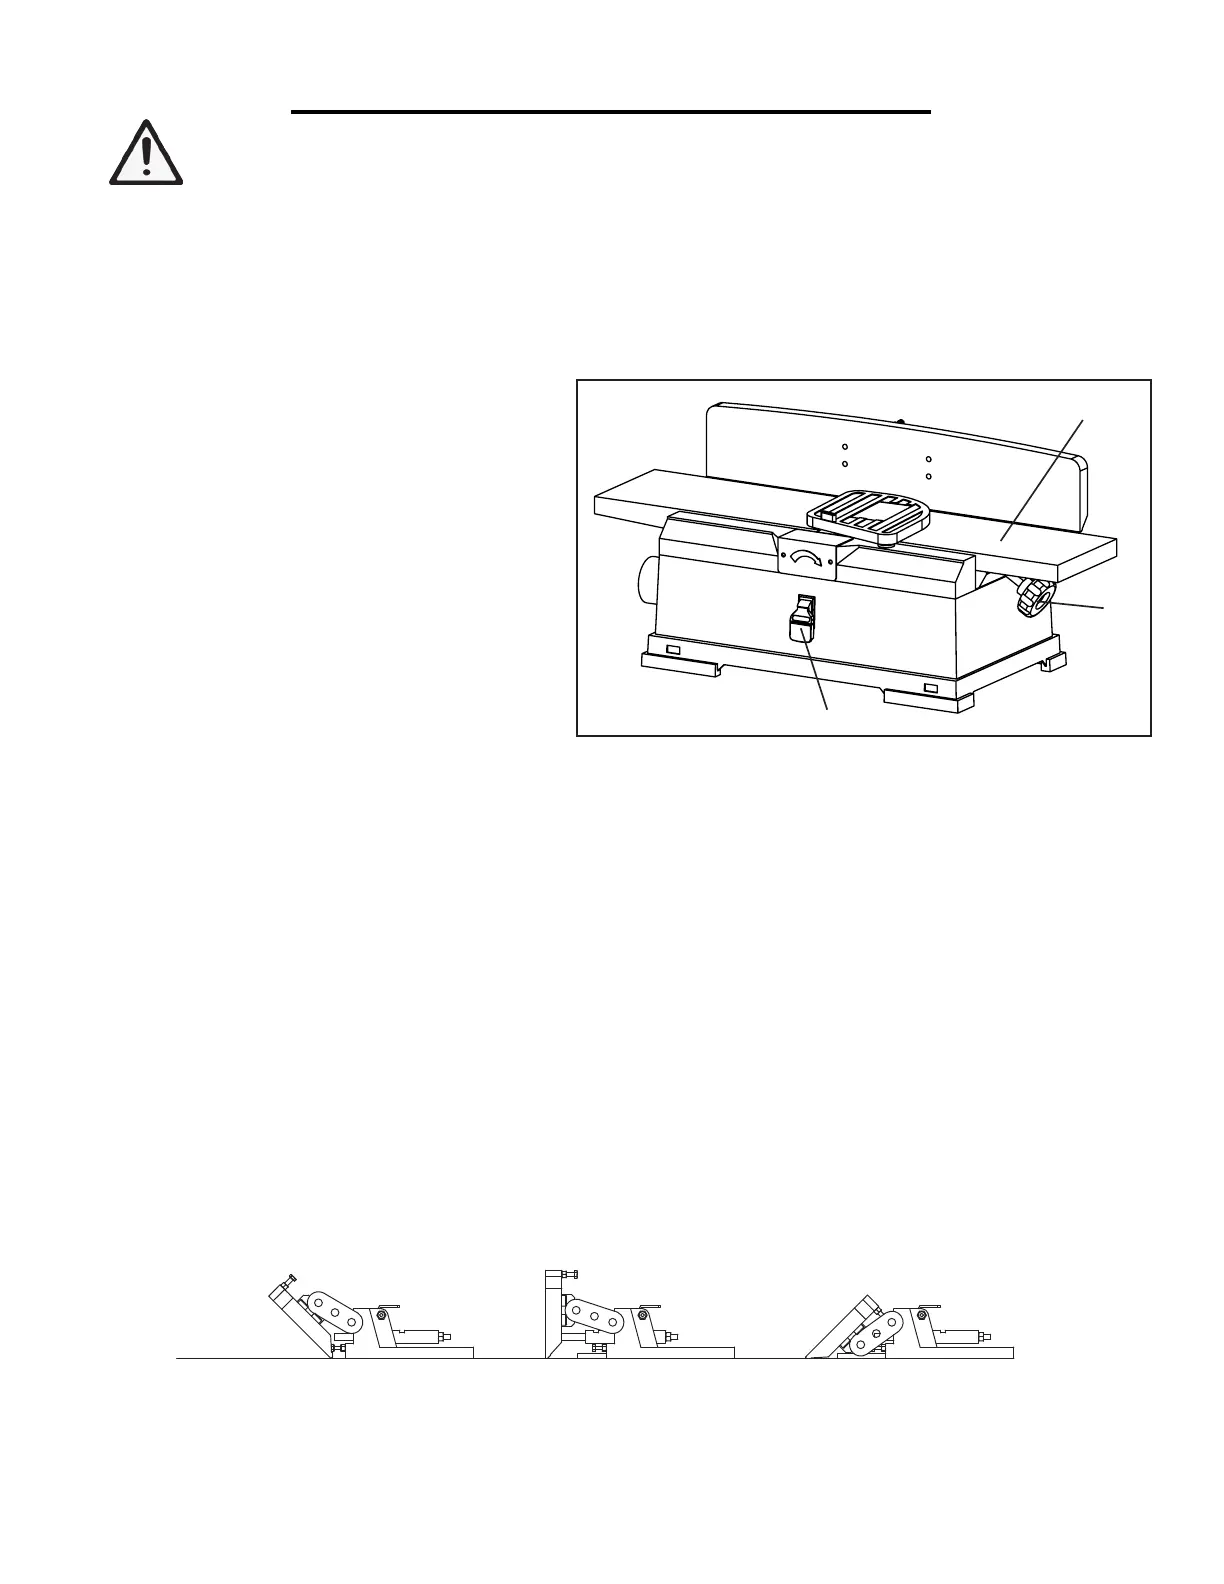
ON/OFF SWITCH (FIG. H - 3)
The ON/OFF switch is located on the front of the jointer. To turn the jointer ON, move the switch to the up posi-
tion. To turn the jointer OFF, move the switch to the down position. Remove the red tab to engage child-safety
lock and prevent unwanted start-ups.
ADJUST THE DEPTH OF CUT
The depth of cut is adjusted by the relative posi-
tioning of the infeed table with respect to the cut-
terhead. The infeed table (Fig. H - 1) can be raised
or lowered using the hand wheel (Fig. H - 2). Turn-
ing the hand wheel clockwise will raise the infeed
table, causing less wood to be removed from the
workpiece. Turning the hand wheel counterclock-
wise will lower the infeed table, causing more wood
to be removed from the workpiece. Do not make
jointing or planing cuts deeper than 1/8 of an inch.
S
借(通)用件登记
爆炸图序号
机
种
旧底图总号
底图总号
签 字
日 期
区
Fig. H
1
2
3
 Loading...