Do you have a question about the Westcott RAPID BOX and is the answer not in the manual?
Attaches a switch insert to the lantern ring using metal tabs and a thumb lock.
Describes opening the lantern, fitting fabric, and securing the frame with internal bars.
Details how to collapse the lantern by undoing fasteners and maneuvering the internal bar.
Instructions for attaching the Switch Lantern to a light stand or mounting arm with a strobe.
Steps for mounting the lantern to a speedlite using compatible inserts and securing the bracket.
Steps to remove the lantern from the light source and then detach the insert using the thumb lock.
Warnings regarding improper assembly, mounting, and securing to prevent damage or injury.
Guidance on gentle spot cleaning with a damp cloth and avoiding cleaning agents.
Information on durable aluminium inserts for attaching various light modifiers to light sources.
Details the one-year limited warranty, exclusions, disclaimers, and repair process.
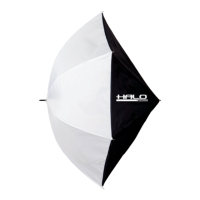
The Westcott Rapid Box Switch Lantern is a light modifier designed to provide soft, diffused light for various photography and videography applications. It is part of the Rapid Box Switch system, which allows for interchangeable light mount inserts to adapt to different light sources.
The primary function of the Rapid Box Switch Lantern is to transform harsh light from strobes, constant lights, or speedlites into a broad, soft, and even light source. Its spherical design, when fully assembled, creates a large diffusion area, ideal for illuminating subjects with a natural-looking light quality, reducing harsh shadows, and producing pleasing catchlights. The "Switch" aspect of its name refers to its modular design, enabling users to quickly swap out light mount inserts to accommodate a wide range of lighting equipment from various manufacturers without needing to purchase a new modifier for each light. This versatility makes it a valuable tool for photographers and videographers who use multiple lighting systems or frequently switch between different types of lights. The Lantern is particularly effective for illuminating entire scenes or groups of subjects due to its omni-directional light output.
The Rapid Box Switch Lantern offers several usage features that enhance its convenience and performance:
The Lantern is designed for quick and straightforward assembly. Users first slide the collapsed Lantern frame into the fabric softbox, ensuring the Switch Insert end faces out. Proper fabric fitment involves aligning the seams of the fabric with the frame's ribs while pressing down on the adapter ring. To open the Lantern, it is placed on a flat surface with the Switch Insert facing upwards. Users then push down on the adapter ring until an internal horizontal bar locks into place, causing the ribs to bow outwards and form the spherical shape. Once open, the collar of the Lantern is secured using hook-and-loop fasteners. A fabric dot with a hook-and-loop fastener is included, which can be affixed to the front of the modifier to maintain clean diffusion fabric during assembly or to reduce hot spots during use.
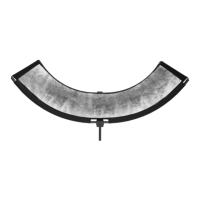
Disassembly is equally simple. The collar's hook-and-loop fasteners are undone. By pushing down on the adapter ring, the internal horizontal bar is released from its hooks, allowing the Lantern to collapse. It is crucial to maintain pressure on the adapter ring until the Lantern is fully collapsed to prevent it from springing open, which could cause injury or property damage.
The modular design centers around the Switch Insert. To attach an insert (sold separately), users locate three metal tabs and a thumb lock on the edge of the Lantern ring. The Switch Insert is slid under these tabs while shifting the thumb lock outwards. Releasing the thumb lock secures the insert in place. This mechanism allows for quick and secure attachment and removal of different light mounts.
The Rapid Box Switch Lantern can be mounted with various light sources:
Strobe or Constant Light: For these lights, the light source is first placed on a light stand, boom, or mounting arm. After the compatible Switch Insert is affixed to the Lantern, the insert is aligned with the face of the light. The Lantern is then secured to the light source, following the light source's specific mounting instructions.
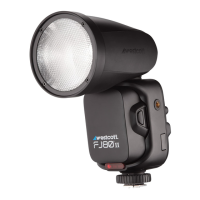
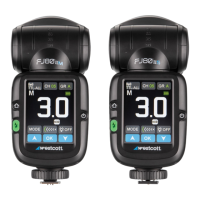
Speedlite: When using a Speedlite, a specific Switch FJ80 Insert #2544 or Speedlite Insert #2541 (both sold separately) is attached to the Lantern. The insert has two pins; pressing the longer pin and rotating the adapter mount counterclockwise locks it into place. A shoe mount tilter bracket, included with the Switch Insert, is then aligned with a channel on the insert and secured with a screw at the desired height. The tilter bracket is then placed on a light stand and secured with its tension knob. Finally, the speedlight is slid into the cold shoe bracket and secured with a tension screw. A lower tension knob on the cold shoe allows for adjusting the speedlite's distance from the Lantern, optimizing light output and spread.
To change an insert, the Lantern must first be removed from the light source and allowed to cool. The thumb lock on the rear of the Switch Lantern is slid outward, and the insert is gently slid up and away from the thumb lock.
The Switch Lantern modifier is heat-rated for a maximum of 300-Watts (COB) and 1200Ws (strobe), ensuring compatibility with a wide range of lighting equipment while maintaining safety.
Several cautions are highlighted to ensure safe and proper use:
Maintaining the Rapid Box Switch Lantern is straightforward, focusing on keeping the diffusion panel clean:
The modular design also implicitly aids in maintenance by allowing individual components, such as the Switch Inserts, to be replaced if damaged or if compatibility with a new light source is desired, extending the overall lifespan and utility of the modifier.
| Type | Softbox |
|---|---|
| Removable Front Diffuser | Yes |
| Removable Inner Baffle | Yes |
| Compatibility | Speedlite |
| Interior | Silver |
| Weight | 1.1 kg |
| Color | Black (exterior), Silver (interior) |