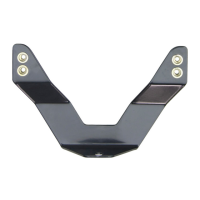
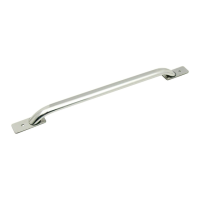
1 1 BRACKET
2 2 M6 X 20MM SOCKET COUNTERSUNK SCREW
3 2 RUBBER BUMPERS
1 1 SOPORTE
2 2 TORNILLOS DE CABEZA PLANA DE M6 X 20MM
3 2 PARACHOQUES DE HULE
1 1 SUPPORT
2 2 M6 X 20MM PO VIS A TETE PLATE
3 2 PARE-CHOCS CAOUTCHOUC
QTY
CONTENTS - CONTENIDO - CONTENU
TOOLS - HERRAMIENTA
- OUTILS
5/32” HEX WRENCH
FLAT TIP SCREWDRIVER
APPLICATION: ALL BULL BAR ASSEMBLIES
ITEM
APLICACIÓN: TODOS LOS ENSAMBLES DE LAS PARRILLAS DELANTERAS
APPLICATION: TOUTES BARRES PARE-CHOCS SAFARI
AUTOMOTIVE PRODUCTS, INC.
LLAVE HEXAGONAL DE 5/32”
DESTORNILLADOR DE PUNTA
PLANA
CLE HEXAGONALE 5/32 po
TOURNEVIS A EMBOUT PLAT
LICENSE PLATE ASSEMBLY
ENSAMBLE DE LA PLACA DE
IDENTIFICACIÓN
MONTAGE DE LA PLAQUE
D'IMMATRICULATION
32-0055
INSTRUCTIONS-INSTRUCCIONES-CONSIGNES
STEP 1. Remove the contents from box and check for damage. Verify all parts are present. Read instructions
completely before beginning.
STEP 2. Place rubber bumpers on bracket face to keep bracket from contacting the bull bar. SEE FIGURE 1.
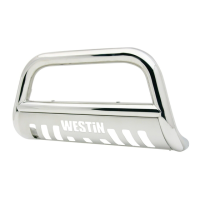
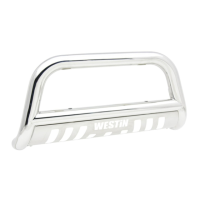
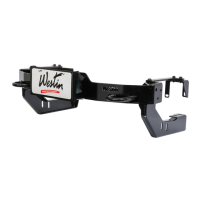
STEP 3. Remove center skid plate bolt from bull bar assembly and install license plate bracket against cross tube
and on top of skid plate. Reinstall center skid plate bolt through license plate bracket and tighten. SEE
FIGURE 2.
STEP 4. Attach license plate to bracket as shown. Use either top or bottom threaded insert to ensure best fit and
License plate visibility. SEE FIGURE 1.
STEP 5. Attach Bull Bar to vehicle according to the instructions supplied with the Bull Bar Assembly.
PASO 1. Retire el contenido de la caja y verifique que ninguna pieza se haya dañado. Verifique que no falte
ninguna pieza. Lea las instrucciones completamente antes de comenzar.
PASO 2. Coloque los parachoques de hule sobre la superficie externa del soporte como se muestra para impedir
que éste haga contacto con la parrilla delantera con tirón y la placa de identificación. VEA LA FIGURA 1.
PASO 3. Retire el perno del protector de la parte inferior central del ensamble de la parrilla delantera con tirón e
instale el soporte de la placa de identificación contra el tubo transversal y arriba del protector de la parte
inferior. Vuelva a instalar el perno del protector de la parte inferior central a través del soporte de la placa
de identificación y apriete. VEA LA FIGURA 2.
PASO 4. Coloque la placa de identificación en el soporte como se muestra. VEA LA FIGURA 1.
PASO 5. Coloque la parrilla delantera con tirón en el vehículo de acuerdo con las indicaciones provistas con la
parrilla delantera con tirón.
FINISH PROTECTION
Westin products have a high quality finish that must be cared for like any other exposed finish on the vehicle. Protect the finish with a non-abrasive automotive wax, (e.g. Pure Carnauba)
on a regular basis. The use of any soap, polish or wax that contains an abrasive is detrimental, as the compounds scratch the finish and open it to corrosion.
ECO#: W14-0028
Date:04/21/14
P.N.: 75-0376 RevC