34
CLEANING YOUR APPLIANCE
Cleaning your oven/grill door
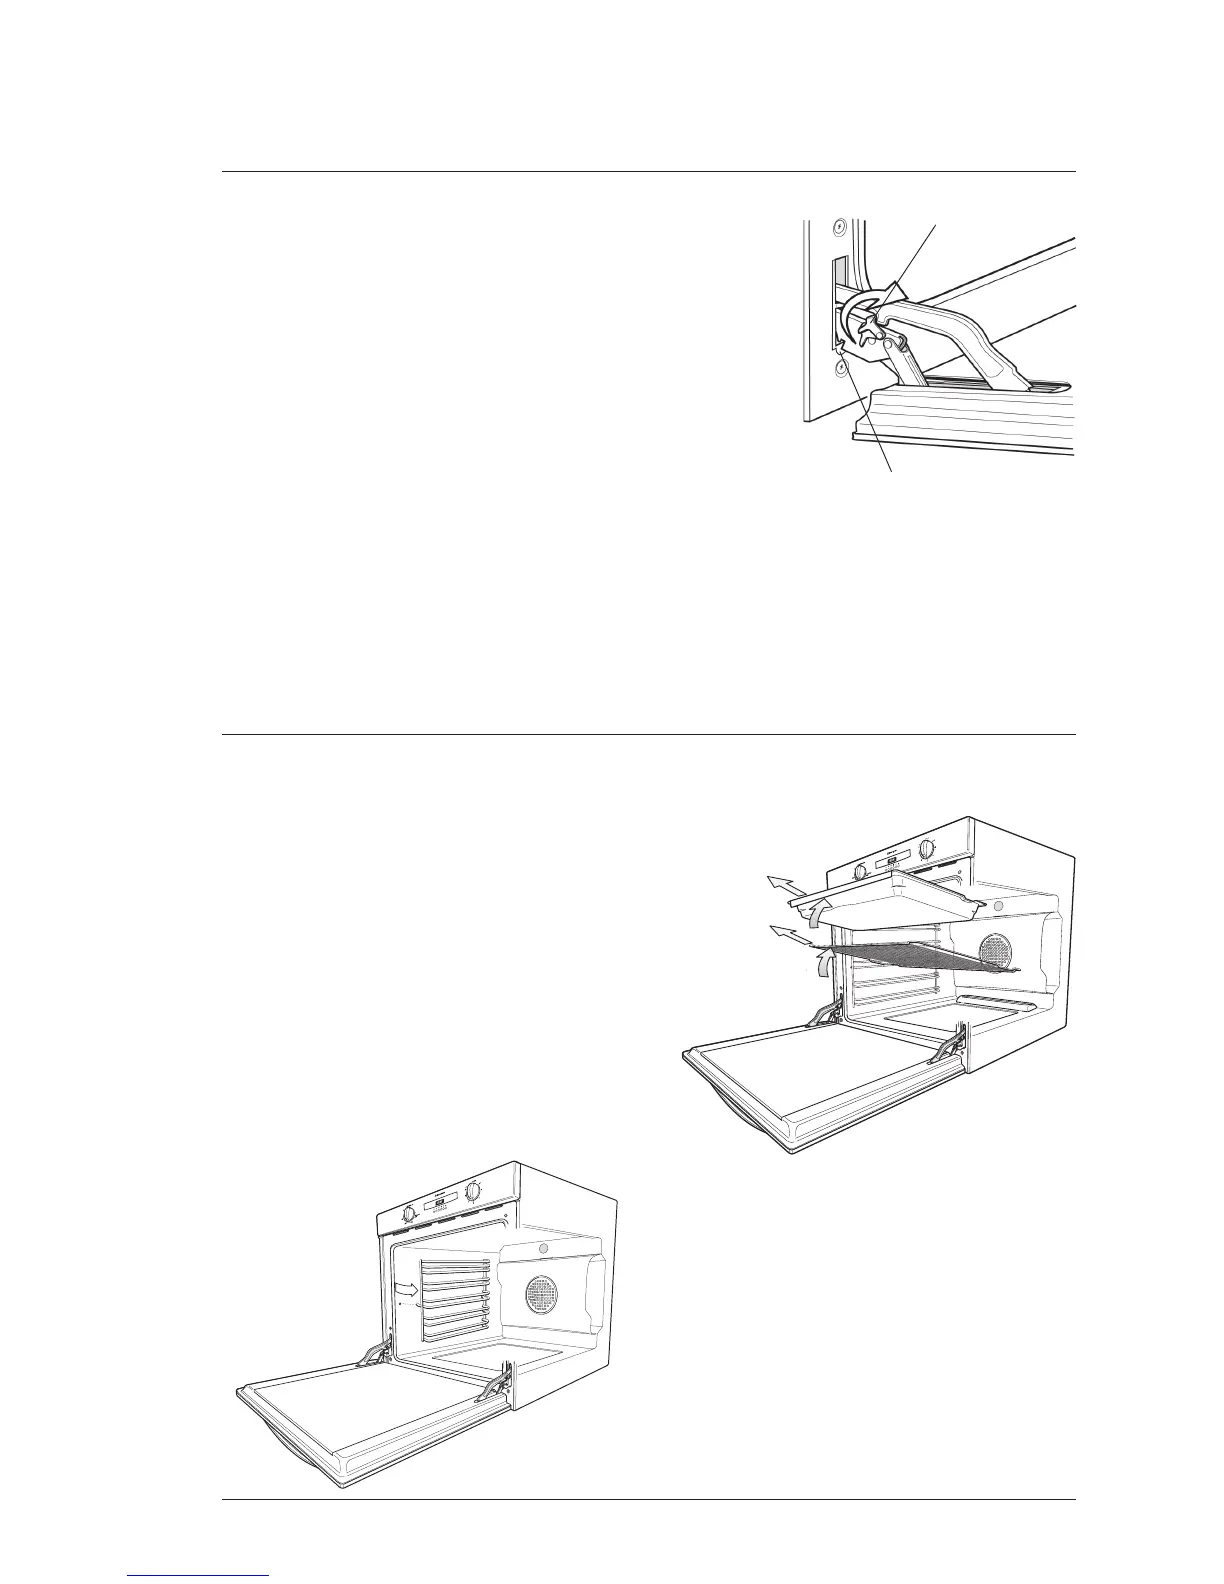
Removing the door from your appliance
Follow these steps to better access the oven for cleaning:
• Open door fully.
• Rotate the two stirrups forwards so that they are engaged
together onto the hooks on the hinge arms.
• Hold both stirrups in place and slightly close the door.
The stirrups will now remain engaged.
• Close the door half way and lift it away from the oven.
• Do not lift the door by the handle, use one hand either
side of the door, keeping fingers clear of the hinge arms.
Replacing the door to your appliance
• Relocate both hinge arms at the same time into the front housing.
• Ensure that the location notches on the bottom of the hinge arms are positioned onto the
lower cutout lip.
• Close the door partially to ensure that the location notch drops into place.
• When the hinges are located, open the door fully and ensure the stirrups are disengaged.
NOTE: Never use force and always ensure that the location notch is correctly engaged before
you operate the door.
IMPORTANT: Never lift or carry the door by the handle.
Do not immerse the door in water.
Cleaning your oven/grill accessories
Removing the dishes and shelves from your
appliance
• Slide the dish and shelves towards you until
they reach the front stop.
• Tilt them up at the front to clear the side
supports, taking care not to spill the contents.
• Lift them clear.
• Wash the dish and insert the shelves in hot
soapy water.
• Reverse the above steps to put the grill dish
and shelves back again.
• Ensure that they are placed between the 2
support wires.
Removing the side racks (shelf supports)
• Grasp the shelf supports at the front.
• Pull them firmly inwards.
• To install the shelf supports, first insert the
rear hook to the rear hole.
• Then locate the front peg into the front hole
and push in firmly.
NOTE: Dish support wires to be on top (as
shown in diagram).
Location Notch
Stirrup
 Loading...