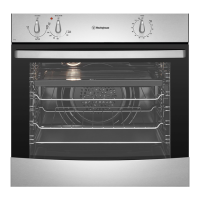
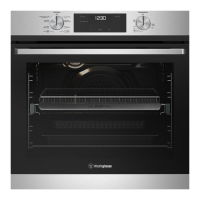
This document is a user manual for the Westinghouse WVES6314 and WVES6314SD-R electric built-in ovens.
Function Description
The Westinghouse WVES6314 oven is an electric built-in oven designed for domestic cooking. It offers various cooking functions, including:
- Off: Turns the oven off.
- Defrost: Uses low temperature air circulated by the fan to gently thaw food. It can also be used to prove yeast dough or dry fruits and vegetables.
- Forced Fan: Circulates hot air around the oven cavity, allowing for multi-shelf cooking, reheating cooked food, roasting, and complete oven meals. This function ensures even cooking and faster browning.
- Fan & Grill: Combines fan circulation with the grill element for "Bake" and traditional "Grill" functions. The grill element turns on and off to maintain temperature, while the fan circulates heated air. This function is suitable for large cuts of meat and for browning dishes.
- Grill: Directs radiant heat from the upper element onto the food. It's suitable for grilling various items like steaks, chops, sausages, fish, cheese toasties, and quick cooking foods. Grilling helps seal in natural juices and can be used for two different spaces within the upper pairs of support rails.
- Keep Warm: Maintains a low temperature to keep food warm.
The oven is equipped with a mechanical "Auto Off" timer, which allows setting a cooking period of up to 120 minutes, after which the oven automatically switches off and a bell sounds.
Important Technical Specifications
- Model: WVES6314, WVES6314SD-R
- Product Dimensions (H x W x D): 597 x 596 x 569 mm
- Minimum Fuse Rating: 16A
- Maximum Power Rating: 2.3kW
- Maximum Current Rating: 9.6A
- Wire Section: 2.5 mm²
- Electrical Connection: 230-240 volts AC 50Hz
- Wiring Minimum Temperature Rating: 75°C
- Cabinet Material Withstanding Temperature: 70°C (for built-in installations)
- Electrical Service Cord Length: 1.5m (for WVES6314 models with 10A power cord for 'Plug & Play')
Usage Features
Installation:
The appliance must be installed by an authorized person according to all local codes and regulations. It requires proper earthing. The cupboard opening should match the appliance measurements, and the appliance should be secured with supplied screws to prevent tipping. For flexible supply cords, the plug must be accessible after installation. Cabinet materials must withstand 70°C. Installation into low-temperature tolerant cabinetry may cause deterioration of the coating. The appliance should be mounted on a flat surface for its full width and depth.
First Use:
Before first operation, all internal boxes and bags must be removed. The oven interior should be wiped with warm soapy water and polished dry with a soft clean cloth. The oven door should not be closed until completely dry. If fitted with a mechanical "Auto Off" timer, ensure it is set to "Off" for manual operation. New appliances may have an odor during first use; it is recommended to "run in" the oven empty at 180°C for approximately 30 minutes with the room well ventilated.
Operating the Oven:
- Function Selector: Used to choose the desired cooking function.
- Temperature Selector: Used to set the desired temperature. The oven/grill indicator light illuminates when the heating elements are on and turns off when the set temperature is reached.
- Electronic Timer: Used to set cooking times or automatic shut-off.
Cooking Guidelines:
- Preheat the oven for 30 minutes for best baking results.
- Adapt usual settings (temperature, cooking time, shelf position) to the values in the tables provided in the manual.
- Use the lower temperature setting initially.
- For multiple shelf baking, cooking times can be extended by 10-15 minutes.
- Ensure dishes fit into the oven before switching it on.
- Keep baking dish edges at least 40mm from the oven sides for free heat circulation.
- Avoid opening the oven door more than necessary.
- Do not place foods with a lot of liquid with other foods to prevent steaming.
- Use residual heat to finish custards or dry bread.
- Minimize cooking oil when roasting to prevent splattering.
- For high heat from below (e.g., tarts), place the cooking dish on a scone tray in the desired shelf position.
- Use aluminum, bright finished, or non-stick utensils for sponges and cakes.
- Remove unnecessary trays or dishes when roasting or baking.
- Cook multiple trays of food simultaneously for efficiency.
- It is not recommended to use more than two shelves at a time; use a fan function when cooking with two shelves.
Roasting Meat:
- Set temperature between 180°C and 200°C.
- Wrap meats in an oven roasting bag or foil to prevent splattering.
- Use the grill/oven dish and grill insert.
- Do not pierce meat to retain juices.
- After cooking, wrap the roast in aluminum foil and let it stand for about 10 minutes before carving.
Grilling:
- Always clean the grill/oven dish after use to prevent fat accumulation and potential fire.
- Preheat the grill for 3 minutes.
- Use only prime cuts of meat or if the cut is less than 40mm thick.
- Do not cover the grill insert with foil.
- Baste food during cooking with butter, olive oil, or marinade.
- Use tongs to turn food; avoid piercing meat.
Maintenance Features
General Care:
- Always keep the appliance clean to prevent accumulation of fats and oils around elements, burners, or fans.
- Use gloves when handling hot items inside the oven.
- It is recommended to have the product inspected every 5 years by an authorized service person.
Cleaning the Oven Interior:
- Wipe out the oven interior with warm soapy water and polish dry with a soft clean cloth.
- Do not use harsh abrasive cleaners, powder cleaners, steel wool, or wax polishes on enamel.
- Do not use sharp metal implements or utensils on any surface.
- Do not use stainless steel cleaners, abrasive cleaners, or harsh solvents to clean stainless steel surfaces.
- Do not line the bottom of the oven with foil or cookware.
- Do not use the base of the oven for cooking.
- Do not put water directly into the hot appliance.
- Clean the appliance immediately after any food spills.
Cleaning Oven Accessories:
- Side Racks: Grasp the middle wire at the front, pull firmly inwards, and push back to remove. Wash in hot soapy water.
- Trays and Shelves: Slide them towards you until they reach the front stop, tilt up at the front to clear side supports, lift clear, and wash in hot soapy water. Reassemble by reversing the steps. Ensure they are placed between the two support wires.
Cleaning the Oven Door Glass Panels:
- Do not use harsh abrasive cleaners or sharp metal scrapers on the oven door glass to avoid scratching or shattering.
- Hand wash only with a soft cloth and warm soapy water. Polish dry with a soft cloth and ensure the glass is dry before reassembly.
- Removing Glass Panels: The inner glass panels can be removed for cleaning. Take hold of the smaller clear glass panel (when fitted) with a hand on its upper and lower edge. Lift the glass to remove it from the retainer. The rubber molding on the upper corner of the small clear glass panel may be removed.
- Re-assembling Glass Panels: Ensure the rubber molding is placed in the correct orientation on one of the upper corners of the smaller clear glass panel. Insert the smaller glass panel (when fitted) first from above and at an angle to the profile of the door. Repeat for the black bordered glass panel, ensuring the painted surface faces outwards.
- Removing Top Door Trim: Take hold of the top door trim at each side and position it to the inside edge of the glass. Push the trim down with its top edge over the glass panel until the clip snaps in on each side.
Replacing the Oven Back Light:
- Turn the oven light glass anticlockwise to remove it for globe replacement.
- Use a special high-temperature resistant globe, available from Electrolux Customer Care Centre.
- WARNING: Make sure the appliance is turned off before removing or replacing parts to avoid electric shock. Light globes are not covered by warranty.
Troubleshooting:
The manual provides a troubleshooting guide for common problems such as the oven or grill not working, loose oven seal, oven light not working, oven not heating enough, clock flashing, unit smoking on first use, condensation build-up, door not replacing after removal, functions appearing on display but oven not working, light staying on when the door is closed, and warm air from the top of the oven door. It also includes a section for dealing with cooking problems like uneven cooking, baked products browning unevenly, cracked cake crusts, pale/flat/undercooked products, fallen cakes, and unbrowned roast meat/potatoes. For service, users are advised to check the data plate for model and serial numbers and contact the Customer Care Centre.