EasyManua.ls Logo

Westinghouse WVE6516 - User Manual

Westinghouse WVE6516
30 pages
Print Icon
To Next Page IconTo Next Page
Loading...
USER MANUAL
WVE6516
ELECTRIC BUILT-IN OVEN
Enjoy peace of mind.
Register your appliance today.
Stay updated on better living services, safety notices and
shop for accessories.
1. Open the camera app on your smartphone and
point at the QR code to scan
Product Registration QR code is located on the
front of your appliance or inside the door rim*.
2. Tap the notification or link to open the registration form
3. Complete your details and enjoy peace of mind
*Exact location of QR code may vary depending on oven model
Timer
Cook Time
MODE
Clock

Questions and Answers

Summary

IMPORTANT SAFETY INSTRUCTIONS

INSTALLING YOUR APPLIANCE

Cabinet construction

Details on constructing cabinets for flush or proud fitting of the appliance.

Hard wiring detail

Step-by-step instructions for connecting the appliance's wiring.

Underbench oven installation

Specific considerations for installing the oven under a benchtop.

PRODUCT DESCRIPTION

BEFORE FIRST USE

Initial preparation

Steps to take before operating the oven for initial use.

Setting the clock

Instructions for setting the electronic clock and timer functions.

Controller operation

Details on using the oven's controller for time and temperature settings.

INSTALLING YOUR OVEN ACCESSORIES

Side racks

Guidance on how to install the oven's side racks correctly.

Shelves and trays

Instructions for fitting and using oven shelves and trays.

Air Fryer setup

Information on using the Air Fry function and its specific tray.

USING YOUR OVEN

Oven cooking functions overview

Explanations of various cooking modes like Air Fry, Bake, Grill.

Maxi Grill and Steam Clean

Details on Maxi Grill, Steam Assisted Clean, and cooling fan functions.

Clock and timer operation

Instructions for using the electronic clock for timing and auto-off.

Baking and roasting tips

Safety features, demo mode, and general baking/roasting advice.

Oven shelf location

Guidance on optimal shelf positions for various cooking tasks.

COOKING GUIDE

Conventional cooking settings

Recommended temperatures and times for conventional cooking.

Fan forced cooking settings

Recommended settings for fan-assisted cooking methods.

AirFry cooking guide

Specific settings and tips for using the AirFry function.

GRILLING GUIDE

Grilling hints and safety

Important tips and warnings for safe and effective grilling.

Fan grill function

How to use the fan grill function for even grilling results.

DEALING WITH COOKING PROBLEMS

GETTING TO KNOW THE OVEN

Simple Test Cake recipe

A recipe to help understand oven performance and hot/cold spots.

CARE AND CLEANING

Cleaning oven surfaces

Instructions for cleaning enamel, stainless steel, glass, oven, and grill.

Cleaning oven accessories

How to remove and clean oven racks, shelves, and trays.

Removing and replacing door parts

Procedures for removing side racks, grill element, and lights.

Door glass panel care

Specific instructions for cleaning and reassembling oven door glass.

Steam assisted cleaning

Procedure for using the steam function to clean the oven interior.

TROUBLESHOOTING

Electrolux Warranty

Warranty terms and period

Details on the warranty duration, what is covered, and what is excluded.

How to claim and contact

Steps for making a warranty claim and contact information.

Important notice

Key information before calling service.

Overview

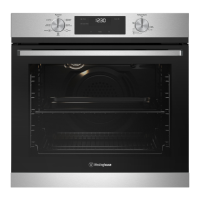
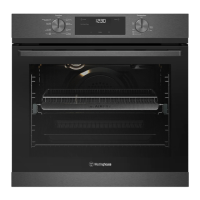
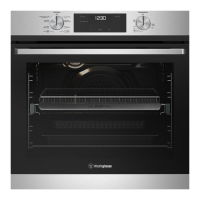
This document describes the Westinghouse WVE6516 Electric Built-In Oven, providing comprehensive information on its functions, usage, and maintenance.

Function Description

The WVE6516 oven offers a variety of cooking functions designed to cater to diverse culinary needs. These functions include:

  • Air Fry: This advanced convection cooking function allows for crispy, great-tasting results in a shorter time without excessive oil. It is ideal for items like french fries, chicken wings, and nuggets, eliminating the need to turn food during cooking.
  • Fan Forced: Heat is circulated around the oven cavity by a fan, enabling multi-shelf cooking, reheating cooked foods, pastries, and complete oven meals. This function cooks at a lower temperature and faster than traditional baking, though some browning variation is normal.
  • Bake: This function utilizes two elements, one above and one below the food, both controlled by a thermostat. It's suitable for single trays of biscuits, scones, muffins, cakes, slices, casseroles, baked puddings, roasts, and delicate egg dishes. The bottom element is a clean heat element.
  • Pizza: Combining "Base heat" and "Fan bake," this function provides heat from both the fan-surrounding element and the clean heat element below the oven floor. It's perfect for foods requiring cooking and browning on the base, such as pizzas, quiches, meat pies, and fruit pies.
  • Base Heat: Heat comes solely from the element below the food, controlled by the thermostat. This function adds extra browning to the bases of pizzas, pies, and pastries, and is best used in the lower half of the oven with silver or shiny trays.
  • Fan & Grill: This function combines "Bake" and traditional "Grill" features. The grill element cycles on and off to maintain temperature while the fan circulates heated air. It's suitable for large cuts of meat, providing a rotisserie-like result without needing to turn the food. The oven door remains closed during this function.
  • Maxi Grill: This function directs radiant heat from two powerful upper elements for quick cooking. It's ideal for tender cuts of meat, steak, chops, sausages, fish, and cheese toasties. Preheating for 3 minutes is recommended for best results, helping to seal in natural juices.
  • Steam Assisted Clean: This function aids in removing light food residue from the oven interior when the oven is cold. It is not effective for stubborn baked-on stains.

The oven is equipped with an electronic clock that can automatically turn the oven off after a set amount of time using the "Cook Time" function. A minute minder is also available for countdown timing.

Usage Features

Before first use, it is essential to remove all internal packaging, wipe the oven interior with warm soapy water, and polish dry. The oven should be "run in" by operating it empty at 180°C for approximately 30 minutes to eliminate any initial odors.

Setting the time of day is crucial for operating the appliance. After electrical connection, "12.00" will flash, and the time can be adjusted using the or + symbols. The clock has a 24-hour display.

The oven temperature selector, a thermostat-controlled dial, allows users to set the desired temperature. An indicator light illuminates when heating and turns off when the set temperature is reached. For multifunction ovens, the desired cooking function must be selected before setting the temperature.

Pre-heating the oven for 30 minutes (3 minutes for grill) is recommended for best baking and grilling results, ensuring the oven reaches the required temperature quickly and efficiently.

The WVE6516 features a safety cut-out that automatically switches off the oven if the temperature is not adjusted or if it operates continuously for extended periods (e.g., 12.5 hours below 120°C, 8.5 hours between 120°C and 200°C, 5.5 hours between 200°C and 250°C, or 3.0 hours at 250°C).

A cooling/venting fan prevents the kitchen cabinet from overheating and reduces condensation inside the oven. It operates whenever the oven is in use and continues to run after cooking until the oven cools down.

The oven's design promotes natural air circulation and steam recycling, which helps in cooking dishes that are soft inside and crusty outside, while also reducing cooking time and energy consumption. Condensation on the oven door glass is normal and should be wiped away after each use.

Cooking results can be influenced by the type of dishes and tins used. Aluminium, earthenware, oven glassware, and bright shiny utensils reduce browning, while enamelled cast iron, anodized aluminium, and dark, heavy utensils increase browning. Adjusting shelf position can control top and base browning. For even browning, dishes should be placed centrally on the shelf. For multi-level cooking, a fan cooking function is recommended.

The oven has 5 shelf positions. For single-shelf cooking, positions 1 or 2 are recommended. For two-shelf cooking, positions 2 and 4 are suggested. The Air Fry feature works best with single-shelf baking, with a separate tray placed on the bottom shelf to catch drips.

Maintenance Features

Regular cleaning is essential for maintaining the appliance's performance and appearance. Before cleaning, the oven must be electrically isolated. Steam cleaners should not be used due to potential moisture build-up.

  • Enamel Surfaces: Persistent stains can be rubbed vigorously with a nylon scourer or creamed powder cleansers. Household oven enamel cleaners can also be used following manufacturer instructions.
  • Stainless Steel Surfaces: These surfaces can stain or discolour and should be cleaned regularly with warm water and a mild detergent. Harsh abrasive cleaners, powder cleaners, steel wool, wax polishes, or harsh solvents should be avoided. Care must be taken when wiping exposed stainless steel edges as they can be sharp.
  • Glass Surfaces (Door and Control Panel): These are best cleaned immediately after soiling with a damp cloth. Oven cleaners can be used for stubborn marks. Harsh abrasive cleaners or metal scrapers should not be used on the oven door glass to prevent scratching and potential shattering.
  • Oven Interior: The oven should always be kept clean to prevent fat and oil accumulation, which can cause fires. Wrapping meats in foil or roasting bags can minimize splattering. Polyunsaturated fats can leave difficult-to-remove varnish-like residue. The upper element can be released for easier cleaning of the oven cavity ceiling.
  • Grill: The grill dish and grill insert must be kept clean to prevent fat deposits from catching fire. The grill element can be released to assist in cleaning the top of the grill cavity.
  • Oven Accessories (Trays and Shelves): These can be removed by sliding them forward until they reach the front stop, tilting them up, and lifting them clear. They should be washed in hot soapy water. When replacing, ensure they are placed between the two support wires.
  • Side Racks: To remove, grasp the middle wire at the front, pull firmly inwards, and push back.
  • Grill Element: For retaining wire models, the upper grill element is secured by a hanger clip that can be removed by pushing its sides in. For rotating latch models, rotating the latch 180 degrees will release the grill element. Always ensure the appliance is turned off before removing or replacing parts to avoid electric shock.
  • Oven Back Light and Side Light: To replace the globe, turn the oven light glass anticlockwise to remove it. For side lights, place a spoon under the glass and lever off. A special high-temperature resistant globe should be used. Always ensure the appliance is turned off before replacing globes.
  • Oven Door: The oven door can be disassembled for cleaning the glass panes. To remove, open the door fully, rotate the 'stirrups' on both hinges to the open position, and then grasp the door with a hand on each side and pull it towards you. Lay the door on a soft, flat surface to prevent scratches. The door glass panels can be lifted out of their guides. Cleaning should be done with a soft cloth and warm soapy water, avoiding harsh abrasives. Reassembly involves inserting the smaller clear glass panel first, followed by the black bordered panel with the painted surface facing downwards.
  • Oven Door Top Trim: To remove, take hold of the grid embossed sections at each end and press inwards to release the clips, then pull the trim towards you. Reassembly involves positioning the trim to the inside edge of the glass and pushing it down until the clips snap into place.

The Steam Assisted Cleaning function involves removing all shelves and racks, spraying a solution of water, white vinegar, and dishwashing detergent into the oven cavity, pouring 40ml of water into the base well, closing the door, setting the function to Steam Assist Clean at 120°C for 18 minutes, then turning off the oven and allowing it to cool before wiping with a wet cloth.

Westinghouse WVE6516 Specifications

General IconGeneral
Oven TypeElectric
Oven Capacity5.1 cu. ft.
Number of Functions8
Self-CleaningYes
Convection CookingYes
Number of Oven Racks2
Interior LightYes
ColorStainless Steel
Oven FeaturesGrill

Related product manuals