Gulper 220
Shower/Galley Waste and Bilge Pump
Ensure all relevant personnel read the points listed
below and that a copy is passed on to the end user.
Read the points listed below before installation and use
of equipment.
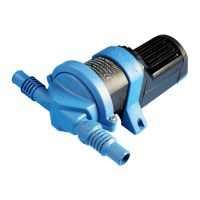
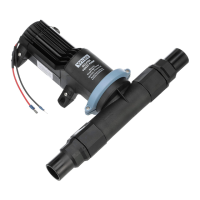
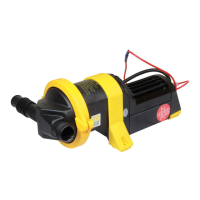
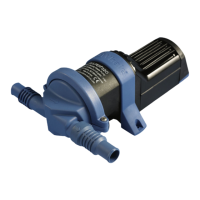
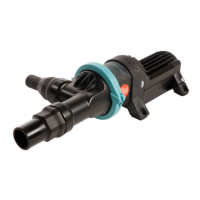
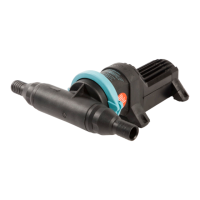
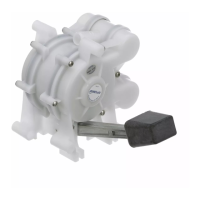
The Gulper 220 self-priming pump has been specifically
designed to pump waste water from the shower
tray/galley sink, (either overboard or into a holding tank)
or as a small bilge pump. Output capacity depends on
installation and operating conditions.
Note: When used as a bilge pump users should be
aware that capacity may not be sufficient to cope with
rapid influx of water. If it is intended for use for any
other purpose or with any other liquid, it is the user’s
responsibility to ensure that the pump is suitable for the
intended use and, in particular, that the materials are
fully compatible with the liquids to be used. With all
applications it is important that a system of safe working
practice is applied to installation, use and maintenance.
Choose a position to mount the pump that is dry and
away from casual water. The pump may be mounted on
a horizontal or vertical surface. When mounted vertically
ensure that the pump head is lower most (see diagram
below)
When mounting, position the pump on the intended sur-
face and work-out the best angles for the hose, then
mark the 4 hole positions using the pump feet. The
pump head may be rotated to suit the hose connec-
tions, this is done by loosening the two screws that hold
Munster Simms Engineering Ltd
2 Enterprise Road, Bangor, Co Down, Northern Ireland, BT19 7TA
Tel: +44 (0)28 9127 0531 Fax: +44 (0)28 9146 6421
Email: info@whalepumps.com Web: www.whalepumps.com
the clamping rings, and rotating the pump head. Once
you have marked the position for the four mounting feet,
drill four pilot holes of 3.2mm (1/8"). Use the four No.8
self tappers and washers to secure the pump. Use
19mm (3/4") smooth bore reinforced hose to connect to
the pump.
The polarity is indicated by coloured cable (Positive -
red, Negative - black). The pump is protected against
reverse polarity connection. Minimum wire size is
1.5mm2 (16 AWG). (Note: undersized wire reduces volt-
age under load at the pump, thus giving poor perform-
ance and potential motor failure). The in-line fuse
assembly supplied (see details below) must be fitted to
the positive side of the pump.
In-Line Fuse Assembly
Purpose
The purpose of this fuse is to protect the pump from
serious damage in the event of system blockages,
therefore please ensure all valves are fully open before
operating the pump.
Connection Instructions
Insert this fuse assembly between the positive terminal
on the pump and the positive feed wire.
Note:
1. If the fuse blows check:
a) all system valves/stop cocks are open.
b) the inlet and outlet nipples are not blocked
c) the remainder of the system is not blocked in any
way.
2. Fuse rating for BP1552 (12v DC) pumps 5 amp
automotive. Fuse rating for BP2554 (24v DC) pumps
2.5 amp automotive
To control the pump an in-line switch should be fitted
between the positive live terminal on the battery and
the positive lead on the pump. If using an automatic
switch (such as a float switch) an isolator switch
should be fitted.
The Gulper 220 is switched on by either a remote on/off
switch or an automatic float switch. When used to drain
a shower or galley, the flow rate should be sufficient to
take away the waste faster than the delivery from either
the shower or galley tap.
1. To the Fitter
2. To the User
3. Application
4. Installation
5. Electrical Connections
6. Operation