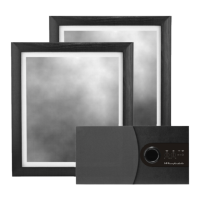
Home Theatre Connections
specify the size of speakers in the various
Home Theatre Environment
channels. These are usually ‘Large’ or ‘Small'.
Although the PPS 1 panels may be placed
The Rear and Centre channels should be set
almost anywhere in the room, it is good practice
to 'Small' as they have no deep bass capability.
to site them conventionally if possible.
Set the Front Channel to 'Large'. All the system
The front channel panels should be placed on
bass is now routed through the LP 1 sub bass
either side of the television screen, 2 to 3 metres
unit. The subwoofer channel on the processor
apart. The Centre speaker should be placed
should be set to ' No' or 'Off'.
central to the listening position and close to the
If your AV processor has an LFE control, use
TV screen. Ideally, the front and centre channel
care as the LFE channel may contain heavy low
speakers should be operated with their centres
frequencies which can overload a domestic unit.
at the same height though this is not essential.
If, during a programme, you hear popping or
We recommend placing the rear panels behind
thumping noises coming from the LP 1 sub bass
the listener and above the listening position. Site
unit, immediately turn the AV Processor's volume
the LP 1 sub bass unit as previously described.
level down and then back off the LFE level.
Many digital AV Processors require you to
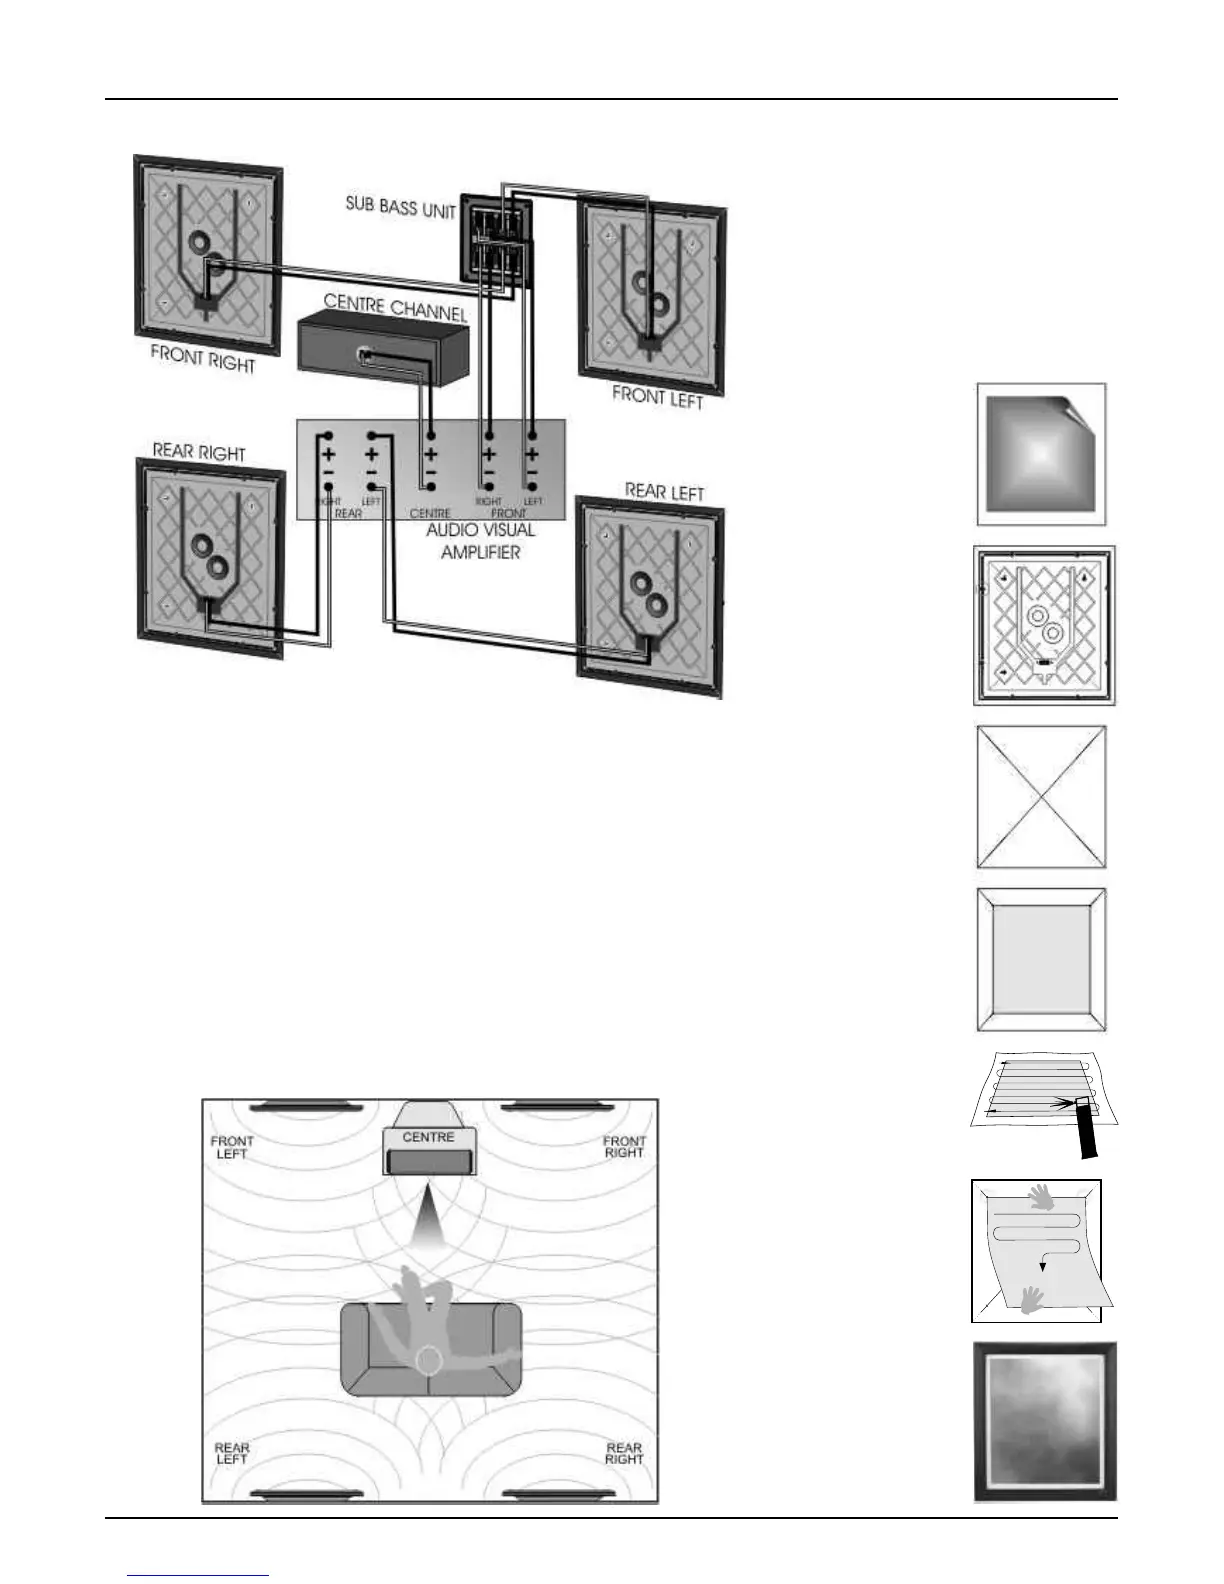
Customising the PPS 1 Panels
The PPS 1 Panel can be customised with your
choice of graphics. For a small charge most high
street picture specialists will be happy to apply
your image to the PPS 1. If you wish to do this
yourself, carefully follow the instructions below.
The material on which the image is applied
should be lightweight-less than 300gsm. Canvas
or painted surfaces are not suitable, nor should
the print be glazed. There must be white space
all round the print. We suggest a maximum
picture size of 360mm x 420mm.
Lay a straight edge
diagonally across the
corners of the panel.
Using a soft blunt 2B
pencil or whiteboard
marker gently mark four
short lines as shown.
These marks can be
removed with a rubber
after the print is fixed.
First remove the
existing print.
Carefully lift one corner
with a fingernail or
wooden spatula and
slowly peel off the print.
To aid picture mounting
the frame may be
removed.
Carefully remove the
eight screws in the
moulded back cover
and put safely to one
side. Lift off the frame.
Lay the print face down
on some newspaper.
Using a suitable spray
mount adhesive, lightly
spray the back of the
print as indicated.
Allow to dry for 2-3
minutes.
Apply the print and
position it along the top
edge only. Gently rub
from side to side
moving down the print
whilst lowering it on to
the panel. Smooth out
any creases as you go.
Place the print on the
panel. When the
corners touch all four
lines, the print is
centred. Mark the
corner positions.
Erase all the guide
lines. Secure the
picture frame back into
place using the original
eight screws removed
earlier.