23
Unpacking (cont.)
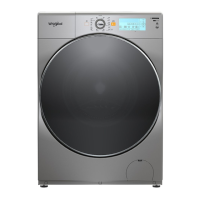
8. Open the door as shown and remove the accessories
that are inside your Washer/Dryer:
q The User and Care Guide;
w Quick Guide;
e Water Inlet Hose;
r Curved Adapter for Water Outlet;
t Plugs for the Transport Screws Holes;
y Bolt Spanner 17” (for removing the transport screws
and adjusting the feet);
u Measuring Cup.
9. For the correct functioning of your Washer/Dryer, be sure
to remove the four transport screws sets located on the
back of the product.
10.On the back of the product, with the help of the supplied
spanner, remove the four transport screws sets i -
consisting of plastic body o and screw a.
Transport Screw Set
Unpacking (cont.)
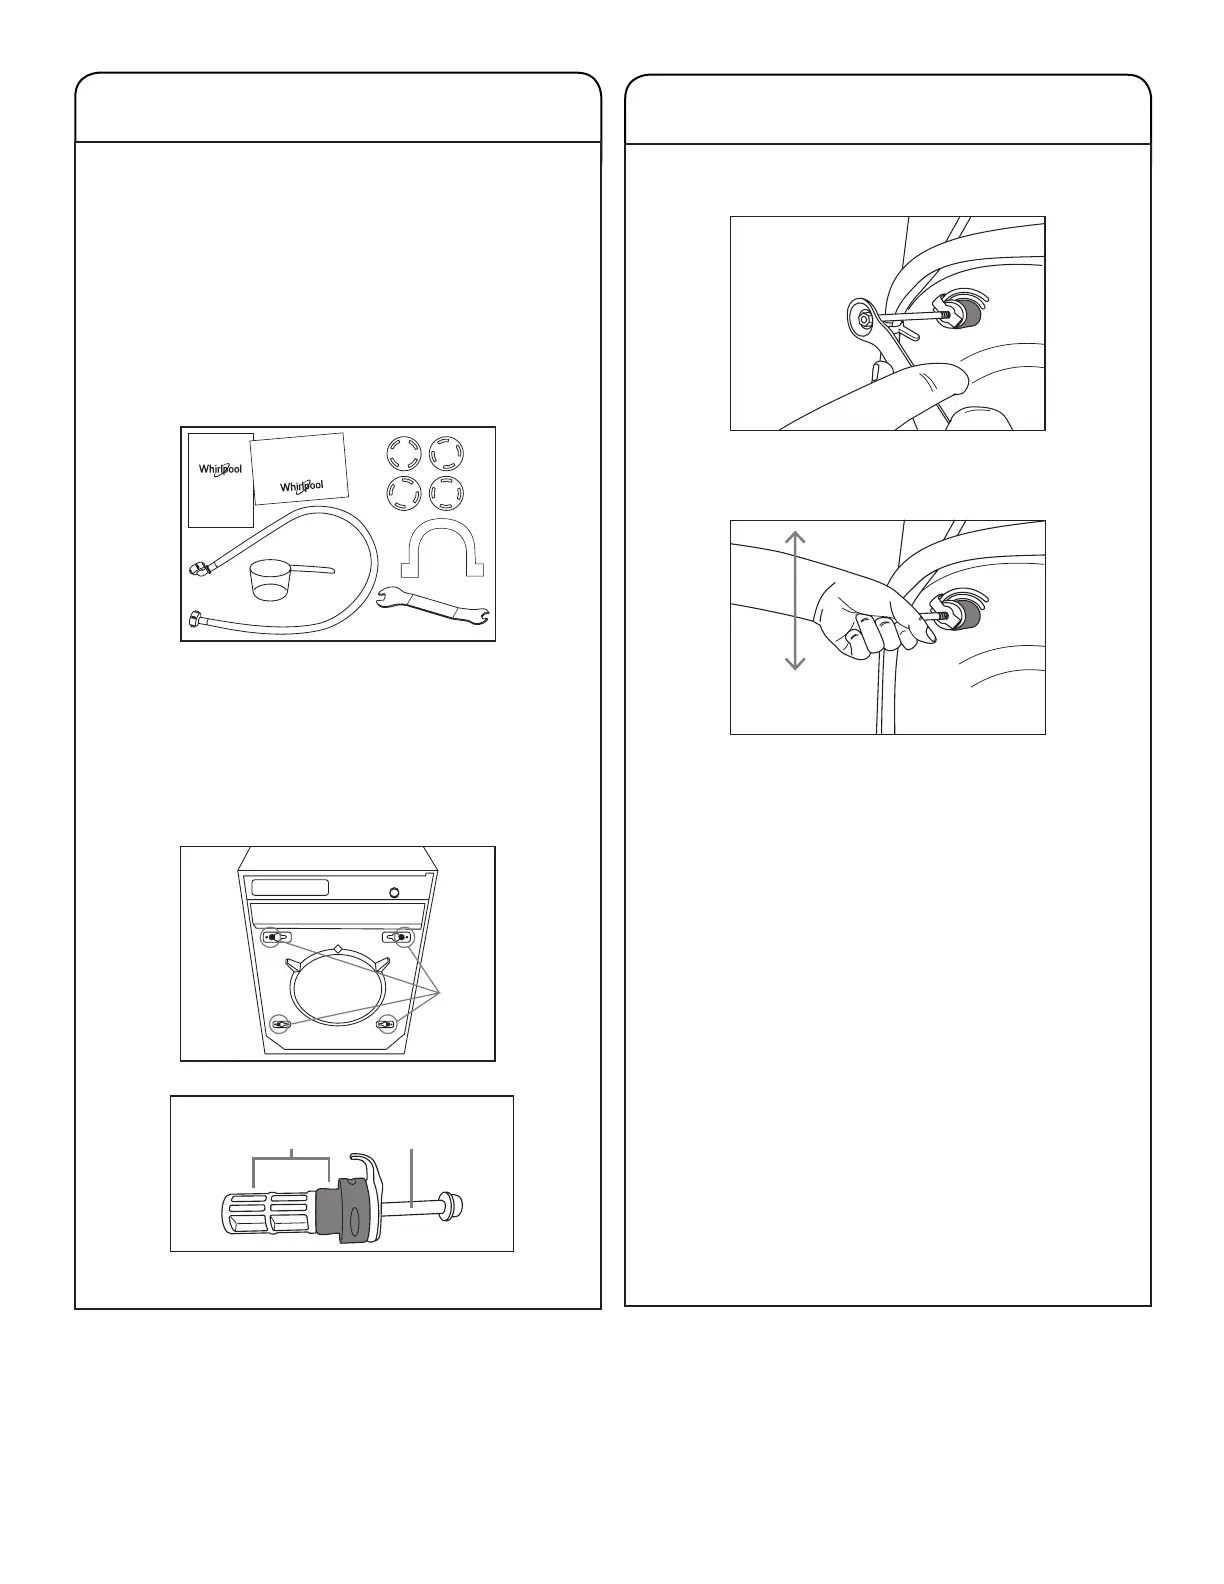
11.Unscrew the screw by holding a small part of the thread
in the hole.
12.Make movements up and down, pulling it out until the
plastic body o and the screw a are totally out.
IMPORTANT:
■
If the screw is not out enough, so that it is possible to
create a lever with it, its removal will be difcult.
■
If the transport screw has not been removed, the
panel will show the warning “TRANSPORT SCREWS
DETECTED.” Remove the screws so that the product
works properly.
13.Release the spacer feed cord. The cord will only be free
after the xing sets have been removed.
IMPORTANT: It is necessary to remove the four transport
screws sets before turning the machine on. Failure to re-
move any of them will damage the product, if it is operated.
14.Use the plugs that come with your product to t into the
transport screws holes.
IMPORTANT: Keep the four transport screws sets, as you
may need them to transport the product when moving.
15.Remove the energy efciency label that is attached to
the cabinet. With use, it can dry out and be difcult to
remove.
I
WASHER/DRYER
Use and
Care Guide
Quick
Start Guide
WASHER/DRYER
 Loading...