20
5
4
6
2
RUBBER
SCREW
COVER
7
SCREW
CONE GEAR
5B
5A
【Figure
7】
Dishwasher installation steps
●
.
.
.
.
6
7
8
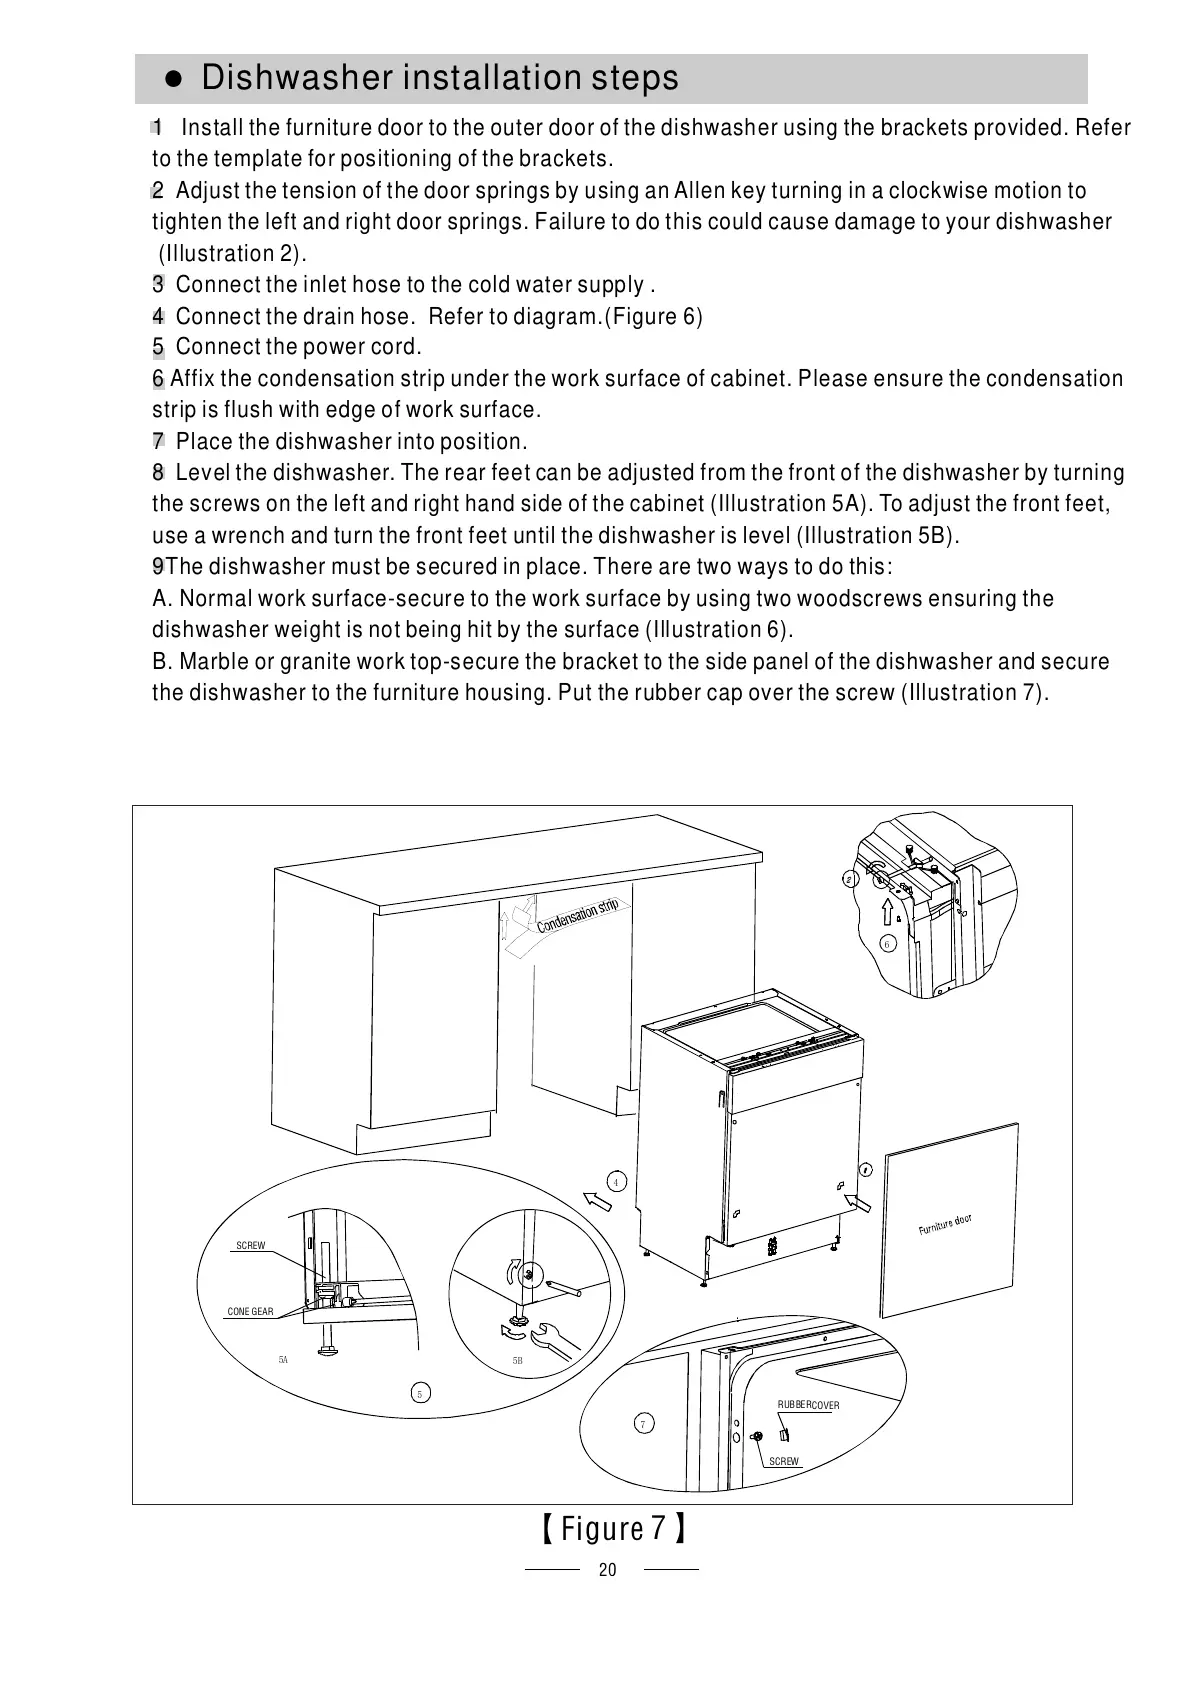
1 Install the furniture door to the outer door of the dishwasher using the brackets provided. Refer
to the template for positioning of the brackets.
2 Adjust the tension of the door springs by using an Allen key turning in a clockwise motion to
ti ghte n the lef t an d ri ght d oor s pri ngs. F ail ure t o do t h is co ul d cau se dama ge t o yo ur dis hw ash er
(Illustration 2)
3 Connect the inlet hose to the cold water supply
4 Connect the drain hose. Refer to diagram (Figure 6)
5 Connect the power cord
Affix the condensation strip under the work surface of cabinet. Please ensure the condensation
strip is flush with edge o f work surface.
Place the dishwasher into position.
Lev el t he d ishw ash er. Th e r ear fe e t ca n be adjus ted f rom t he fr ont o f th e dis hwa she r by tu rnin g
the s cre ws o n th e le ft a nd r i gh t ha nd si de o f th e c abi net ( Ill ustr at ion 5 A). To a djus t th e fr on t fe et,
use a wrench and turn the front feet until the dishwasher is level (Illustration 5B).
9The dishwasher must be secured in place. There are two ways to do this:
A. Normal work surface-secure to the work surface by using two woodscrews ensuring the
dishwasher weight is not being hit by the surface (Illustration 6).
B. Marb le or gr ani te w or k top -s e cure t he brack et to the side pa nel of the d ishwas he r and se cure
the dishwasher to the furniture housing. Put the rubber cap over the screw (Illustration 7).
 Loading...