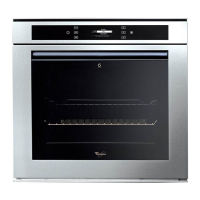
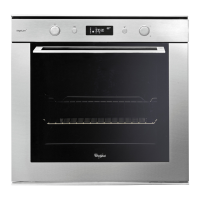
The Whirlpool AKZM 775 is an oven designed for domestic use, featuring a range of cooking functions and user-friendly maintenance options. This appliance is intended for use by individuals aged 8 years and above, and persons with reduced physical, sensory, or mental capabilities, provided they are supervised or have received instructions on safe usage.
Function Description:
The oven offers various cooking functions, including:
- OFF (0): Halts cooking and switches off the oven.
- LAMP: Switches the oven interior light on/off.
- DEFROST: Speeds up defrosting of food, placing it on the middle shelf.
- KEEP WARM: Keeps cooked food hot, suitable for meat, fried items, or flans. The function maintains a temperature above 65°C.
- RISING: For optimal rising of sweet or savoury dough. It safeguards the quality of proving, ensuring the temperature in the oven is above 40°C.
- ECO FORCED AIR: Cooks stuffed roasts and meat in pieces on one shelf. This function uses discontinuous, delicate fan assistance, which prevents excessive drying of foods. It optimizes energy efficiency by not opening the door during cooking. It is advisable to use the 3rd level, and the oven does not need to be preheated.
- CONVENTIONAL: Cooks any kind of dish on one shelf only, such as pizza, savoury pies, and sweets with liquid fillings. Use the 1st or 2nd shelf. The oven does not need to be preheated.
- CONVECTION BAKE: Cooks meat and pies with liquid filling (savoury or sweet) on a single shelf. Use the 3rd shelf. The oven does not need to be preheated.
- FORCED AIR: Cooks different types of food (e.g., fish, vegetables, cakes) requiring the same cooking temperature on up to three shelves at the same time. This function allows cooking without odors being transferred from one food to another. Use the 3rd level to cook on one shelf only, the 1st and 4th to cook on two shelves, and the 1st, 3rd, and 5th to cook on three shelves. The oven does not need to be preheated.
- MAXI COOKING: Cooks large joints of meat (above 2.5 kg). Use the 1st or 3rd shelves, depending on the size of the joint. The oven does not need to be preheated. It is advisable to turn the meat over during cooking for more even browning.
- GRILL: To grill steak, kebabs, and sausages; to cook vegetables au gratin and toast bread. Place food on the 4th or 5th shelf. When grilling meat, use the drip tray to collect the cooking juices. Position it on the 3rd/4th shelf, adding approximately half a litre of water. The oven does not need to be preheated.
- TURBO GRILL: To roast large joints of meat (legs, roast beef, chickens). Position the food on the middle shelves. Use the drip tray to collect the cooking juices. Position it on the 1st/2nd shelf, adding approximately half a litre of water. The oven does not need to be preheated. This function can also use the turnspit, if provided.
- SETTINGS: For display settings (language, time, brightness, volume of acoustic signal, energy saving function).
- BREAD/PIZZA: To bake different types and sizes of pizza and bread. This function contains two programmes with predefined settings. Simply indicate the values required (temperature and time) and the oven will manage the cooking cycle automatically. Place the dough on the 2nd shelf after preheating the oven.
- FAST PREHEATING: To preheat the oven quickly. At the end of preheating, the oven automatically selects the conventional function. To set a different cooking function, turn the "Functions" knob and select the required function.
The oven also includes an electronic programmer with a display that shows cooking time, current time, and temperature. The control panel features a function selector knob, a browse knob for adjusting settings, and buttons for navigating menus and confirming selections.
Important Technical Specifications:
- Power Supply: The appliance must be disconnected from the power supply before carrying out any installation or maintenance work.
- Electrical Connection: The appliance must be earthed. The power cable must be long enough for connecting the appliance once fitted in its housing to the main power supply. For installation, an all-pole disconnect switch with a minimum contact gap of 3 mm must be utilized.
- Lamp Type: Only use 25-40W/230V type E-14, T300°C incandescent lamps, or 20-40W/230 V type G9, T300°C halogen lamps. The lamp used is specifically designed for electrical appliances and is not suitable for household room illumination (Commission Regulation (EC) No 244/2009). Lamps are available from After-sales Service.
- Energy Efficiency: The cooking table advises the ideal function and temperature to ensure the best results with all recipes. If you wish to cook on one shelf only using the fan-assisted function, place food on the third shelf and select the temperature recommended for the "FORCED AIR" function on more than one shelf. The indications in the table are without use of the runners. Do the tests without the runners. When grilling food, it is advisable to leave a space of 3-4 cm from the front edge of the grill to facilitate removal.
Usage Features:
- Preheating: The oven can be preheated using the "FAST PREHEATING" function.
- Cooking Time Setting: Users can set the desired cooking time, with a maximum duration of 23 hours and 59 minutes.
- Start Delayed Setting: The start of cooking can be delayed for specific functions like FAST PREHEATING, BREAD/PIZZA.
- Key-Lock: A key-lock function is available to prevent accidental changes to settings during cooking.
- Special Functions: The oven offers special functions such as DEFROST, KEEP WARM, RISING, and ECO FORCED AIR.
- Language, Clock, Eco, Acoustic Signal, Brightness: These settings can be adjusted through the "SETTINGS" menu.
- Accessories: The oven comes with a wire shelf and a drip tray. The wire shelf can be used to grill food or as a support for pans, cake tins, and other ovenproof cooking receptacles. The drip tray is designed to be positioned under the wire shelf to collect fat or as an oven tray for cooking meat, fish, vegetables, focaccia, etc.
- Inserting Wire Shelves and Other Accessories: Wire shelves should be inserted horizontally with the raised part "A" upwards. They lock into place when reaching position "B". The drip tray and baking tray are inserted in the same way.
Maintenance Features:
- Cleaning:
- Always use protective gloves when cleaning.
- Never use steam cleaning equipment.
- Only clean the oven when it is cool to the touch.
- Disconnect the appliance from the power supply before cleaning.
- Oven exterior: Do not use corrosive or abrasive detergents. Clean surfaces with a damp microfibre cloth and dry with a clean cloth.
- Oven interior: Do not use abrasive sponges or metallic scrapers or scourers. Over time, these can ruin enamelled surfaces and the oven door glass.
- After every use, allow the oven to cool then clean it, preferably while it is still warm, to remove built-up dirt and stains caused by food residues.
- Use proprietary oven detergents and follow the manufacturer's instructions.
- Clean the door glass with a suitable liquid detergent.
- The top heating element of the grill can be lowered (some models only) to clean the roof of the oven.
- N.B.: During prolonged cooking of foods with a high water content (e.g., pizza, vegetables), condensation may form on the inside of the door and around the seal. When the oven is cold, dry the inside of the door with a cloth or sponge.
- Accessories: Soak accessories in water with washing up detergent immediately after use, handling them with oven gloves if still hot. Food residues can be easily removed using a brush or sponge.
- Removing the Door:
- Open the door fully.
- Lift the catches and push them forwards as far as they will go.
- Close the door as far as it will go (A), lift it up (B), and turn it (C) until it is released (D).
- Refitting the Door:
- Insert the hinges in their seats.
- Open the door fully.
- Lower the two catches.
- Close the door.
- Moving the Top Heating Element (some models only):
- Remove the side accessory holder grills.
- Pull the heating element out a little.
- To reposition the heating element, lift it up, pulling it slightly towards you, making sure it comes to rest on the lateral supports.
- Replacing the Oven Lamp:
- Rear lamp: Disconnect the oven from the power supply. Unscrew the lamp cover, replace the lamp, and screw the lamp cover back on. Reconnect the oven to the power supply.
- Side lamp: Disconnect the oven from the power supply. Remove the side accessory holder grills. Use a screwdriver to prise off the lamp cover. Replace the lamp, and snap the lamp cover back into place. Refit the side accessory holder grills. Reconnect the oven to the power supply.
- Important: If using halogen lamps, do not handle with bare hands since fingerprints can damage them. Do not use the oven until the lamp cover has been repositioned.
- Scrapping of Household Appliances: This appliance is manufactured with recyclable or reusable materials. Dispose of it in accordance with local waste disposal regulations. For further information on the treatment, recovery, and recycling of household electrical appliances, contact your competent local authority, the collection service for household waste, or the store where you purchased the appliance.
- Safeguarding the Environment: The packing material is 100% recyclable and is marked with the recycle symbol. The various parts of the packing must therefore be disposed of responsibly and in full compliance with local authority regulations governing waste disposal. This product is marked in compliance with European Directive 2002/96/EC, Waste Electrical and Electronic Equipment (WEEE). By ensuring this product is disposed of correctly, you will help prevent potential negative consequences for the environment and human health. The symbol on the product or on the accompanying documentation indicates that it should not be treated as domestic waste but must be taken to an appropriate collection centre for the recycling of electrical and electronic equipment.
- Energy Saving: Only pre-heat the oven if specified in the cooking table or your recipe. Use dark lacquered or enamelled baking moulds as they absorb heat far better. Switch the oven off 10/15 minutes before the set cooking time. Food requiring prolonged cooking will continue to cook even once the oven is switched off.