HOB INSTRUCTIONS
GB
5019 619 01279
Manufacturer: Whirlpool Europe S.r.l. Viale G. Borghi, 27 21025 Comerio (VA) ITALY
ITIE CH ES PTGB GR
HOW TO USE THE COOKTOP
• To ignite one of the burners, turn the relative knob anti-clockwise to the maximum flame setting
• Press the knob against the control panel to ignite the burner
(if your model is equipped with ignition button - You must press it while turning the knob).
• After the burner has ignited, keep the knob pressed for about 5-10 seconds to allow proper device operation.
This burner safety device shuts off the gas supply to the burner if the flame goes out accidentally (because of sudden
draught, an interruption in the gas delivery, boiling over of liquids, etc.).
• The knob must not be pressed for more than 15 sec. If, after that time has elapsed, the burner does not
remain lit, wait at least one minute before trying to light it again.
Note: Should particular local conditions of the delivered gas make the ignition of burner difficult, it is advisable to repeat
the operation with the knob turned to small flame setting.
- The burner might go out when the knob is released. This means that the safety device has not warmed up enough.
In this case, repeat the operations described above. Safety device is optional - if Your model is not equipped with it, the
ignition should be instant.
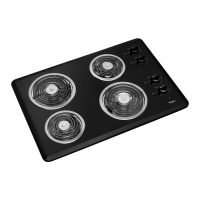
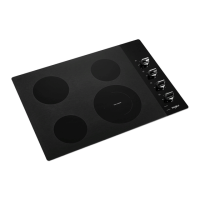
- If Your model is equipped with cast iron electric hotplate You can easy operate it with relevant knob.
By turning the knob from position 1 to 6 You can increase the temperature. Switch off the hotplate by turning knob to 0
Apply the label from warranty here
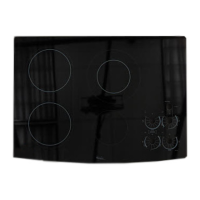
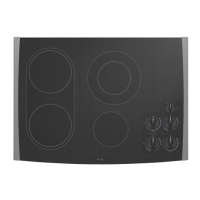
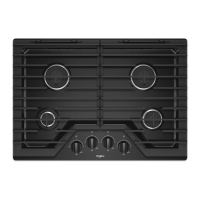
1. Removable panstand grids
2-3. Semirapid burners
4-5. Rapid-auxiliary burners
6-9. Control knobs
10. Electric ignition button (if present)
Symbols
Shaded circle Tap closed
Large flame Maximum opening/delivery
Small flame
Minimum opening or reduced
delivery
Star Electric ignition
The symbols are indicating which cooking field this knob activates
Note: Your cooktop aesthetics can be slightly different from the drawing.
PRATICAL ADVICE FOR USING THE BURNERS
For better burner performance, please stick to the following
rules:
- Use pots and pans that fit the burners (see table on the
right).
- Only use flat-bottomed pots and pans.
- Use the correct amount of water for cooking foods and
keep the pot covered.
CARE AND MAINTENANCE
To maintain your hob in perfect conditions, clean it after every use, removing any food spills.
Disconnect power before servicing or cleaning and wait for it to cool down.
CLEANING THE HOB SURFACE
• All the enamelled and glass parts should be cleaned with warm water and neutral solution.
• Stainless steel surfaces may be stained by calcareous water or aggressive detergents if left in contact for too long. Any
food spills (water, sauce, coffee, etc.) should be wiped away before they dry.
Clean with warm water and neutral detergent, and then dry with a soft cloth or chamois. Remove baked-on dirt with
specific cleaners for stainless steel surfaces.
Note: Clean stainless steel only with soft cloth or sponge.
• Do not use abrasive or corrosive products, chlorine-based cleaners or pan scourers.
• Do not use steam cleaning appliances.
• Do not use flammable products.
• Do not leave acid or alkaline substances, such as vinegar, mustard, salt, sugar or lemon juice on the hob.
CLEANING THE HOB PARTS
• Grids, burner caps and burners can be removed to be cleaned.
• Clean them by hand with warm water and non-abrasive detergent, removing any food residues and checking that none
of the burner openings is clogged.
• Rinse and dry
• Refit burners and burner caps correctly in the respective housings.
• When replacing the grids, make sure that the panstand area is aligned with the burner and that the burner feet are fitted
in the respective housings on the hob surface. In the case of single grids, make sure that they fit on the burner cap
protuberance.
• Models equipped with electrical ignition plugs and safety device require thorough cleaning of the plug end in order to
ensure correct operation. Check these items frequently, and if necessary, clean them with a damp cloth. Any baked-on
food should be removed with a toothpick or needle.
Note: to avoid damaging the electric ignition device, do not use it when the burners are not in their housing.
GENERAL ADVICE AND SAFETY INSTRUCTIONS
To get full satisfaction from your hob, please read and save these instructions.
• These instructions are only valid for those Countries where the destination abbreviations are mentioned on the product
description sheet and on the hob.
• Keep the packaging material (plastic bags, polystyrene parts, etc.) out of the reach of children, as they are
potentially dangerous.
• Check whether the hob has been damaged during transport and remove any protective film from the appliance parts.
• This hob (Class 3) is designed solely for household use for cooking food. Any other use (such as heating
rooms) is to be considered improper and, as a consequence, dangerous.
• Ensure that the installation and gas/electrical connections are performed by a qualified technician in
compliance with current local safety regulations.
• This appliance must only be installed and used in well-ventilated rooms, in accordance with current
regulations. Read instructions before installing and using this appliance.
• Gas adjustment and supply pressure are indicated on the rating plate located under the hob. If the
appliance is arranged for a type of gas different from that available, refer to the paragraph “Adjustment to
different types of gas”.
Burner Pot Ø
rapid from 24 to 26 cm
semirapid from 16 to 22 cm
auxiliary from 8 to 14 cm