Do you have a question about the Whirlpool Gold GH7208XR and is the answer not in the manual?
| Category | Microwave Oven |
|---|---|
| Wattage | 1200 Watts |
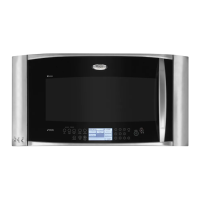
| Color | Stainless Steel |
| Type | Microwave Oven |
| Control Type | Electronic |
| Preset Programs | Popcorn, Reheat |
Describes hazards that can kill or seriously injure if instructions are not followed immediately.
Describes hazards that can kill or seriously injure if instructions are not followed.
Lists necessary tools for the installation process, emphasizing following provided instructions.
Details the parts that are included with the microwave oven for installation purposes.
Specifies the necessary conditions for the installation location, including dimensions and clearances.
Outlines specific requirements for wall and roof venting installations, including clearance needs.
Provides critical dimensions for installing the microwave oven, including height and clearances.
Details the necessary electrical supply specifications, including voltage, frequency, and safety precautions.
Lists the physical measurements of the microwave oven, including width, height, and depth.
Instructions on how to safely remove the mounting plate from the back of the microwave oven.
Steps to modify the microwave oven for external wall or roof venting, including vent deflector installation.
Detailed steps for preparing the microwave oven for wall venting installation.
Detailed steps for preparing the microwave oven for roof venting installation.
Guidance on using a stud finder to locate wall studs for secure mounting.
Illustrations showing different wall stud configurations for mounting plate attachment.
Steps for marking the rear wall for mounting plate placement and vent cutout.
Specific markings required on the rear wall for wall venting installation.
Instructions for drilling holes in the rear wall based on wall stud configurations.
Procedure for attaching the mounting plate when no wall studs are present at corner holes.
Procedure for attaching the mounting plate when a wall stud is present at one corner hole.
Procedure for attaching the mounting plate when wall studs are present at both corner holes.
Completes cabinet preparation by cutting holes for power supply cord and venting.
Step-by-step guide for safely lifting and securing the microwave oven to the mounting plate.
Specific instructions for completing the roof venting installation, including damper and vent connection.
Final steps for completing installation, including power reconnection and operational checks.
Details on the required clearance and specifications for a rectangular to round vent transition.
Information on standard vent fittings and their equivalent lengths for system calculations.
Guidance on calculating total vent system length and examples for different vent types.
Information on how to contact the authorized dealer or service center for help and inquiries.
Details on how to order replacement parts, including part numbers.
Information about optional accessories like filler panel kits.