Sealed System Repair
R600A Sealed System
n
2-7
¾ Wait unl the display of the scale remains constant
(Stabilizes). The scale will display a weight change.
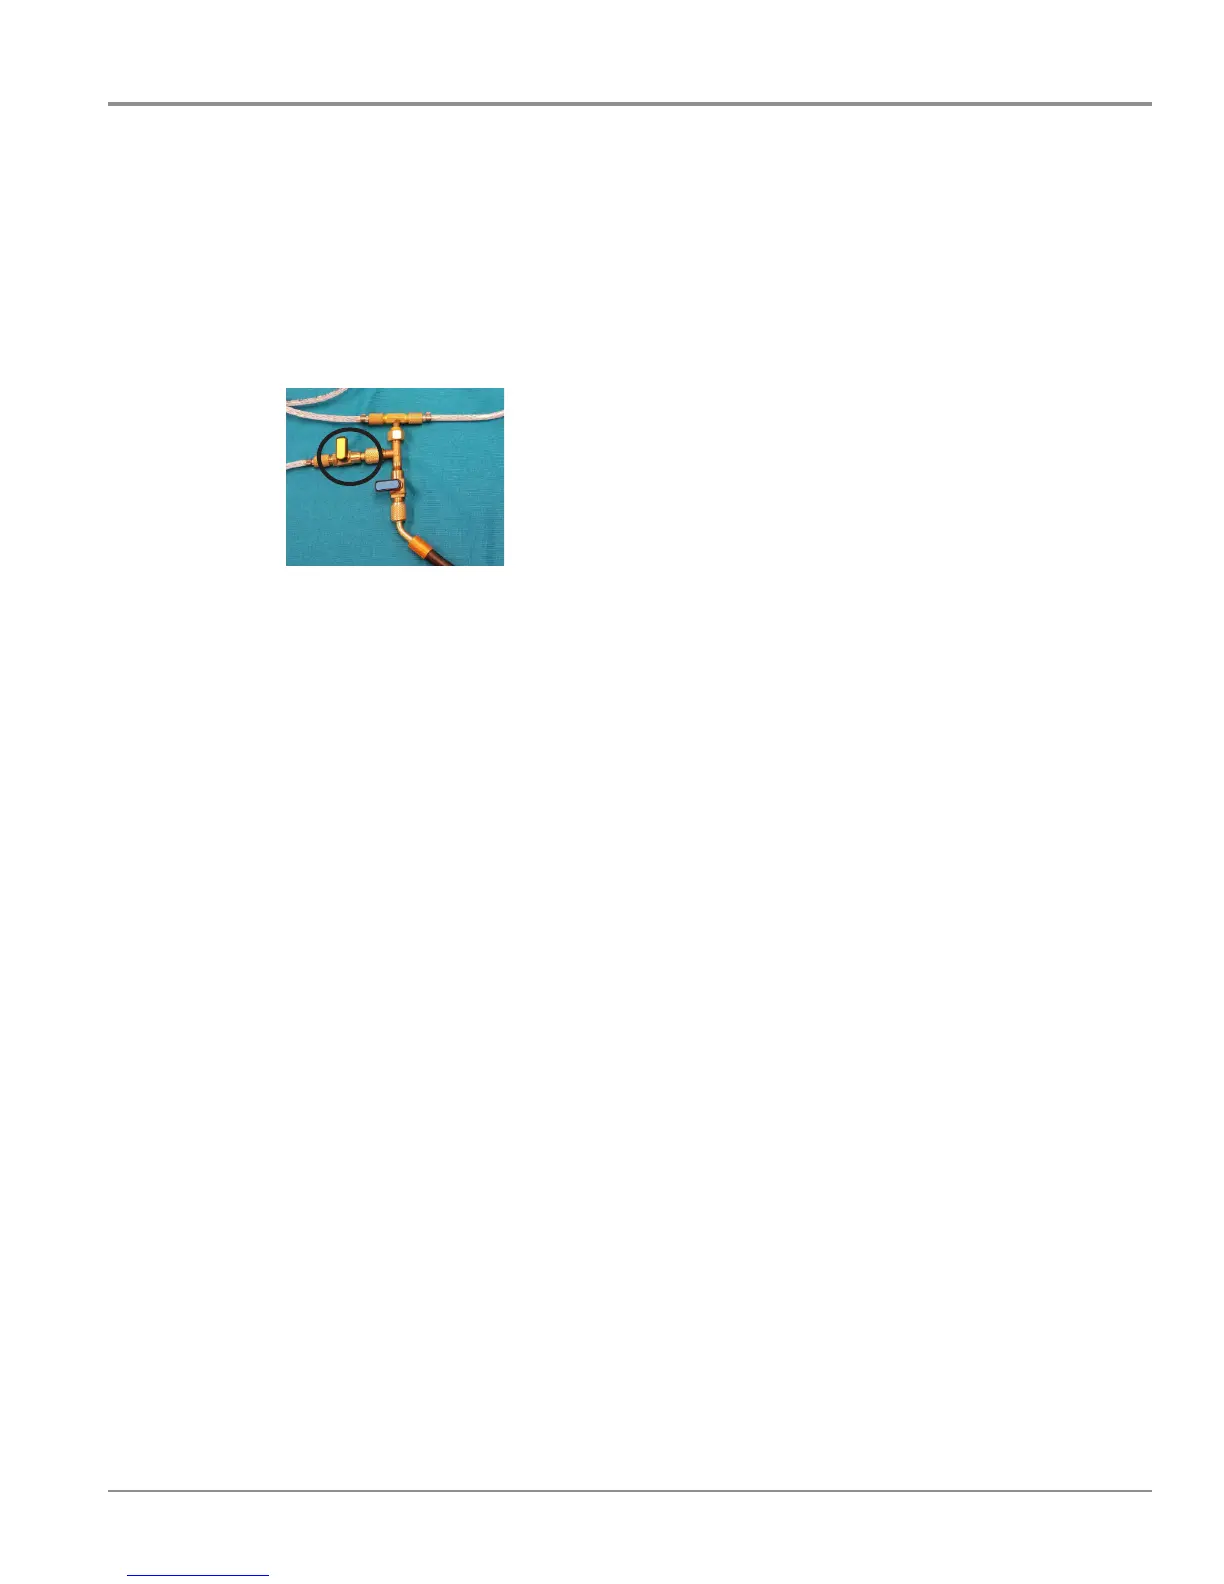
¾ Open the ball valve (Figure T) at the Lower
T-connecons to charging staon and allow the
refrigerant to ow into the refrigerator circuit unl
approximately 50% of the full charge is in the system.
¾ Close the ball valve of the charging case T- connecon.
Plug in the product and start the compressor.
¾ Complete charge in small steps by opening the ball
valve to the Refrigerant only slightly and closing it
immediately.
¾ As soon as the desired lling weight is reached, close
the ball valve at the Lower T-piece to charging staon.
¾ Then close the valve on the refrigerant bole. Reopen
the ball valve at the lower T- connecon to charging
staon and allow the refrigerant remaining in the hoses
to ow into the refrigerant circuit.
¾ Aer waing 1 minute, start the compressor to suck the
refrigerant from the hoses into the system. As soon as
a pressure of less than 0 PSI is reached, the hoses are
emped. Now the ball valve of the T- connecon can be
closed. The Low Pressure Gauge can be read to check
the evaporaon pressure. Aer the pressure check
disconnect the quick coupling and close the service
connector.
NOTES: