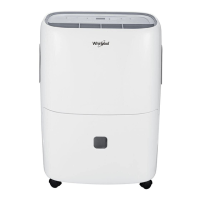
This document is an operation guide for an Estate dehumidifier, manufactured by Whirlpool Corporation. It provides essential information for installation, operation, maintenance, troubleshooting, and warranty details.
Function Description:
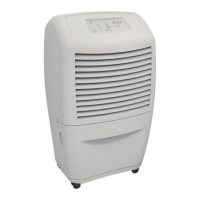
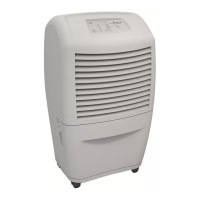
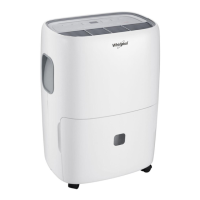
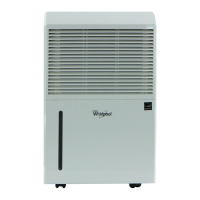
The Estate dehumidifier is designed to remove excessive moisture from indoor environments, helping to prevent moisture damage and maintain comfortable humidity levels. It is suitable for use in various areas of the home, such as basements to prevent moisture damage, cooking, laundry, bathing, and dishwashing areas with excess moisture, and any location where books or valuables are stored and need protection from humidity. The unit operates by drawing in humid air, passing it over cooling coils to condense moisture, and then expelling drier air. The collected water is stored in a removable pan or can be drained continuously.
Important Technical Specifications:
- Electrical Requirements: The dehumidifier requires a 115 volt, 60 Hz, AC only, 15 or 20 ampere fused electrical supply. A time delay fuse or circuit breaker is recommended, and a separate circuit serving only this appliance is advised. It must be plugged into a grounded 3-prong outlet, and the ground prong should never be removed. Extension cords are not recommended.
- Operating Temperature: The unit should not be operated in temperatures below 65°F (18.3°C) to prevent the coil from icing over, which would hinder proper operation.
- Water Pan Capacity: The water pan has an adjustable fill level. In the "Normal Fill Position," the water pan and water will weigh approximately 16 lbs (7.2 kg) and be ½ full. In the "Maximum Fill Position," the water pan and water will weigh approximately 24 lbs (10.8 kg) and be ¾ full.
- Clearance: A minimum of 12 inches (30.5 cm) of space around the unit is required for good air circulation.
- Hose Connection: The unit features a threaded hose connection for continuous drainage, supporting a maximum hose length of 8 feet for effective water disposal.
Usage Features:
- Portability: The dehumidifier is equipped with two rollers for easy movement. To move, the water pan should be removed, the unit tilted forward, and then rolled to the desired position.
- Humidistat Control: The unit has an automatic humidistat that allows users to set a desired humidity level. Turning the control clockwise towards "DRYEST" increases dehumidification, making the unit run continuously. Turning it counterclockwise reduces dehumidification. The dehumidifier automatically starts when humidity rises above the selected level and stops when it falls below.
- PAN FULL Light: A "PAN FULL" indicator light illuminates when the water pan is full, signaling that it needs to be emptied.
- Automatic Shut-off: The dehumidifier features an automatic shut-off mechanism that activates when the water pan reaches the selected fill level, preventing overflow. This requires the water pan to be properly positioned on its hangers inside the cabinet.
- Water Level Adjustment: A "Water Level Adjustment" lever allows users to select between "Normal Fill Position" (½ full) and "Maximum Fill Position" (¾ full) for the water pan before the automatic shut-off engages. This lever can be moved by loosening and retightening a screw.
- Water Disposal Methods:
- Manual Emptying: The water pan can be manually removed, emptied into a sink or tub, and then replaced. Proper replacement is crucial for the automatic shut-off to function.
- Direct Drainage: The unit can be placed directly over a drain. The threaded hose connection on the pan can be opened (by cutting out the opening with a knife or ¾-inch wood drill) to allow continuous water drainage.
- Garden Hose Connection: A garden hose can be attached to the threaded hose connection for continuous drainage to a remote drain. The hose must not be kinked or bent and should lie flat.
Maintenance Features:
- Annual Inspection: It is recommended to check and inspect the dehumidifier coils annually. This can be done by a service company or by the owner if familiar with electrical appliances.
- Coil Cleaning: Coils should be brushed clean with warm water and a mild detergent, then rinsed and dried thoroughly. The power supply cord must be disconnected before cleaning.
- Lubrication: The compressor is sealed and does not require oiling. The fan motor is permanently lubricated and also does not require further oiling.
- Plastic Parts Cleaning: All plastic parts can be washed with a soft cloth, warm water, and a mild detergent, then rinsed and dried.
- Cabinet Removal for Maintenance: To access internal components for inspection and cleaning, the outer cabinet can be removed by:
- Unplugging the unit.
- Removing the plastic front grille (two screws at the bottom front).
- Removing socket-head screws on each side of the cabinet and top flange screws.
- Removing the rear grille.
- Lifting the cabinet from the unit.
- Tech Sheet: A "Tech Sheet" is located inside the cabinet and should not be removed, as it contains information needed by service technicians.
- Upright Position: When moving the dehumidifier, it should be kept in an upright position.