EasyManua.ls Logo

Whirlpool WED4950HW - User Manual

Whirlpool WED4950HW
2 pages
Print Icon
To Next Page IconTo Next Page
Loading...
Gas and Electric Dryer
PRODUCT MODEL NUMBERS
W10848818A
01/18
WED4950HW, WGD4950HW, WED4850HW,
WGD4850HW, YWED4850HW
Installation clearances:
For each arrangement, consider allowing more space for ease of
installation and servicing, spacing for companion appliances, and
clearances for walls, doors, and oor moldings. Space must be
large enough to allow door to fully open. Add spacing on all sides
of dryer to reduce noise transfer. If a closet door or louvered door
is installed, top and bottom air openings in door are required.
Check code requirements. Some codes limit, or do not permit,
installation of the dryer in garages, closets, mobile homes, or
sleeping quarters. Contact your local building inspector.
Dryer Dimensions
Front View
50
3
/4"
(1289 mm)
42"
(1067 mm)
28
1
/4"
(717 mm)
28
1
/4"
(717 mm)
NOTE: Minimum height of leveling legs should be 1/2" (13 mm),
or high enough for dryer to match the height of the accompanying
washer.
Side View
29"
(737 mm)
40
7
/8"
(1038 mm)
1
/2"
(13 mm)
A B
A. Wide opening side-swing door
B. Wide opening hamper door
Back View
14
1
/
2
"
(368 mm)
4
3
/4"
(121 mm)
9
1
/4"
(235 mm)
1
1
/4"
(32 mm)
14
1
/
2
"
(368 mm)
4
3
/4"
(121 mm)
9
1
/4"
(235 mm)
1
1
/4"
(32 mm)
30
1
/4"
(768 mm)
4"
(101 mm)
Non-Steam
Installation spacing for recessed area
or closet
The dimensions shown are for the minimum spacing allowed.
Additional spacing should be considered for ease of
installation and servicing.
Additional clearances might be required for wall, door,
and oor moldings.
Additional spacing of 1" (25 mm) on all sides of the dryer
is recommended to reduce noise transfer.
For closet installation, with a door, minimum ventilation
openings in the top and bottom of the door are required.
Louvered doors with equivalent ventilation openings are
acceptable.
Companion appliance spacing should also be considered.
Installation Spacing
6"/0"
(152 mm/
0 mm)
14" max
(356 mm)
1"/0"
(25 mm/0 mm)
1"/1"
(25 mm/25 mm)
18"/18"
(457 mm/
457 mm)
3"/3"
(76 mm/
76mm)
3"/3"
(76 mm/
76mm)
48"
2
/48"
2
(310 cm
2/
310 cm
2
)
24"
2/
24"
2
(155 cm
2/
155 cm
2
)
Recommended/Minimum spacing
Steam

Other manuals for Whirlpool WED4950HW

Questions and Answers

  • M
    Melanie ClarkAug 17, 2025
    What to do if my Whirlpool WED4950HW won't start?
    • J
      joshua58Aug 17, 2025
      If your Whirlpool dryer will not run, first ensure that the dryer door is closed completely. Then, press and hold the PUSH to START knob until you hear the dryer drum moving. Also, check your household fuses or circuit breakers, as electric dryers use two. Replace both fuses or reset the circuit breaker. If the problem continues, call an electrician. Ensure your electric dryer has a 240-volt power supply by checking with a qualified electrician, and use a time-delay fuse.
  • C
    Colin ChapmanAug 21, 2025
    Why does my Whirlpool WED4950HW Dryer make unusual sounds?
    • T
      Tracy JohnsonAug 21, 2025
      Unusual sounds from your Whirlpool dryer can stem from several causes. If the dryer hasn’t been used for a while, a thumping sound may occur during the first few minutes. Check the front and rear edges of the drum for small objects such as coins, buttons, or paper clips. For gas dryers, the gas valve clicking is a normal operating sound. The dryer may vibrate if not properly installed, so refer to the Installation Instructions. If clothing is knotted or balled up, separate the items and restart the dryer. Also, make sure the supply line valve is open for gas dryers.
  • R
    Roy White IIAug 25, 2025
    How to prevent wrinkles in my Whirlpool WED4950HW Dryer?
    • B
      bartonandrewAug 25, 2025
      To prevent wrinkles when using your Whirlpool Dryer, select the Wrinkle Shield™ feature to tumble the load without heat at the end of the cycle. Also, dry smaller loads that can tumble freely to reduce wrinkles from forming. Make sure to remove the load from the dryer at the end of the cycle.
  • S
    Susan Lopez DVMAug 27, 2025
    What to do if my Whirlpool Dryer cycle time is too short?
    • C
      Clifford PalmerAug 27, 2025
      If your Whirlpool dryer's automatic cycle is ending early, the load may not be contacting the sensor strips. Try leveling the dryer. For very small loads, use Timed Dry. You can also change the Dry Level setting on ACCUDRY™/Automatic Dry cycles to increase or decrease the drying time.
  • T
    Tracy HowardAug 31, 2025
    Why is there lint on my clothes after using my Whirlpool WED4950HW Dryer?
    • T
      Tyler BarryAug 31, 2025
      If you find lint on your clothes after using your Whirlpool Dryer, the lint screen is likely clogged. Clean the lint screen before each load.
  • P
    phendricksSep 3, 2025
    Why is my laundry too hot after using my Whirlpool WED4950HW Dryer?
    • R
      Ryan HopkinsSep 3, 2025
      If your laundry items are too hot after using your Whirlpool Dryer, it may be because they were removed before the end of the cycle. Allow the Cool Down cycle to finish before removing laundry. Also, if a high-temperature cycle was used, select a lower temperature and use an automatic drying cycle, which senses the temperature or moisture level and shuts off when the load reaches the selected dryness, reducing overdrying.
  • F
    fmarquezSep 6, 2025
    What causes stains on clothes or drum in my Whirlpool WED4950HW?
    • C
      christophermackSep 7, 2025
      Stains on clothes or the drum in your Whirlpool Dryer can be caused by dryer fabric softener not properly used. Add dryer fabric softener sheets at the beginning of the cycle, as adding them to a partially dried load can stain garments. Drum stains are often caused by dyes in clothing, such as blue jeans; these stains will not transfer to other clothing.
  • T
    Teresa BullockSep 10, 2025
    Why does my Whirlpool WED4950HW smell?
    • G
      George HughesSep 10, 2025
      If your Whirlpool dryer smells, it could be due to recent painting, staining, or varnishing in the area. Ventilate the area, and rewash and dry the clothing when the odors or fumes are gone. If it is a new electric dryer, the new heating element may have an odor that will disappear after the first cycle.
  • P
    patricia66Nov 13, 2025
    How to fix Whirlpool WED4950HW taking too long to dry clothes?
    • J
      Jennifer AndersonNov 13, 2025
      If your Whirlpool Dryer is taking too long to dry clothes, the lint screen may be clogged and should be cleaned before each load. Also, ensure you've selected the right cycle for the garments you're drying, as the Fluff Air cycle or No Heat setting can extend drying times. A large, heavy load can also increase drying time. Check that the exhaust vent or outside exhaust hood isn't clogged with lint, restricting air movement. Run the dryer for 5-10 minutes and check for air movement under the exhaust hood. Clean the exhaust system if needed, or replace the vent with a heavy metal or flexible metal vent, ensuring it's not crushed or kinked. Fabric softener sheets can also block the grille if you use too many or reuse them. Use only one sheet, and only once. Finally, check that the exhaust ven...

Summary

Installation Clearances and Dimensions

Installation Clearances

General guidelines for spacing around the dryer for installation and servicing.

Dryer Dimensions

Front, back, and side views detailing the dryer's physical measurements.

Installation Spacing for Recessed Area or Closet

Minimum spacing requirements for dryers installed in closets or recessed areas.

General Installation Spacing

Recommended spacing for optimal dryer installation and performance.

Installation Requirements

Gas Supply Requirements

Guidelines for natural gas and L.P. gas connections, including pipe size and shut-off valves.

Electrical Requirements

Electrical connection specifications for both gas and electric dryer models.

Water (Steam Models Only) Requirements

Water connection requirements for steam dryer models, including faucet pressure and hose length.

Venting Requirements

Crucial guidelines for outdoor dryer exhaust to prevent fire and ensure proper function.

Overview

This document outlines the installation and usage requirements for a Whirlpool dryer, available in both gas and electric models. The dryer is designed to efficiently dry clothes while offering various installation options to suit different home layouts.

Function Description

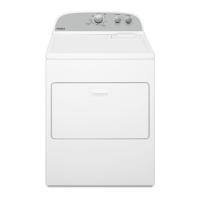
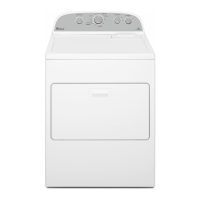
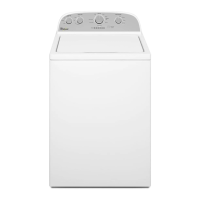
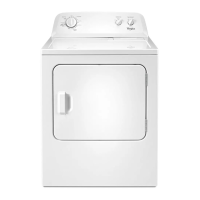
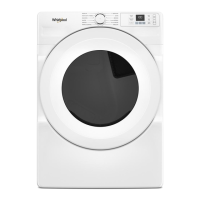
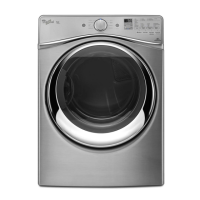
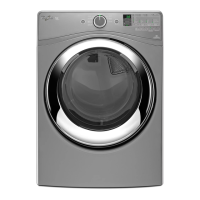
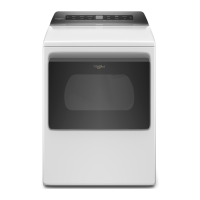
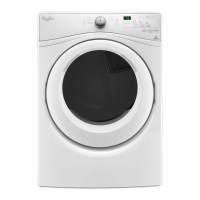
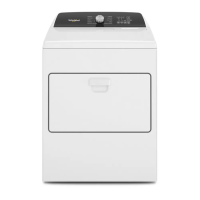
The Whirlpool dryer's primary function is to dry clothes using either natural gas or electricity, depending on the model. It is designed to be installed in various locations, including recessed areas, closets, and open spaces, with specific clearance and venting requirements to ensure safe and optimal operation. The dryer can be configured with different door types, including a wide-opening side-swing door and a wide-opening hamper door, to accommodate user preferences and laundry room layouts. Some models also feature steam capabilities, requiring a cold water connection for operation.

Usage Features

Installation Flexibility: The dryer offers significant flexibility in installation. It can be placed in recessed areas or closets, provided the minimum spacing requirements are met. For closet installations, adequate ventilation openings in the top and bottom of the door are crucial, and louvered doors with equivalent ventilation are acceptable. The design also considers companion appliance spacing, allowing for harmonious integration into a laundry setup.

Door Options: Users can choose between two main door configurations: a wide-opening side-swing door (A) and a wide-opening hamper door (B). These options cater to different user preferences and room configurations, making loading and unloading laundry more convenient.

Leveling Legs: The dryer is equipped with leveling legs, which should be adjusted to a minimum height of 1/2" (13 mm) or high enough to match the height of an accompanying washer. This ensures stability and a uniform appearance in the laundry area.

Steam Models (Water Connection): For steam-enabled models, a cold water faucet connection is required. The dryer must be connected using new inlet hoses, and users are cautioned against overtightening to prevent damage. The cold water faucet should be located within 4 ft. (1.2 m) of the water fill valves, and the water pressure should be between 20-100 psi (137.9-689.6 kPa). A "Y" connector and short hose are provided, allowing the dryer to share the water supply with a washer if needed.

Electrical and Gas Supply: Gas models require a 3- or 4-wire, single-phase, 120/240 volt, 60 Hz, AC-only electrical supply (or 120/208 volt if specified on the serial/rating plate) on a separate 30 amp circuit. It is crucial to connect to an individual branch circuit and avoid using a fuse in the neutral or grounding circuit, or an extension cord. Gas supply requires a 1/2" IPS rigid pipe or 3/8" approved aluminum or copper tubing for shorter lengths. An individual manual shut-off valve must be installed within 6 ft (1.8 m) of the dryer.

Electric models also require a 3- or 4-wire, single-phase, 120/240 volt, 60 Hz, AC-only electrical supply (or 120/208 volt if specified on the serial/rating plate) on a separate 30 amp circuit, connected to an individual branch circuit without a fuse in the neutral or grounding circuit, and no extension cord.

Maintenance Features

Venting Requirements: Proper venting is critical for the dryer's performance and safety. The dryer MUST be exhausted outdoors using a 4" (102 mm) heavy metal exhaust vent and clamps. Plastic or metal foil vents are explicitly prohibited. The vent path should be as straight and direct as possible, minimizing the number of elbows and turns. When turns are necessary, they should be gradual to avoid kinking.

Vent Material and Length: Rigid metal vents are recommended for best drying performance and to prevent crushing and kinking. Flexible metal vents are acceptable only if accessible for cleaning, fully extended, and supported. The total length of flexible metal vents should not exceed 73/4 ft. (2.4 m). If an existing vent system is used, it must be thoroughly cleaned of lint, and any plastic or metal foil vents must be replaced with rigid or flexible metal vents.

Exhaust Hoods: Exhaust hoods must be positioned at least 12" (305 mm) from the ground or any object that could obstruct exhaust, such as flowers, rocks, bushes, or snow. Recommended styles include louvered hoods and box hoods.

Noise Reduction: To reduce noise transfer, it is recommended to allow an additional 1" (25 mm) of spacing on all sides of the dryer.

Clearance for Servicing: When installing the dryer, it's important to consider allowing extra space for ease of installation and future servicing. This includes ensuring enough room for the door to fully open and for any necessary maintenance access.

Code Compliance: Users are advised to check local code requirements, as some codes may limit or prohibit dryer installation in garages, closets, mobile homes, or sleeping quarters. Contacting the local building inspector is recommended to ensure compliance.

Lint Cleaning: For existing vent systems, it is crucial to clean lint from the entire length of the system and ensure the exhaust hood is not plugged. This helps maintain optimal airflow and prevents potential fire hazards.

Whirlpool WED4950HW Specifications

General IconGeneral
Capacity7.0 cu. ft.
Fuel TypeElectric
Drum MaterialPowder Coat
Ventilation SystemVented
Moisture SensorYes
Appliance CategoryLaundry
ColorWhite
Control TypeKnobs
Voltage240 V
BrandWhirlpool
ModelWED4950HW
Number of Temperature Settings4
Wrinkle Control OptionYes
Energy Star CertifiedNo

Videos

How to Troubleshoot Whirlpool Dryer WED4950HW Running Non-Stop

Related product manuals