8
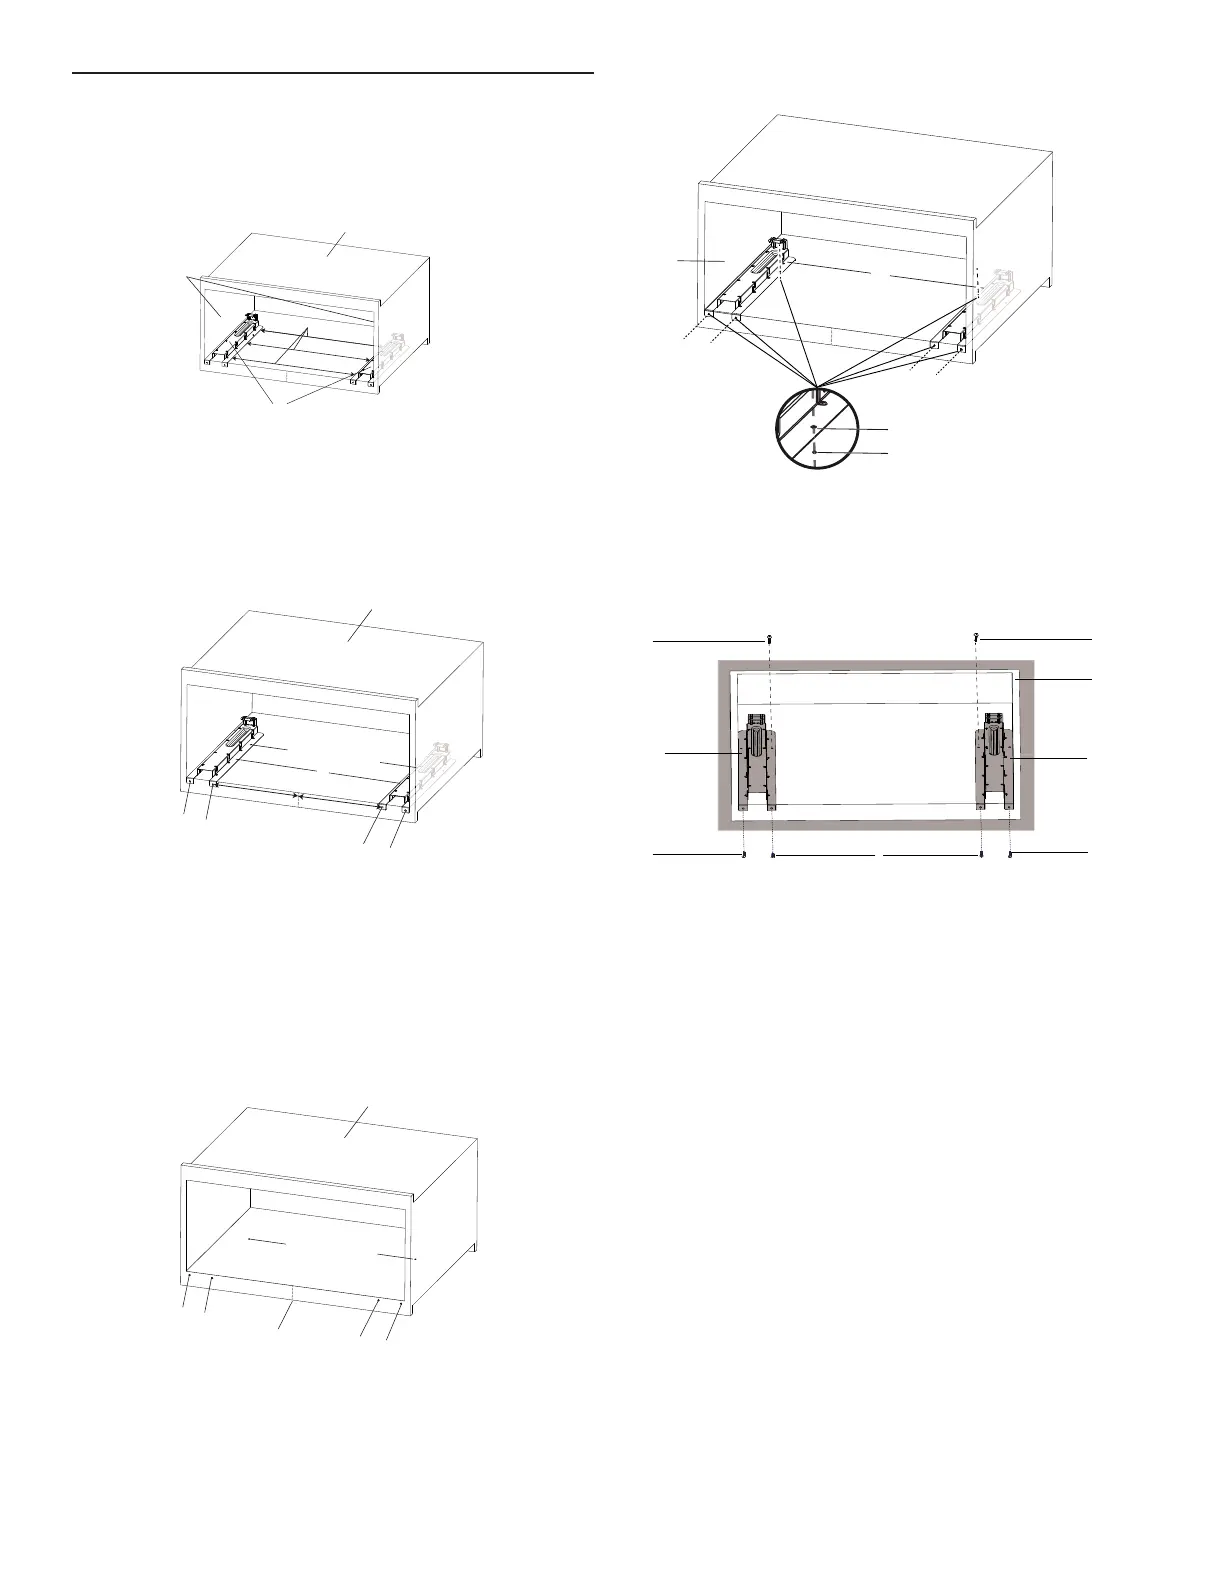
Install the Rails
1. Using measuring tape and pencil, mark the centerline of the
opening on the cabinet lower front wall.
2. Place the two rails inside the cabinet as shown below such
that distance between the nearest edges are 20
3
/
4
"
(52.7cm).
3. Use a pencil to draw screw marks across six rails screw
holes C, D, E, F, G, H in the cabinet. Conrm that the
distance from hole D to centerline is 10
27
/
32
" (27.6 cm). Also,
distance from hole F to centerline should be 10
27
/
32
"
(27.6cm) as shown. Then take out of the two rails.
4. Using a 7/64" drill bit, drill four pilot holes C, D, F, G on the
cabinet lower front wall and two screw pilot holes E and H
inside the bottom of cabinet.
5. Put the two rails inside the cabinet, and align the screw holes
on rails and pilot holes on cabinet.
6. Attach the two rails using the six #7-16x7/16" round-head
wood screws.
A. Cabinet
B. Rails
C. Side wall
A
20¾" (52.7 cm)
C
A. Cabinet
B. Rails
C. Hole C on left rail
D. Hole D on left rail
E. Hole E on left rail
F. Hole F on right rail
G. Hole G on right rail
H. Hole H on right rail
A
C
D
E
H
B
A
B
C
B
A
C
G
E
D
H
F
B
10²⁷⁄₃₂" (27.6 cm)
10²⁷⁄₃₂" (27.6 cm)
A
B
C
D
A. Cabinet
B. Rails
C. Holes on rails
D. Pilot holes on cabinet
A. Cabinet
B. Rail (2)
C. #7-16x7/16" round head wood screw (6)
A. Cabinet
B. Centerline
C. Pilot hole C
D. Pilot hole D
E. Pilot hole E
F. Pilot hole F
G. Pilot hole G
H. Pilot hole H
 Loading...