OPERATIONS OPERATIONS
6 7
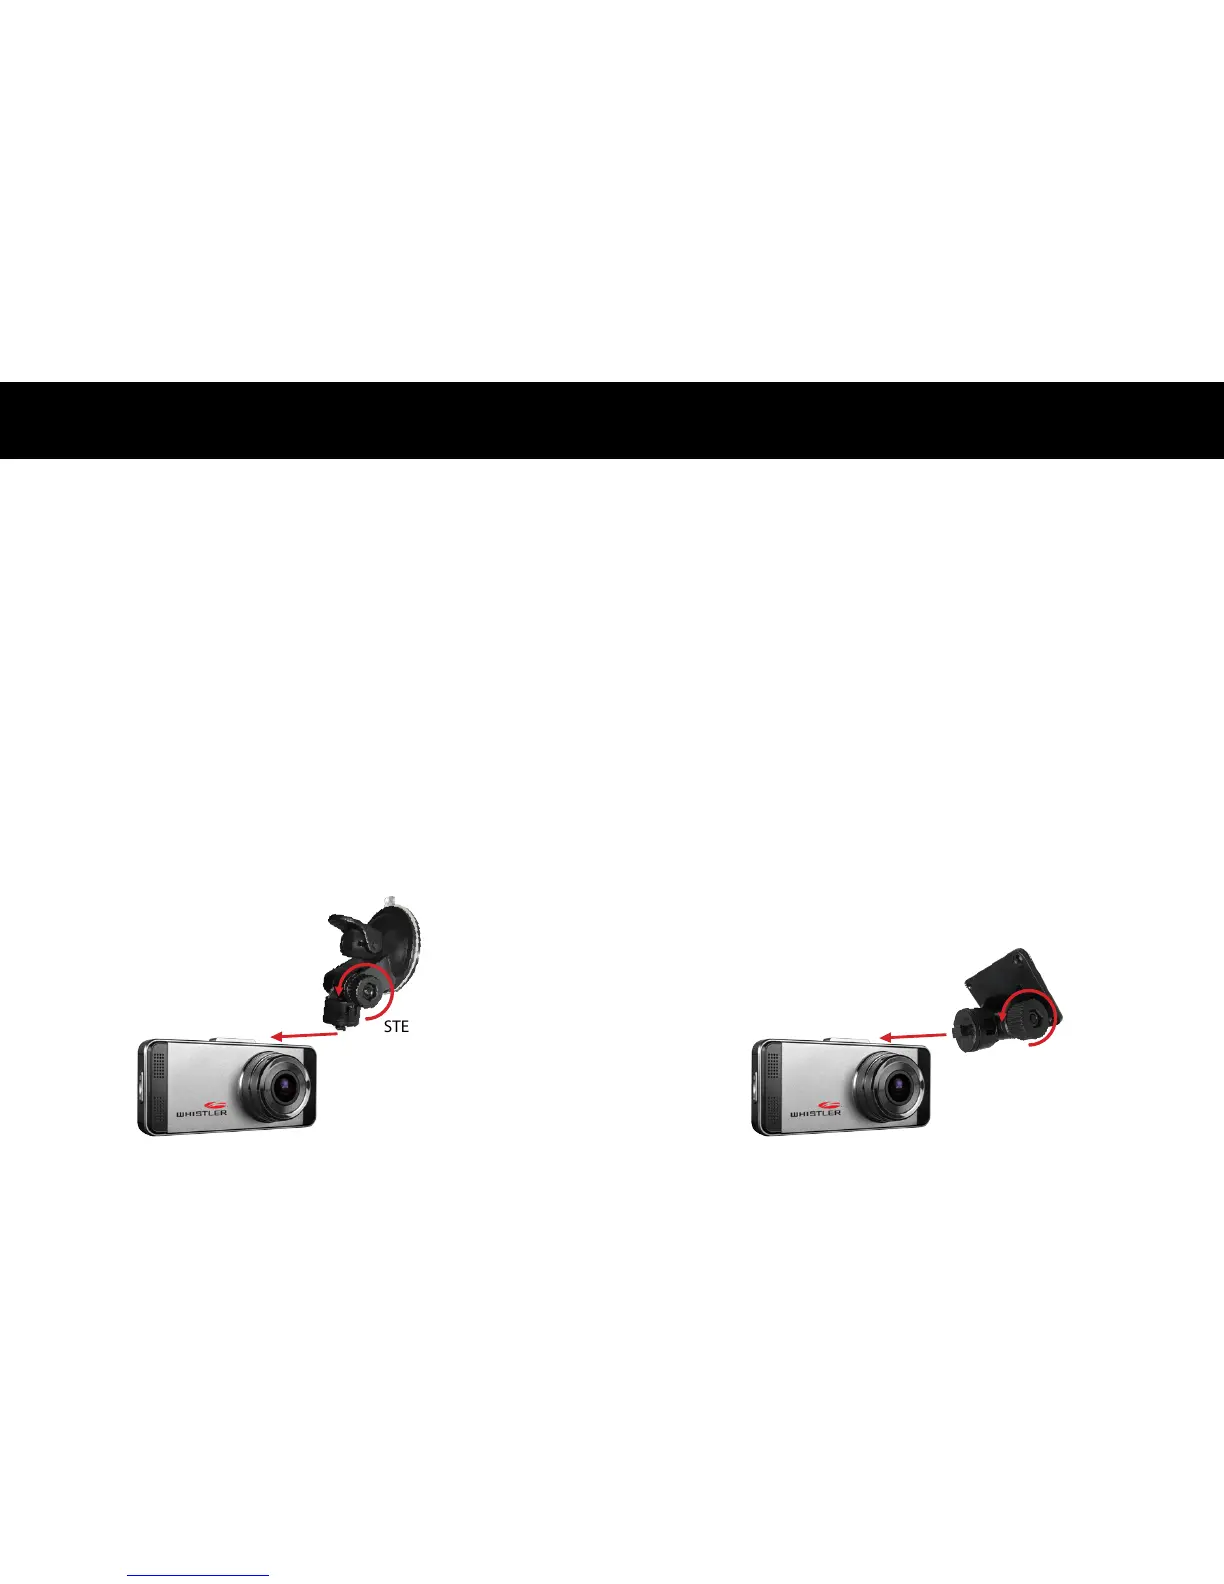
Installing the Windshield Bracket
The included windshield bracket securely places the DVR
onto the vehicle’s windshield.
Follow the procedure below to secure the bracket:
1. Slide the BRACKET into the rail on the top of the DVR.
2. If applicable, remove protective lm from the suction cup.
3. Clean the selected area of the windshield for mounting
using a quality glass cleaner.
4. Press the bracket onto the windshield. To secure the
suction cup press the locking tab toward the windshield.
5. Loosen the knob on the bracket to adjust the angle of the
DVR. Tighten knob securely to secure the DVR’s position.
Installing the Flat Surface Mount
The included dash bracket securely places the DVR onto
the vehicle’s dash.
Follow the procedure below to secure the mount:
1. Select a location on the dash or any at interior surface
of the vehicle.
2. Clean the selected area with an isopropyl pad to clean
any wax or polish. This will prepare the area for the 3M
Adhesive to properly stick.
3. Locate the bottom of the Flat Surface Mount and peel
o the protective backing to expose the adhesive.
4. Slide the mount into the rail on the top of the DVR.
5. Loosen the knob on the mount to adjust the angle of the
DVR. Tighten knob securely to secure the DVR’s position.
STEP 1
STEP 5
STEP 5
STEP 3
STEP 4
STEP 4
 Loading...