Compass quick guide
Page 4
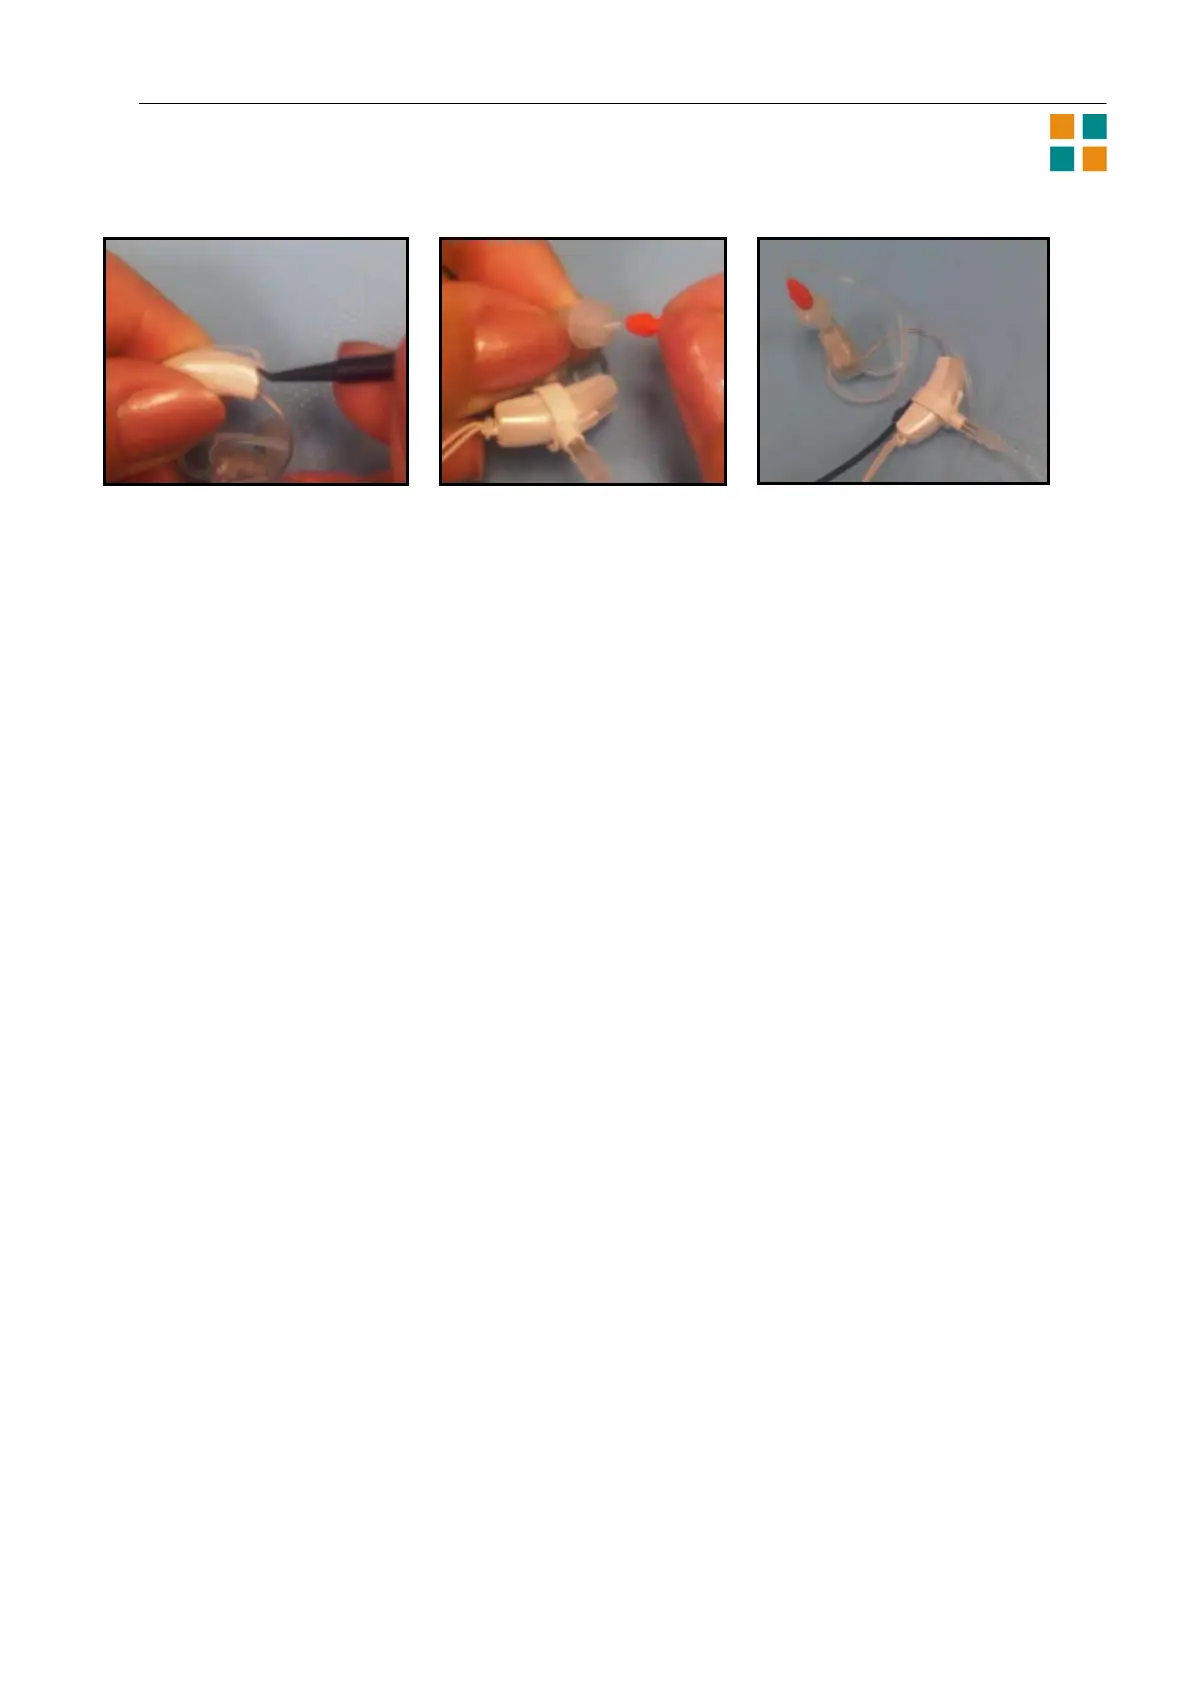
2a 2b 2c
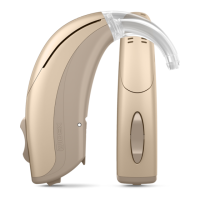
5. To perform a Widex in-situ RECD measurement, attach a Widex probe tube to the end of the
white RECD “grip”. Remove the hearing aid microphone cover as shown in 2a above. Position
the RECD microphone attachment as shown, 2b. It should snap in place when positioned
properly. Insert the end of the probe tube into the eartip (2b), and place on desktop in a quiet
environment for calibration (2c).
Remove the probe from the eartip and position it in the child’s ear canal after otoscopy. After
performing a Widex in-situ RECD measurement, be sure to remove the probe from the child’s ear
immediately after performing the measurement. Remove the RECD grip and reposition the
microphone cover.
If you are able to perform VRA or play audiometry, proceed to the Sensogram window. After the
Sensogram, a feedback test may be performed if the fitting room is quiet and if the child is able
to remain quiet for the test signals.
6. Confirm hearing aid fitting goals have been met by means of real ear or simulated real ear
measurements and/or behavioral testing if possible. See [Fine-tuning] section for details re:
verification set-up.
Depending on your observations, you may decide not to make fine tuning adjustments during the first
visit, but in later sessions you may want to fine tune the hearing aids.
Questionnaires
The ChildFit procedure has two questionnaires that are very helpful in determining how far the child is in
its development and how well the hearing aids work for the child. They are accessible from the Client or
the Finalize sections of Compass.
Parent questionnaire
This questionnaire is a list of practical questions about the hearing aid, how much the child uses it, and
how well it works for the child. The top of the Parent questionnaire window contains information about
the child, and an option to print it.
The list of questions is below the basic information. Select the appropriate answer(s) for each question.
Some questions are followed by a list of radio buttons, and for these you can only enter one answer.
Other questions let you list more than one answer. These questions are followed by a number of check
boxes.
Hearing checklist
The second questionnaire is the Hearing checklist that can help you determine whether the child is
developing as expected.
At the top of the Hearing checklist window you can see the child’s age and various data about the fitting
and the checklist. You can also print it, either as an empty list or with the data you have entered.