Time/Date
Image
Still
Video
Photos
M
D D
M
Time/Date
Image
Still
Video
Photos
M
D D
M
Time/Date
Image
Still
Video
Photos
Time/Date
Image
Still
Video
AM
Photos
Time/Date
Image
Still
Video
Photos
AM
Time/Date
Image
Still
Video
AM
Photos
Time/Date
Image
Still
Video
Photos
AM
Time/Date
Image
Still
Video
AM
Photos
FCC STATEMENT
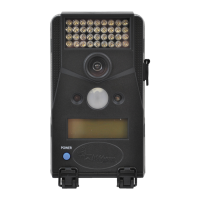
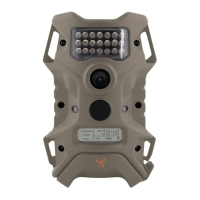
Product Name: Digital Game Scouting Camera
Trade Name: Wildgame Innovations
NOTE: This equipment has been tested and found to comply with the limits for a Class B digital device,
pursuant to part 15 of the FCC Rules. These limits are designed to provide reasonable protection against
harmful interference in a residential installation. This equipment generates, uses and can radiate radio
frequency energy and, if not installed and used in accordance with the instructions, may cause harmful
interference to radio communications. However, there is no guarantee that interference will not occur in a
particular installation. If this equipment does cause harmful interference to radio or television reception,
which can be determined by turning the equipment off and on, the user is encouraged to try to correct the
interference by one or more of the following measures:
• Reorient or relocate the receiving antenna.
• Increase the separation between the equipment and the receiver.
• Connect the equipment into an outlet on a circuit different from that to which the receiver is connected.
• Consult the dealer or an experienced radio/TV technician for help.
CAUTION: Changes or modifications not expressly approved by the party responsible could void the user’s
authority to operate this device. Product specifications are subject to change. Wildgame Innovations is not
responsible for any photographic or typographical errors.
IC WARNING
This device contains license-exempt transmitter(s) that comply with Innovation, Science and Economic
Development Canada’s license- exempt RSS(s).
Operation is subject to the following two conditions:
(1) This device may not cause interference.
(2) This device must accept any interference, including interference that may cause undesired operation of the
device. This equipment meets the exemption from the routine evaluation limits in section of RSS-102. It should
be installed and operated with a minimum distance of 20cm between the radiator and any part of your body.
Product specifications are subject to change. Good Sportsman Marketing, LLC is not responsible for any
photographic or typographical errors.
May be protected by one or more U.S. Patent numbers: 6,735,387 / 6,768,868 /
6,834,162 / 7,149,422 / 7,308,196 / 7,593,632 / 7,710,457 / 8,895,926.
MODEL# WGI-KICK2LO
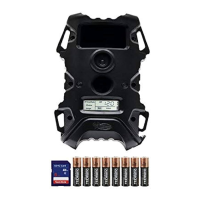
Battery Installation
Ready Mode
MountingImage
FCCLimited Warranty
Test Mode
Notes:
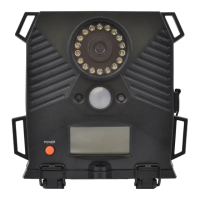
Power
Settings Photos
Format SD CardRetrieving Images
(SD Card Reader)
3.
NOTE:
The LCD will not “wake up” when the camera is writing to memory.
TIME: DATE:
ON: OFF:
1.
2.
1. Slide the power switch up to turn the unit ON.
2.
1.
1.
1. Press the enter navigation button
while Image is selected. The
highlighted option will be blinking.
2.
1.
To change date and time, start by
pressing and releasing the Enter
navigation button to set the hour.
1. Press the Enter navigation button
after setting the minute to change
the Date.
2.
3. When the Month is set, repeat
steps 1 and 2 to set the Day and
Year.
2.
3. When the hour is set, repeat
steps 1 and 2 to set the minutes.
2. The LCD screen can be awakened by pressing any button.
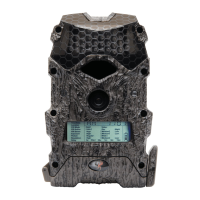
PICTURES DISPLAY:
User’s Manual
IMPORTANT TIPS:
• Recommended distance from target area is
25-30 feet for optimal imaging quality.
• To improve the quality of your images,
try not to mount the unit facing the rising
or the setting sun in order to avoid direct
sunlight into the camera lens.
• If mounting to a feeder unit or dusty
environment, be sure to clean the camera
lens cover, incandescent flash cover, and
the PIR sensor cover on a regular basis.
• Periodically check the mounting of the
camera to ensure it is not loose.
• Make sure that you securely latch the door
closed every time you use the camera, as
the moisture seal will not be activated
unless closed properly.
• Check batteries frequently to ensure no
corrosive build-up, as this may cause harm
to the camera.
Your Wildgame Innovations scouting camera is covered by a 365 Day Limited Warranty on parts and labor from
eBay voids the warranty.
number must be obtained from customer service at 877-269-8490 prior to returning product.
Authorization at the time of return.
Technical Support Email:
Customerservice
gsmorg.com
Please allow 48 hours for email response.
Wildgame Innovations
P.O. Box 535189
Grand Prairie, TX 75053-9504
Customer Service
Toll Free: 877-269-8490
Call Center Hours
Mon – Fri / 8AM – 5 PM (CST)
GSM, LLC
P.O. Box 535189
Grand Prairie, Texas 75053
Toll-free 877-269-8490
www.gsmoutdoors.com
www.wildgameinnovations.com
SDXC CARDS ARE NOT SUPPORTED
Having trouble with your SD card? Try this.
Press and hold the - button for 5 seconds. dLE (delete) will display on the LCD screen
while the camera is formatting the card.
WARNING: formatting your SD card will delete all files placed on it .
To format your SD card using your camera
1.
2. Open (Windows) File Explorer by pressing Win + E on simultaneously your keyboard.
3. Right-click the drive letter associated with your memory device, then select “Format.”
4. Ensure FAT32 is selected under “File System.”
5. Ensure ”Quick Format” is checked.
6. Click “Start.”
1. Connect the SD card to your computer. If your computer has an SD card slot you can
insert the SD card directly into the port.
NOTE: If you are using a MicroSD card, you will need an adapter to allow it to fit into
standard SD card ports. If your computer does not have an SD card port built-in, you can
use an external USB card reader that plugs into any USB port on your computer.
To format your SD card using your computer
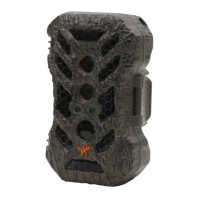
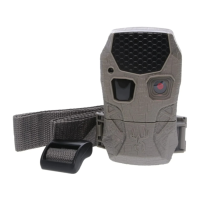
When mounting to a tree, first remove
the clip from one end of the strap so
you can slide the strap through the
slots located on the back of the camera.
Once the camera is attached, place the
clip back on to the strap. Then, wrap
the strap around the tree and clip the
two ends together. Pull the excess
material so that the camera is strapped
tightly to the tree.
Open the door at the bottom of the
camera by pulling the latch.
Drop the battery tray by sliding the orange
EJECT latch to the right.
Align the batteries with the positive
(+) facing up on the outside, and the
negative (-) facing up on the inside.
4.
IMPORTANT:
Load SD memory card (up to 32GB)
into the SD card slot with the notch
in first and the metal pins facing you.
5. No SD card message will appear
after power up if the SD card is
missing or corrupted.
To turn the unit off, slide the power
switch down.
Check the battery level icon to ensure
the batteries just installed contain the
proper charge level. If so, you are ok
to proceed with camera use.
Make sure the camera is powered off
before removing or installing an SD card.
If you are using an SD card from other
cameras, please make sure to format
the SD card in your computer prior to
use in your camera. New cards are ok to
use straight from the package.
Press the + or - navigation button
to go up or down in sequence.
Press the + or - navigation button
to go up or down in sequence.
Press the
+ or - navigation button
to move to switch between Still and
Video. Press the enter navigation
button to save the setting.
A- Time
B- Date
C- Moon Phase
D- Photo Count
A B C D
NOTE:
Do not mix old and new batteries.
Do not mix alkaline, standard
(carbon-zinc) or rechargeable
(ni-cad, ni-mh, etc) batteries.
First, remove the SD Card from the camera by pressing on it until it automatically ejects.
Next, insert the SD card into your SD card reader.
Please refer to your card reader's owner's manual for the proper way of viewing the files.
You can also use the WGI SD Card Reader for Apple or Android to access and upload
your photos to the cloud using the WGI Huntsmart app on your mobile device.
1.
2.
Press the
+ or - navigation button to navigate to “Photos” in the menu. The number displayed
is the number of photos saved to your SD card. This is not a programmable setting.
SD Card Installation
After 30 seconds without any buttons being pushed, the LCD will turn off and the camera
enters Ready Mode.
LED Status Light: During the first 3 minutes of the Ready Mode, the red light
will illuminate when the camera detects movement. After 3 minutes, all
indicator lights will turn off until a button is pressed.
Page 13
Page 9
Page 5
Page 1
Page 12
Page 8
Page 4
Page 14
Page 10
Page 6
Page 2
Page 11
Page 7
Page 3