Do you have a question about the Wildgame Innovations Terra 8 and is the answer not in the manual?
Open the camera door by unlatching the locking tab.
Slide the latch to the left to open the battery compartment cover.
Insert batteries with positive ends towards the marked positive terminals.
Press and release the power button to turn the unit ON.
Ensure the installed batteries have a proper charge level via the icon.
Camera enters Ready Mode if no button is pressed for over 30 seconds.
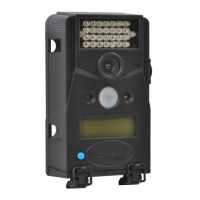
Red light illuminates for PIR events; blinks when photo is taken.
LCD turns off and camera enters Power Save/Ready Mode after 30 seconds.
Press the Power button briefly to awaken the LCD screen.
Press enter to set the hour, then use +/- to adjust.
Repeat steps to set the minutes after the hour is set.
Press enter after setting minutes to change the Date; set the Month.
Repeat steps to set the Day and Year after the Month is set.
Press enter to choose Photos; displayed number is photos on SD card.
Press enter when Image is selected; the option will blink.
Use +/- to move to options, press enter to save the setting.
Wake LCD, then hold power button until LCD turns off to power down.
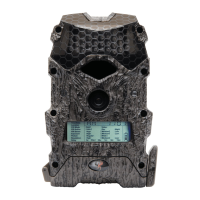
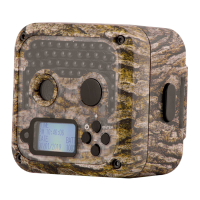
Image displays Time (A), Date (B), Moon Phase (C), and Photo Count (D).
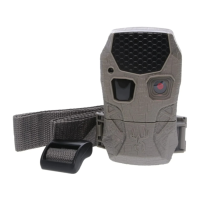
Latch bungee cords through mounting holes, stretch around tree, and re-latch.
Recommended distance from target area is 25-30 feet for best quality.
Avoid mounting facing sun; clean lens and sensor covers regularly.
Check mounting, ensure doors are latched, and check batteries for corrosion.
Remove SD card, insert into reader, connect to computer, and access files.
View images individually; select and right-click to delete permanently.
Note that SDXC cards are not supported by this device.
Connect SD card, use computer's format option, select FAT32 and Quick Format.
One year workmanship warranty; excludes damage from misuse, alterations, etc.
Obtain RMA number, include details, pack carefully, customer pays return shipping.
Contact customer service for assistance with operation, assembly, or missing parts.
Device complies with Part 15; may not cause harmful interference.
Unauthorized modifications can void user's authority to operate the equipment.
If interference occurs, try reorienting antenna, increasing separation, or checking connections.
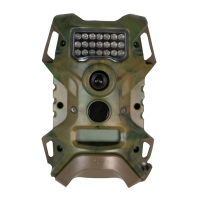
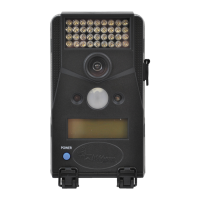
This document is a user manual for an Infrared Digital Scouting Camera, specifically Model # TR8i1-7, manufactured by Wildgame Innovations. The manual provides instructions for setting up, operating, and maintaining the camera, as well as important information regarding its features, warranty, and FCC compliance.
The primary function of this device is to capture digital still images and AVI-format digital videos in an outdoor scouting environment, utilizing infrared technology for low-light conditions. It is designed to detect motion and heat through a Passive Infrared Sensor (PIR) and record activity within its sensor and flash range.
The camera unit is designed for ease of use, with a straightforward setup process. To begin, users must install 8 AA alkaline batteries (not included) into the battery compartment located at the bottom of the camera. The manual emphasizes the importance of correctly orienting the batteries according to the positive and negative markings and advises against mixing old and new batteries or different battery types (alkaline, carbon-zinc, rechargeable). After battery installation, the battery compartment cover must be securely latched.
Next, an SD memory card (up to 32GB, Class 4 or above recommended, not included) needs to be loaded into the SD card slot with the connectors facing up. It is crucial to ensure the camera is powered off before inserting or removing the SD card. For SD cards previously used in other cameras, formatting the card on a computer is recommended before use with this device, although new cards can be used directly from the package.
Powering on the camera involves a simple press and release of the power button. Upon activation, the user should check the battery level icon on the LCD screen to confirm adequate charge. The camera features an LCD Ready Mode, which it automatically enters if no buttons are pressed for more than 30 seconds. During the initial 30 seconds of LCD Ready Mode, a red LED status light will illuminate when a PIR event is triggered. After the LCD turns off, the red light will blink for 2-3 seconds when a photo is taken. All indicator lights will turn off after 2 minutes until a button is pressed again, conserving power.
The camera also incorporates a Power Save feature. After 30 seconds of inactivity, the LCD will turn off, and the camera will enter Power Save or Ready Mode. The LCD screen can be reactivated by briefly pressing the Power button, though it will not "wake up" while the camera is writing to memory.
Setting the time and date is an interactive process using the navigation buttons. Users press and release the enter button to set the hour, then use the '+' or '-' navigation buttons to adjust the value. This process is repeated to set the minutes, month, day, and year.
The camera allows users to view the number of photos stored on the SD card by selecting the "Photos" option. This is a display-only mode and not programmable. For image settings, users can select "Image" and press the enter navigation button. The highlighted option will blink, and the '+' or '-' navigation buttons can be used to cycle through different image options. Pressing the enter button saves the selected setting.
To power off the unit, the user must first wake up the LCD screen and then depress and hold the power button until the LCD turns off.
The camera is designed for outdoor mounting to a tree using two included bungee cords. The cords are latched through mounting holes on one side of the camera, stretched around the tree, and then latched through mounting holes on the opposite side, ensuring a secure attachment.
The manual provides several tips for maintaining the camera and optimizing its performance. To achieve optimal imaging quality, a recommended distance of 25-30 feet from the target area is suggested. To prevent direct sunlight from affecting image quality, users should avoid mounting the camera facing the rising or setting sun.
Regular cleaning is essential, especially if the camera is mounted near a feeder or in a dusty environment. The camera lens cover, incandescent flash cover, and PIR sensor cover should be cleaned periodically. Users are also advised to periodically check the camera's mounting to ensure it remains secure and not loose.
A critical maintenance step is to ensure the door is securely latched every time the unit is used. This activates the moisture seal, protecting the internal components from environmental elements. Frequent checks of the batteries are also recommended to prevent corrosive build-up, which could damage the camera.
Retrieving images from the camera involves removing the SD card and using an SD card reader connected to a computer. The manual outlines a detailed process for accessing and managing image files, including steps for automatic launching of "AutoPlay" or manually navigating to the "Secure Digital Storage Device" through the computer's file system. Images are typically stored in the "MEDIA" folder. The manual also covers viewing individual images and deleting unwanted files, emphasizing caution when deleting as it is a permanent action.
For SD card maintenance, the manual provides instructions on how to format an SD card using a computer, specifically for Windows operating systems (Vista/7/8/XP). It clarifies that SDXC cards are not supported and advises connecting the SD card to the computer, right-clicking the drive letter, selecting "Format," ensuring FAT32 is selected as the "File System," checking "Quick Format," and clicking "Start." This ensures the SD card is properly prepared for use with the camera.
The device also comes with a one-year product workmanship warranty from WGI Innovations, LTD, which requires product registration on their website. The warranty covers defects but excludes damage from unauthorized repairs, alterations, improper connection, shipping, abuse, theft, accident, neglect, or collateral loss. For service, customers must obtain a Return Merchandise Authorization (RMA) number and include specific contact and problem details when returning the product.
In summary, the Infrared Digital Scouting Camera is a user-friendly device designed for outdoor surveillance, with clear instructions for setup, operation, and essential maintenance to ensure longevity and optimal performance.
| Megapixels | 8 MP |
|---|---|
| Flash Type | Infrared |
| Storage | SD Card (up to 32 GB) |
| Battery Life | up to 6 months |
| Video Resolution | 640x480 |
| Photo Resolution | 8 MP |
| Detection Range | 50 ft |
| Battery Type | AA |