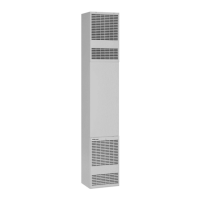
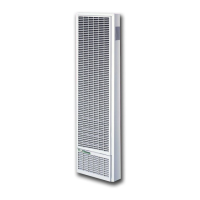
Troubleshooting
FOR MODELS: 6008532; 6008531
1. Pilot w ill not stay lit
after following lighting
instructions.
A. Thermocouple producing
insufficient millivolts.
Check pilot flame – it must impinge on thermocouple. Pilot flame may be low or
blow ing (high) causing safety to drop out. Pilot orifice or aerating hole may be plugged
(check for spiders, w ebs or other organic material). Be sure the thermocouple is fully
inserted in its bracket.
B. Loose or dirty
thermocouple
connection at gas valve.
Clean and/or tighten the thermocouple fitting at the connection to the valve.
C. Thermocouple defective.
Check thermocouple w ith millivolt meter – it should generate approximately 30
millivolts w hen not connected to a load. When connected to a load, it should generate
approximately 14 millivolts. If below 7 millivolts, replace.
D. Thermomagnet pilot
safety defective
Replace gas valve after above is checked out.
E. Vent safety shutoff
device.
Check w iring connections from valve to the vent safety shutoff device. Be sure all
connections are tight. Check for blocked or incorrect venting.
2. Main burner w ill not
come ON - pilot
burning and
thermostat set for
heat.
A. Gas valve not turned ON
after lighting the pilot.
Turn gas valve knob to 'ON" position - if no main gas flow , proceed to Step. "B".
B. Electric pow er to furnace
turned OFF.
Check for line voltage at furnace - if okay and no main gas flow , proceed to Step "C".
C. Low voltage transformer
or limit sw itch defective.
Check for 24 volts at the low voltage terminals of the transformer. If no voltage, turn
OFF electric pow er to furnace. Remove one w ire from limit sw itch and check for
continuity across both terminals. No continuity – replace limit sw itch. With a good limit
sw itch back in the circuit and the electric power turned ON - if no voltage, replace
transformer. NOTE: Before replacing the transformer or limit sw itch, check wiring for
loose connections or broken wires and repair as needed. If voltage is present at
transformer, proceed to Step "D".
D. Wall thermostat
defective.
With thermostat set for heat (contacts closed) check for voltage at terminals on gas
valve. If no voltage is present replace defective thermostat. NOTE: Before replacing
thermostat, be sure to check the wiring from the furnace to thermostat for loose
connections or broken w ires and replace as needed.
E. Burner orifice plugged.
Clean or replace orifice - if okay and still no gas flow to main burners, proceed to Step
"F".
Replace defective gas valve.
3. Burner comes "ON"
but goes OFF before
blow er turns ON.
Turn OFF electric pow er to furnace. Remove top front panel, fan shroud and blow er
w heel. Refer to Wiring Diagram and check all w iring inside junction box. Remove
center front panel and check all wiring inside sw itch box containing fan, limit and
selector sw itches. Correct if necessary. If correct, proceed to Step "B".
B. Defective limit sw itch.
If burner goes OFF in less than five minutes from room temperature start, check limit
control sw itch. If detective, replace. NOTE: Blow er should turn "ON" w ithin three
minutes after burner is "ON" from a room temperature start. If not, proceed to Step
"C”.
C. Defective motor (2-
speed).
Jumper across the fan switch, turn electric pow er ON, the motor should rotate. If a 2-
speed motor is used - jumper from "brown" terminal on the fan sw itch to #2 (red)
terminal on the selector sw itch, motor should rotate on "LOW" speed. Jumper from
same "brown" terminal on the fan sw itch to #3 (black) terminal on the selector sw itch,
motor should rotate on "HIGH" speed. Replace motor if defective.
D. Defective motor (1-
speed).
Jumper across fan switch, turn electric power ON, motor should rotate. Replace motor
if detective.
E. Detective fan sw itch.
If, after checking above possibilities, problem still exists, replace fan sw itch.
4. Burner comes "ON",
blow er comes "ON",
but cycles "ON"
and "OFF" w hile
burner remains "ON".
A. Furnace not operating at
full rate.
Check for low gas pressure at gas valve - should be 4" W.C. for Natural Gas, 11" W.C.
for L.P. Gas. Check burner orifice.
5. Burner comes "ON",
blow er comes "ON",
but burner cycles
"OFF" and "ON" w ith
blow er "ON".
A. Furnace operating over-
rate.
Check for high gas pressure at gas valve - correct if necessary. See correct pressure
above.
B. Line voltage too low .
Check line voltage to motor, if below 115 volts motor w ill run too slow .
Heated air discharging against an object causing recirculation, such as a hall
installation or a large piece of furniture w ithin 4' of discharge.
D. Loss of circulating air
due to leakage.
Check header plate installation and proper use of gaskets. Repair as necessary.
6. Furnace operates but
turns "OFF" before
room temperature is
attained.
Check location of thermostat. It should not be in the path of w arm air discharge from
the furnace, near a lamp, or above a TV set or stereo.
Check thermostat calibration or replace.