en Installation and electrical connection
14 WILO SE 2017-03
▪A dry run of the pump is prohibited! Avoid air pockets in
the hydraulics housing or in the pipe system. Ensure the
water level never falls below the minimum. The install-
ation of a dry-running protection is recommended!
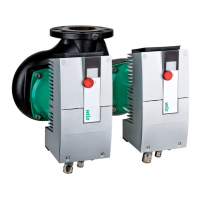
6.4.1 Indications for double pump operation
If several pumps are used in an operating space, min-
imum distances between the pumps and the wall must
be complied with. Here there is a difference in the dis-
tances depending on the type of system: Alternating
operation or parallel operation.
Fig.3: Minimum distances
d Diameter hydraulics housing
A
1
Minimum distance from the wall:
- alternating operation: min. 0.3×d
- parallel operation: min. 1×d
A
2
Distance to discharge pipelines
- alternating operation: min. 1.5×d
- parallel operation: min. 2×d
6.4.2 Note on DN50/65 combination flange
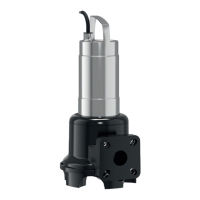
The Rexa UNI V06... is equipped with a DN50/65 com-
bination flange. The nuts on the combination flange are
factory-set to the DN65 flange. For use with a DN50
flange, adjust the nuts at the flange. The flange can be
reset to DN65 at any time!
Fig.4: Adjust combination flange
‡ No accessories mounted on flange.
‡ Nut is freely accessible.
1. Push the nut inwards onto the small hole circle using a
screwdriver.
▶ The flange connection is reset to DN50.
6.4.3 Maintenance tasks
After a storage period of more than 6months, check
the oil in the sealing chamber prior to installation:
Fig.5: Check the oil
1 Screw plug sealing chamber
‡ Pump is not installed.
‡ Pump is not connected to the mains.
‡ Protective equipment has been put on!
1. Place the pump horizontally on a firm surface. The
screw plug points upwards. WARNING!Risk of hands
being crushed. Ensure that the pump cannot fall over
or slip away!
2. Unscrew the screw plug.
3. Place a suitable tank to collect the operating fluid.
4. Drain the operating fluid: Rotate the pump until the
opening points downwards.
5. Check the operating fluid:
⇒ If the operating fluid is clear, reuse operating fluid.
⇒ If the operating fluid is contaminated (black), fill
with new operating fluid. Dispose of operating
fluid in accordance with the local regulations!
⇒ Notify customer service if an operating fluid con-
tains metal chips!
6. Pour in operating fluid: Rotate the pump until the
opening points upwards. Fill-in the operating fluid into
the opening.
⇒ Comply with the specifications for operating fluid
locations and quantity! When recycling the operat-
ing fluid, check the quantity and if required adjust
it!
 Loading...
