en Decommissioning/dismantling
22 WILO SE 2017-03
8.4.2 Portable wet well installation
‡ Pump is taken out of operation.
1. Disconnect the pump from the mains.
2. Roll up the power supply cable and place it over the
motor housing. CAUTION!Never pull on the power
supply cable! This damages the power supply cable!
3. Loosen the pressure pipe from the pressure port.
4. Attach the lifting equipment to the attachment point.
5. Lift the pump from the operating space. CAUTION!The
power supply cable may be squeezed and damaged
when setting the pump down! Pay attention to the
power supply cable when setting the pump down!
6. Clean pump thoroughly (see point “Cleaning and disin-
fecting”). DANGER!Disinfect the pump when used in
fluids hazardous to health!
8.4.3 Clean and disinfect
DANGER
Danger due to fluids hazardous to health!
Danger to life if the pump is used in fluids hazardous
to health! Decontaminate the pump before carrying
out any further work! Wear the following protective
equipment while performing cleaning tasks:
• Closed safety goggles
• Breathing mask
• Protective gloves
⇒ The equipment listed here is the minimum re-
quirement, observe the specifications of the
work regulations! The operator must make
sure that the personnel has received and read
the work regulations!
‡ Pump is dismantled.
‡ The contaminated cleaning water is disposed of in the
sewage in accordance with the locally applicable regu-
lations.
‡ A disinfectant is provided for contaminated pumps.
1. Attach the lifting equipment to the attachment point
of the pump.
2. Lift the pump approximately 30cm above the ground.
3. Spray the pump with clear water from top to bottom.
NOTICE!An appropriate disinfectant must be used
for contaminated pumps! Strictly observe the manu-
facturer’s specifications concerning use!
4. To clean the impeller and the interior pump space,
guide the water jet inside via the pressure port.
5. Flush all dirt residue onto the floor of the channel.
6. Allow the pump to dry out.
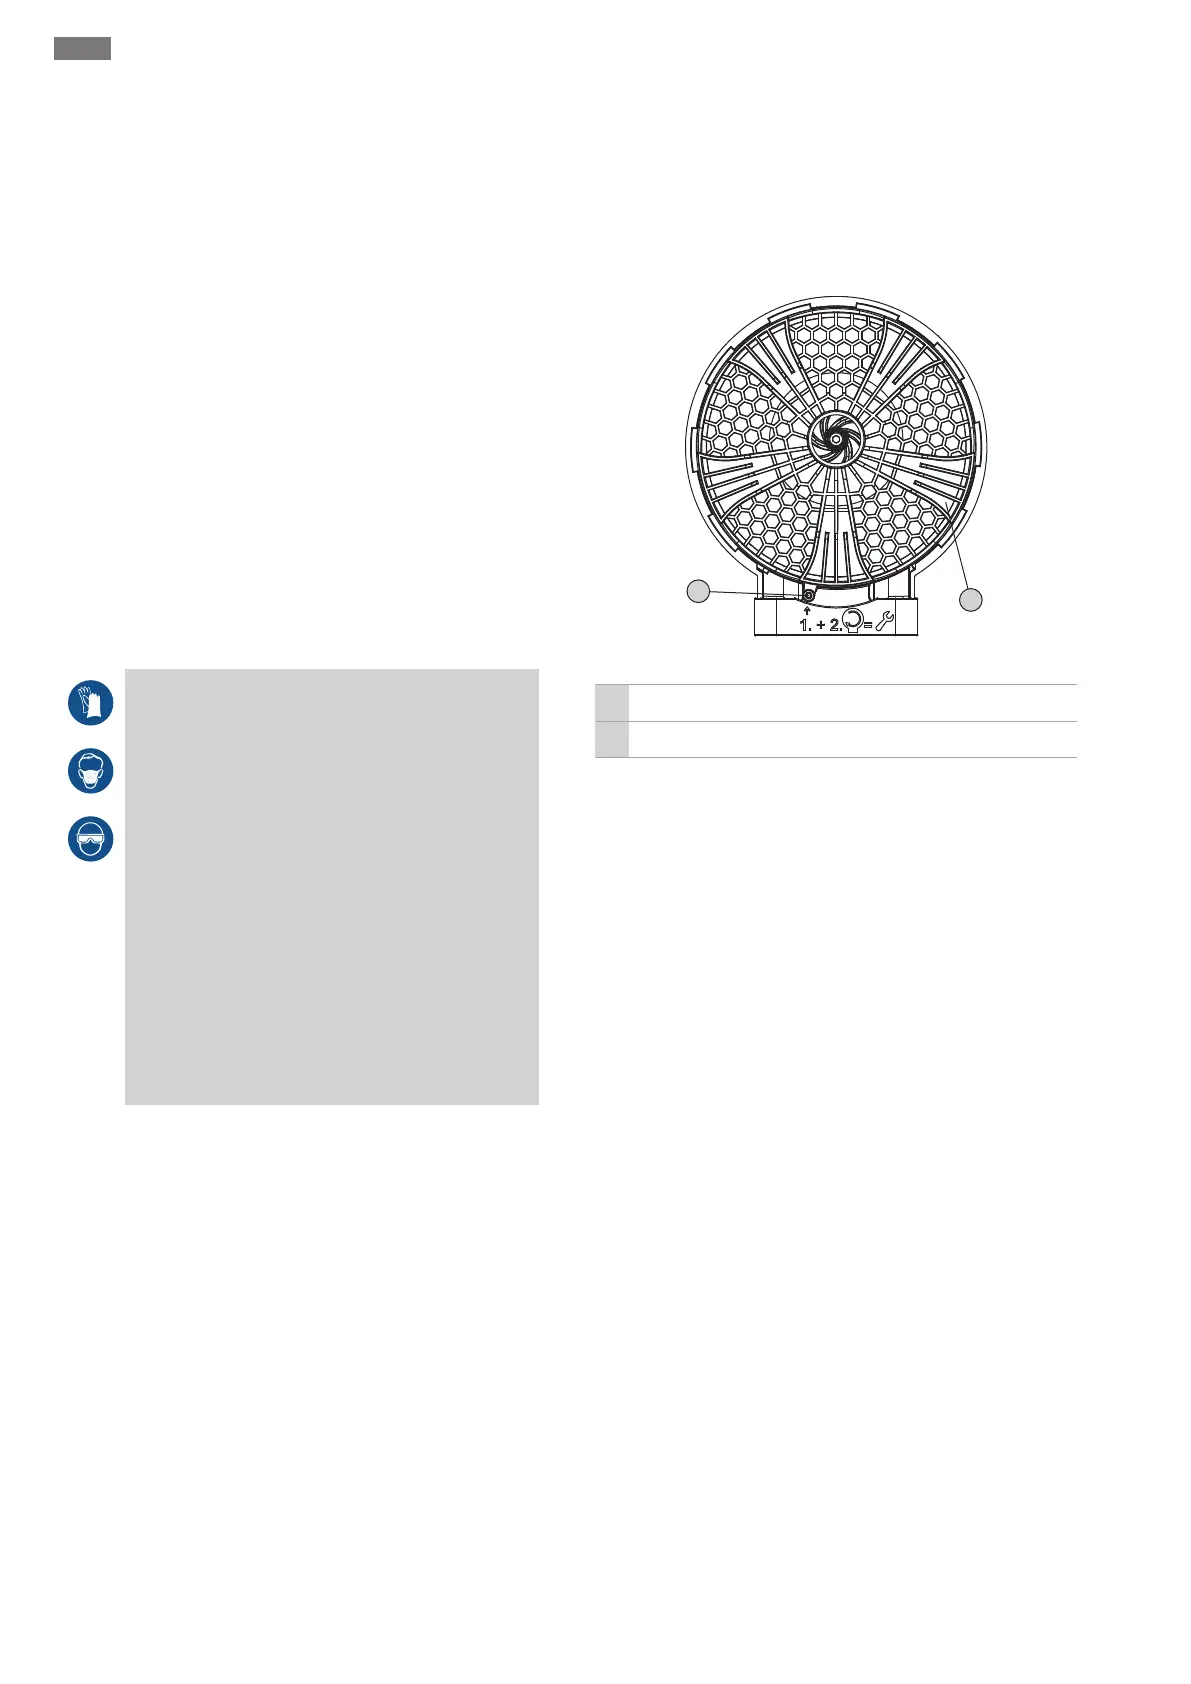
8.4.3.1 Clean the interior area of the hydraulics
Disassemble the baseplate of the hydraulics for easier
cleaning of the interior area of the hydraulics.
Fig.10: Disassemble baseplate
1 Safety screw
2 Baseplate
1. Place the pump horizontally on a firm surface. WARN-
ING!Risk of hands being crushed. Ensure that the
pump cannot fall over or slip away!
2. Unscrew the safety screw (hexagonal socket4) of the
baseplate half-way, until the bayonet coupling can be
turned.
3. The baseplate is attached with a bayonet coupling.
Turn the baseplate clockwise (to the right) and remove.
4. Rinse the interior area of the hydraulics with clear wa-
ter, remove solids manually. WARNING!Sharp edges
can form on the impeller. This can lead to extremities
being cut off! Wear safety gloves to protect against
cuts!
5. Check correct position of O-ring on the baseplate.
6. Lubricate the O-ring with O-ring grease and set the
baseplate on the hydraulic part.
7. Turn baseplate anticlockwise (to the left). The base-
plate is fixed in place with the bayonet coupling.
8. Screw in the safety screw of the baseplate. Max. tight-
ening torque: 1.5Nm!
▶ Hydraulics cleaned and locked, complete cleaning
tasks.