English
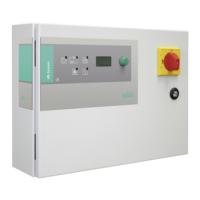
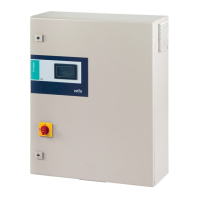
Installation and operating instructions Wilo VR System 25
Mains connection 1~230 V:
The 3-wire cable (L1, N, PE) is to be provided onsite.
The connection is established at the main switch
(Fig. 2, item 1), the PE is connected to the earth
bar.
Mains connection 3~400 V:
The 4-wire cable (L1, L2, L3,
PE) is to be provided
onsite. The connection is established at the main
switch (Fig. 2, item 1) or for systems of higher
power at the term
inal strips in accordance with
the wiring diagram, the PE is connected to the
earth bar.
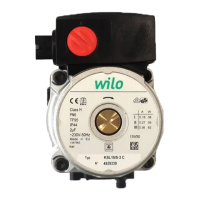
Pump mains connections:
CAUTION! Risk of damage to the product!
Observe the installation and operating instruc-
tions for the pumps!
The connection of the pumps with integrated fre-
quency converter is to be established directly at
the circuit breakers (2, 4, 6), or for systems of
higher power at the terminal strips in accordance
with the wiring diagram enclosed (Fig. 2, item 4).
The
PE is to be connected to the earth bar. If exter-
nal frequency converters are used, shielded cables
must always be used. To ac
hieve the best shield-
ing effect, fit the shield on both sides!
Pump control signals:
CAUTION! Risk of damage to the product!
Observe the installation and operating instruc-
tions for the pumps!
Connect them to the base board at terminal
“Pumps 1...4” (Fig. 6) and to the terminal strips of
the pumps.
Use a shielded cable, place the s
hield on one side
in the control device.
If a three-wire cable is used (as shown in Fig. 6)
an “SBM” terminal must be bridged with the earth
terminal of the 0...10 V input in the pump terminal
box.
If a four-wire cable is used, t
his bridging may also
be performed in the control device.
CAUTION! Risk of damage to the product!
Do not connect any external voltage to the ter-
minals!
Pressure sensor 4...20 mA:
Connect the sensor according to the installation
and op
erating instructions correctly to the base
board at the “Sensor” terminal (Fig. 6).
Use a shielded cable, place the s
hield on one side
in the control device.
CAUTION! Risk of damage to the product!
Do not connect any external voltage to the ter-
minals!
External On/Off switching:
Remote On/Off switching by means o
f a poten-
tial-free contact (NC contact) can be connected
via the “
Ext. Off” terminals of the base board (Fig. 3)
after removing the jumper (premounted at the
factory). That gives you the option of switching
the system on and off (Fig. 6).
Contact closed: Automatic On
Contact open: Automatic Off, “OFF” signal on
the display
Contact load: 24 V DC/10 mA
CAUTION! Risk of damage to the product!
Do not connect any external voltage to the ter-
minals!
Protection against low water level:
Protection function against low water level by
means of a potential-free contact (NC contact)
can be connected via the “dry” terminals of the
base board (Fig. 3) after removing the jumper
(premounted at the factory). (Fig. 6).
Contact closed: No low water
Contact open: Low water
Contact load: 24 V DC/10 mA
CAUTION! Risk of damage to the product!
Do not connect any external voltage to the ter-
minals!
Collective run/collective fault signals SBM/SSM:
Potential-free contacts (changeover contacts) for
external signals are available via the “Failure”
(collective fault signal) and “Operation” (collective
run signal) terminals.
Potential-free contacts, max. contact load (see
Fig. 6)
• 250 V ~/1 A ohmic load,
• 30 V-/1 A ohmic load
Actual pressure indication:
A 0 ... 10 V voltage signal for an external display
option of the current actual pressure is available
via the “P
out” terminal. 0 ... 10 V corresponds to
the pressure sensor signal 0 ... pressure sensor
limit value.
For
example:
Sensor Display
range
Voltage/
pressu
re
16 bar 0 … 16 bar 1 V = 1.6 bar
CAUTION! Risk of damage to the product!
Do not connect any external voltage to the ter-
minals!
Optional individual run and fault signals of the
pumps and low water protection system:
EBM 1 ... EBM 4, ESM 1 ... ESM 4, WM
Potential-free contacts (changeover contacts),
max. contact load (see Fig. 5)
• 250 V ~/1 A ohmic load,
• 30 V-/1 A ohmic load