Do you have a question about the Wilo Control SC-L and is the answer not in the manual?
Details the manual's language, structure, and the EC declaration of conformity.
Specifies required qualifications for personnel working with the switchgear.
States the copyright ownership and restrictions on use of the manual.
Informs that the manufacturer reserves the right to make technical modifications.
Covers general warranty terms, period, spare parts, maintenance, and liability.
Defines the manufacturer's obligation to correct defects under specific conditions.
Specifies how the warranty period duration is stipulated.
Emphasizes using genuine spare parts and warns against unauthorized parts.
Highlights the importance of regular prescribed maintenance by qualified personnel.
Stresses immediate elimination of safety-endangering damage by trained personnel.
Lists conditions under which the manufacturer assumes no liability for damage.
Explains how instructions and safety warnings are identified and presented.
Provides general safety advice for electrical work and operation.
Details dangers of electrical voltage and requirements for electrical work.
Outlines safe practices and responsibilities during switchgear operation.
Lists applicable European directives, standards, and regulations.
Confirms the presence of the CE marking on the rating plate.
Defines the product's intended use, applications, and limitations.
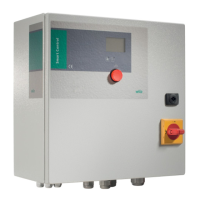
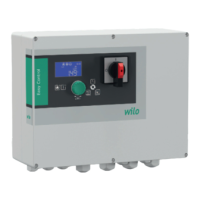
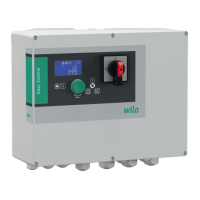
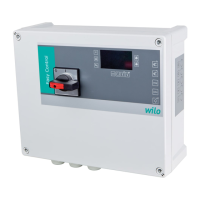
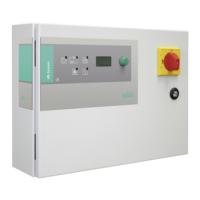
Provides an overview of the operating components of the switchgear.
Describes the microcontroller-controlled switchgear's functionality and features.
Details the two available operating modes: 'Empty' and 'Fill'.
Explains the 'Empty' mode for draining reservoirs, typically for water drainage.
Explains the 'Fill' mode for filling reservoirs, typically for water supply.
Lists the technical specifications of the switchgear.
Details the available inputs for level sensors and float switches.
Lists the available potential-free contacts for alarms and signals.
Presents key technical data like mains connection, current, and protection class.
Explains the coding system used to identify different switchgear variants.
Mentions available options for expanding switchgear functionality.
Lists the items included in the switchgear package.
Lists optional accessories that can be ordered separately.
Instructions for checking the shipment upon delivery for completeness and damage.
Guidelines for proper packaging and transport of the switchgear.
Recommendations for temporary storage, including temperature and humidity limits.
Procedure for returning switchgear, requiring cleanliness and proper packaging.
Observes local regulations for sewage systems and pump water coverage.
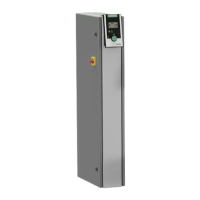
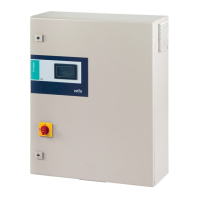
Describes available installation methods: wall, floor, and outdoor pedestal.
Covers general installation requirements, location, and ambient conditions.
Provides tips for securely fixing the switchgear to various structures.
Details the steps for wall mounting the switchgear unit.
Guidance on installing signal transmitters for automatic pump control.
Explains how to implement dry-running protection using float switches or sensors.
Describes methods for setting up a high water alarm via float switch or sensor.
Crucial safety information and steps for connecting the switchgear electrically.
Details how to connect the power supply to the switchgear, including rotating field.
Explains the connection procedure for pump power supply and motor protection.
Instructions for connecting temperature sensors for motor winding monitoring.
Guidance on connecting a moisture probe for leakage detection.
Details connecting float switches or level sensors for level measurement.
Explains connecting a float switch for dry-running protection.
Details connecting a float switch for high water alarm signaling.
Describes connecting a contact for remote activation/deactivation of automatic mode.
Explains connecting for external display of the level sensor's actual value.
Details connecting terminals for collective run, fault signals, or high-water alarms.
Instructions for connecting a contact to activate/deactivate external controls.
Explains the two operating modes and the general principle of pump actuation.
Details the 'Empty' mode for draining, activating pumps on rising level.
Details the 'Fill' mode for filling, activating pumps on falling level.
Describes automatic pump control based on fill levels and signal transmitters.
Explains how to navigate and control the switchgear via the operating knob.
Describes the basic operation using the operating knob for selection and confirmation.
Details the two menu areas: Easy menu for quick commissioning and Expert menu.
Lists essential checks before initial start-up, like installation and terminals.
Guides on setting various operating parameters through the menu structure.
Covers parameters for operating mode, start/stop delays, and limit values.
Details communication settings for Modbus, BACnet, and GSM modules.
Explains settings for pump operating modes (OFF, MANUAL, AUTO).
Continues settings for pump operating modes and activation status.
Lists parameters for displaying current operating values and system data.
Covers fundamental settings for communication, sensors, and signal outputs.
General settings for the switchgear, including communication parameters.
Provides overall communication settings for the switchgear.
Details Modbus settings like baud rate, slave address, parity, and stop bits.
Details BACnet settings like baud rate, slave address, parity, and stop bits.
Notes that GSM menu is active only if the optional module is installed.
Covers sensor measurement range and type selection.
Continues settings for priority, signal detection, and limit values.
Sets priority between dry run and high water signals during simultaneous events.
Configures signal detection for level control using float switches or level sensors.
Sets limit values for dry run and high water conditions.
Specifies the threshold value for dry-running protection.
Sets the threshold level for the high water alarm.
Configures the delay time for the high water alarm.
Enables or disables running time monitoring for individual pumps.
Sets the maximum permitted running time for individual pumps.
Defines switchgear response to mains connection errors like phase loss.
Sets pump response to thermal winding or leakage detection events.
Determines switchgear reaction when the 'External OFF' contact is open.
Configures output signals for collective run and fault signals.
Sets the status for the collective run signal (Ready or Run).
Configures the logic (falling or rising edge) for the collective fault signal.
Enables general or time-dependent pump cycling to prevent standstill.
Configures periodic test runs (pump kick) to prevent long standstill times.
Describes forced pump activation only for high water via a separate float switch.
Explains that forced pump switch-off occurs regardless of the signal transmitter.
Details using a pump as standby, activated only on pump malfunction.
Describes pump deactivation and fault signaling when the level sensor fails.
Informs that the switchgear is pre-set with standard factory settings.
Covers installation of signal transmitters and setting switching points via menu.
States the switchgear is not for explosive areas and warns of fatal injury risk.
Guides on turning on the switchgear and checking initial operating parameters.
Explains checking and setting the correct rotation direction for AC motors.
Details how to perform a brief test run to check pump rotation direction.
Describes fault code E06 and how to correct incorrect rotating field issues.
Explains how to activate automatic mode and its operation with signal transmitters.
Steps to activate automatic mode via menu item 3.1.0.0.
Reiterates following safety laws and checking settings during operation.
Describes manual switching of pumps in case of control failure.
Procedure to deactivate automatic mode, putting the system in standby.
Covers temporary deactivation by switching off control and main switch.
Details the procedure for final shutdown and the associated electrical dangers.
Continues final shutdown steps, including switching off voltage and securing cables.
Specifies packaging requirements for switchgear returned for shipping or storage.
Provides guidance on environmentally responsible disposal of the product.
Outlines the recommended maintenance intervals for reliable operation.
Lists essential maintenance tasks to be performed by qualified personnel.
Instructions for cleaning the switchgear using a damp cloth.
Details inspection of contactor contacts for melting by qualified personnel.
Specifies that repairs must be carried out by authorized service centers.
Explains how faults are indicated via LEDs, display codes, and symbols.
Describes the procedure for acknowledging and resetting detected faults.
Details how the switchgear stores and allows access to the last 16 errors.
Lists common error codes, their causes, and recommended solutions.
Advises contacting Wilo customer service for issues not resolved by the manual.
Provides a comprehensive guide to the symbols used in the switchgear interface.
Continues the explanation of various symbols used in the switchgear interface.
Presents tables detailing system impedances for different power ratings and starting types.
Continues system impedance tables for 3~400 V, 2-pole, star-delta starting.
Advises on ordering spare parts and the information required for correct orders.
| Brand | Wilo |
|---|---|
| Model | Control SC-L |
| Category | Control Unit |
| Language | English |