Data transmission
Page 5/19
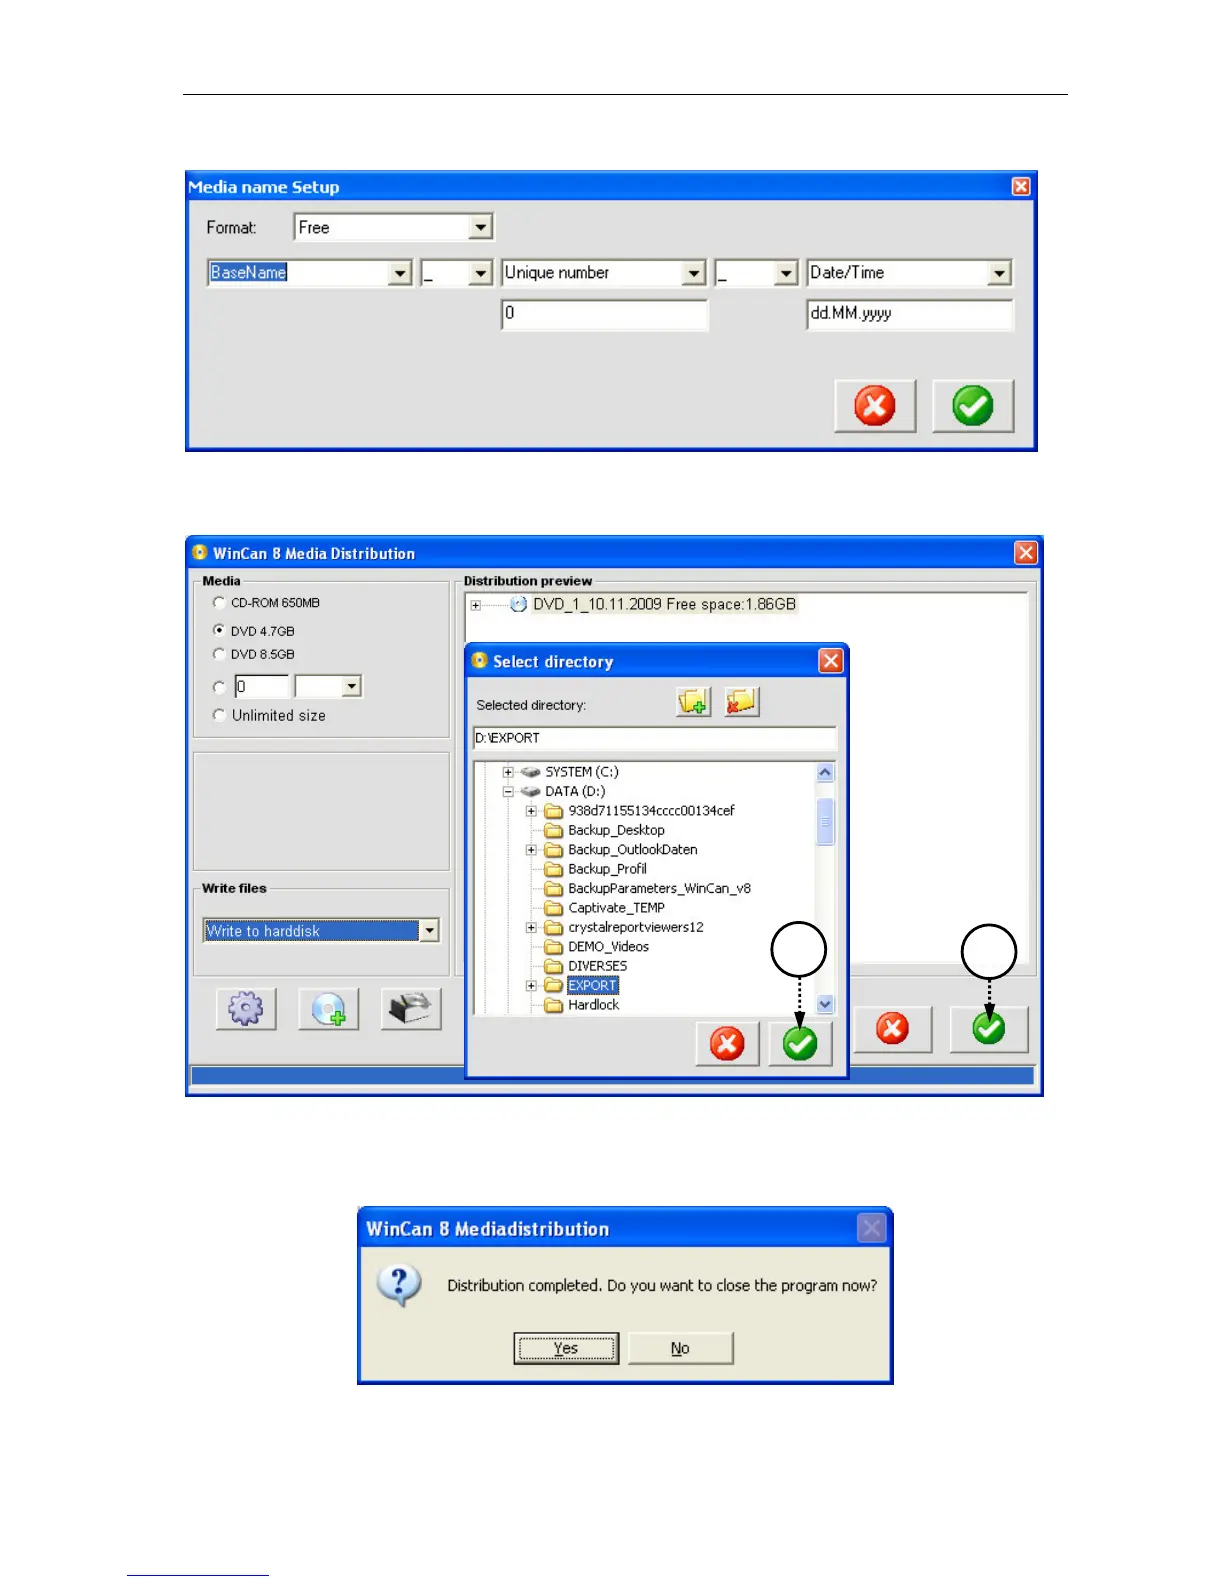
Click on button media name settings and define another name pattern for the folder that
will finally contain the distributed data.
Confirm all the name settings with a click on the green button and you will find yourself
again in the dialogue WinCan8 Media Distribution. Also click on the green button in this win-
dow to distribute your project data directly to the hard disk (4):
First define the folder on the hard disk where the data finally should be written in (e.g.
D:\EXPORT) and confirm this entry with the green button in the Select directory panel (5):
now the distribution process is launched. Once this job is finished the MediaDistribution
software can be closed by clicking on YES in the dialogue shown below:
In case you want to provide the distributed project data on CD or DVD, you will have to
burn them afterwards.
 Loading...