Setting up the Rear Cab Mount with Winegard ConnecT WiFi Antenna Page 10
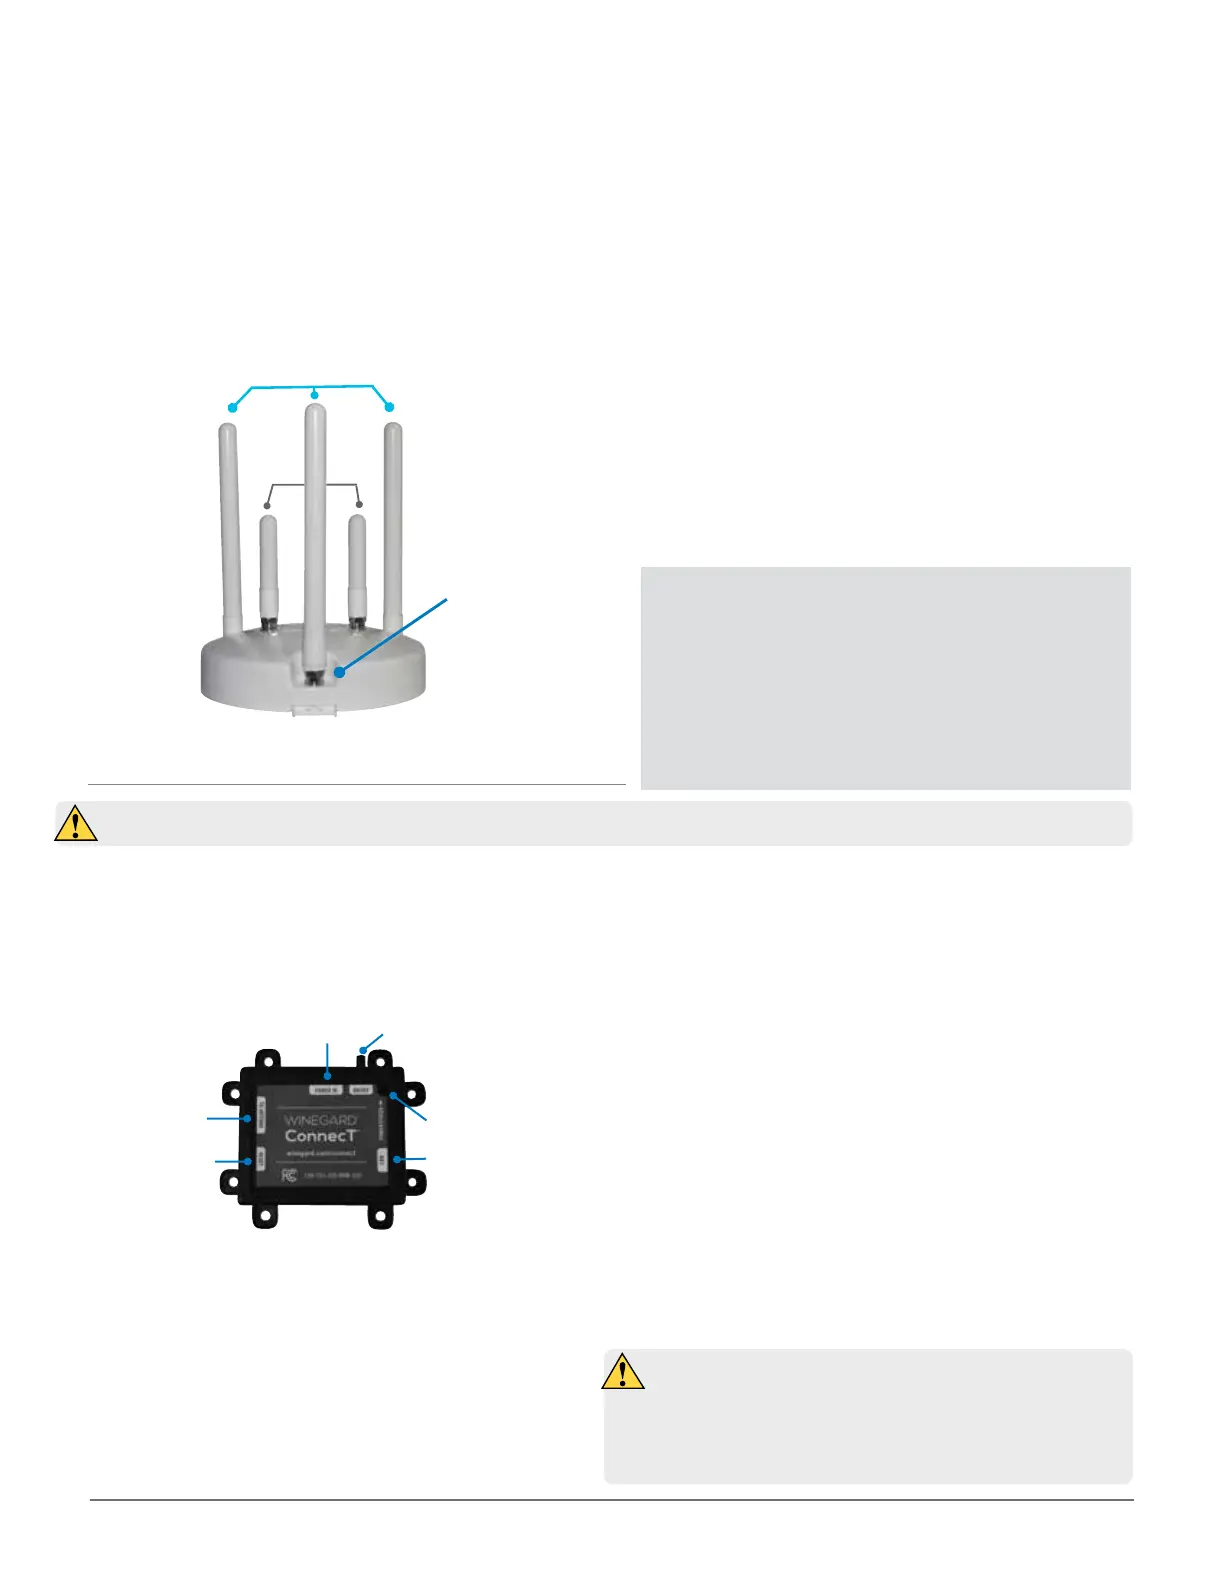
Screw each antenna to the correct open port on the ODU.
Firmly tighten each antenna by hand. If using a wrench, do
not overtighten the antenna as the antennas or housing
may become damaged. The antennas should be tightened
to 20–25 inch pounds of torque.
Connect the 10 foot Ethernet cable to the ODU. Ensure
that the Ethernet cable exits the unit towards the rear of
the vehicle.
Place cable entry cover on the ODU and secure using the
provided screw.
Decide where the supplied PoE (Power over Ethernet)
power inserter will be mounted inside the vehicle to
determine the best location for the Ethernet cable to
enter the vehicle. Drill a 3/4” hole through the roof or side
of the cab and push the Ethernet cable into the vehicle.
Make sure the cable is accessible from the area where the
power inserter will be located.
Add a bead of sealant around the hole for the cable. Place
the provided cable entry plate over the hole and cable.
Secure cable entry plate in place using the supplied screws.
Seal the plate and screws (10) with approved sealant.
Interior Installation
From the previously determined location for the PoE
(Step 10 of Exterior Installation) connect the supplied
10’ Ethernet cable from the outdoor antenna to the “To
Antenna” connection on the PoE device. Ensure the cable
is adequately secured to this port.
Connect the supplied 9.5” power cable into the “Power IN”
port on the PoE. Again, ensure the cable is tightly secured
to this port.
Next, connect the bare wire ends of the 9.5” power
cable to an 18AWG power wire (not supplied and must
not exceed 50 feet). Connect the red (Power) cables
together and the black (Ground) cables together with
wire connectors (not included). Wrap electrical tape (not
included) around each wire connector down to the wire.
Run the opposite end of the power cable to a dedicated
12VDC circuit with an in-line 3A fuse.
If connecting a device to the LAN port, run an Ethernet cable
(not provided) from the LAN port on the PoE to the Ethernet
connection on your device. Winegard recommends not
using an Ethernet cable longer than 50 feet.
Lastly, there are 8 mounting eyelets on the PoE. We
recommend using the remaining mounting screws (4), from
the hardware pack, to mount the PoE to the desired location.
To ensure eyelets don’t break, do not overtighten screw.
Turn the power switch to the on position. The LED should
light up.
Before proceeding, be sure to shut off electricity in order to avoid electrical shock
Make sure no bare wire or wire strands are visible
after making connections. Failure to properly install
may make the unit inoperable and could even cause
fire, explosion, personal injury or death
Reset Button
LAN
To Antenna
Power In
Power/Status
LED Indicator
On/Off Switch
PoE Wiring Requirements
• Supply voltage – 9-16V
• Output Voltage – 24V
• Max. operating current – 1A
• Max. operating temperature – 60C
• Max. power cable length – 18 gauge (recommended)– 50’
• LAN port – Max. Ethernet length – CAT5e – 50’
16.
17.
19.
20.
21.
18.
1.
2.
3.
4.
5.
6.
Antenna
secured
to ODU
Antenas WiFi 4G LTE
 Loading...