Figure 2
Cable
connections
must face
rear of
vehicle
at least 12”
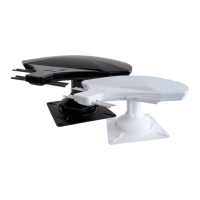
Front of RV
Mount on or parallel to
centerline of coach
Figure 3
Mark
around
foot
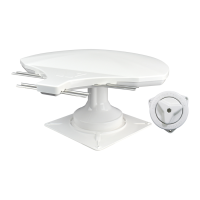
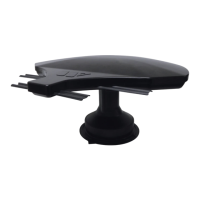
After selecting a location for the unit, place the unit so that the centerline
of the dome is on or parallel to the centerline of the vehicle. The centerline
of the dome runs from the point between the two back feet where cable
connections are located to the opposite point directly between the two front
feet. Position base so that cables exit toward the rear of the vehicle.
To ensure proper installation, check that the distance from the edge of the
roof to the rear corner of any foot is at least 12”.
Place the unit on the roof in its permanent location, and mark around each
base foot. See Figure 3.
Clean the roof area where the base feet will attach to the roof; do not erase
your marks.
Put approved sealant in the areas marked for the base feet. Check with your
vehicle manufacturer for approved sealant. Place the base feet on top of the
sealant.
Before using the supplied mounting screws, check with your vehicle
manufacturer for any special screw requirements. Screw down with three
screws for each foot. After all base feet are secured to the roof, put sealant
around the edge of feet and over screws. Do not apply sealant to the hex
nuts on the feet.
Mission Antenna 4
3
4
5
7
8
Installing Unit on Roof of Vehicle, Cont.
6

 Loading...