7-9
SECTION 7 –
PLUMBING
4. Remove filter cartridge from the filter
assembly below the galley sink (if equipped
with refrigerator/ice maker).
5. Turn on water pump and open all sink faucets
and shower head knobs. Leave open after
water stops flowing.
6. Press the toilet flush pedal and hold until
water stops flowing in the toilet. Then turn
water pump switch off.
7. At this time, if your coach is equipped with an
optional refrigerator ice maker, dishwasher, or
washer/dryer, the waterlines for these
appliances must also be drained. (See
“Winterizing Optional Appliances”
instructions at the end of this section.)
If not equipped with optional appliances,
proceed to the next step.
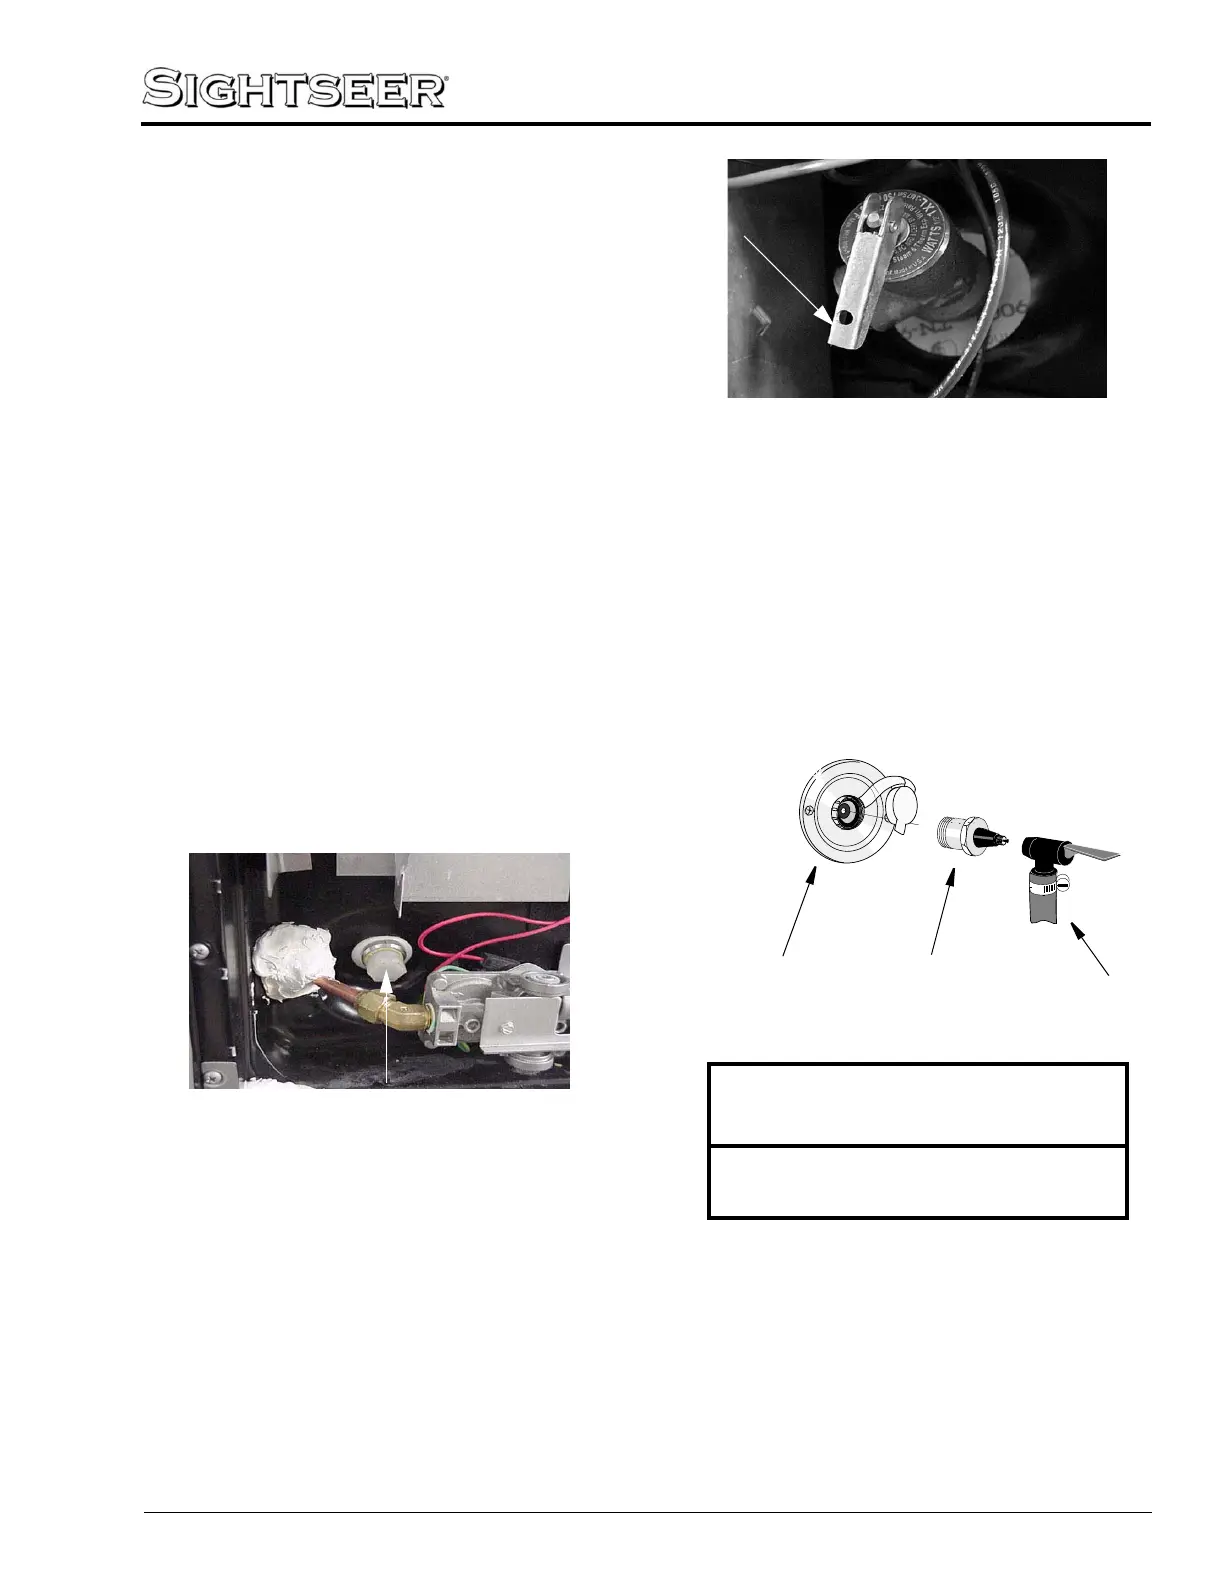
8. Turn off the water heater power switch before
draining the water heater tank to avoid
damage to the heating element. Drain the
water heater by removing the plug from the
base of the water heater tank, accessible from
the outside of the coach. (Requires socket and
ratchet).
Also open the Pressure-Temperature relief
valve at the top right portion of the tank to
prevent air locking in the tank while draining.
9. After water has stopped draining at all faucets
and drain valves, leave faucets open and
connect a “blow-out” plug to the city water
connection on the coach. Then use a
compressed air hose regulated to 30 psi or less
to force air through the system. A “blow-out”
plug can be purchased at any Winnebago
®
or
Itasca
®
dealer.
NOTE: DO NOT burst air into the system. This
can damage the water pump. It is better
to let air in slowly.
10. Let air flow for five minutes until water is
completely drained out of faucets and drain
valves. Then close faucets one at a time.
11. Operate and hold toilet flush lever until water
is completely drained from toilet.
Water Heater Drain Plug
(Remove with socket)
-Typical View
NOTICE
Limit air pressure to 30 psi to avoid
damage to equipment.
Pressure-Temperature Relief Valve
(Lift handle only when water heater is cold)
-Typical View
City Water
Connection
Fresh Water
Inlet
Blow-out
Plug
Air Hose
 Loading...