22 23
Adjust the cutting height to its maximum level (60mm) for first mow. Place
your lawnmower inside the working area, work for a while, then check boundary
wire properly, check whether the lawnmower go back to the charging station along
the boundary wire. When the lawnmower successfully returns to the charging base,
the installation has been completed successfully!
icon
Password
setting icon
Trun
Start
OK
Back to
station
/Turn down
1)
After
the
boundary
wire
installation,
you
can
start the LAWNMOWER
(Please refer to Installation Guide for boundary wire installation).
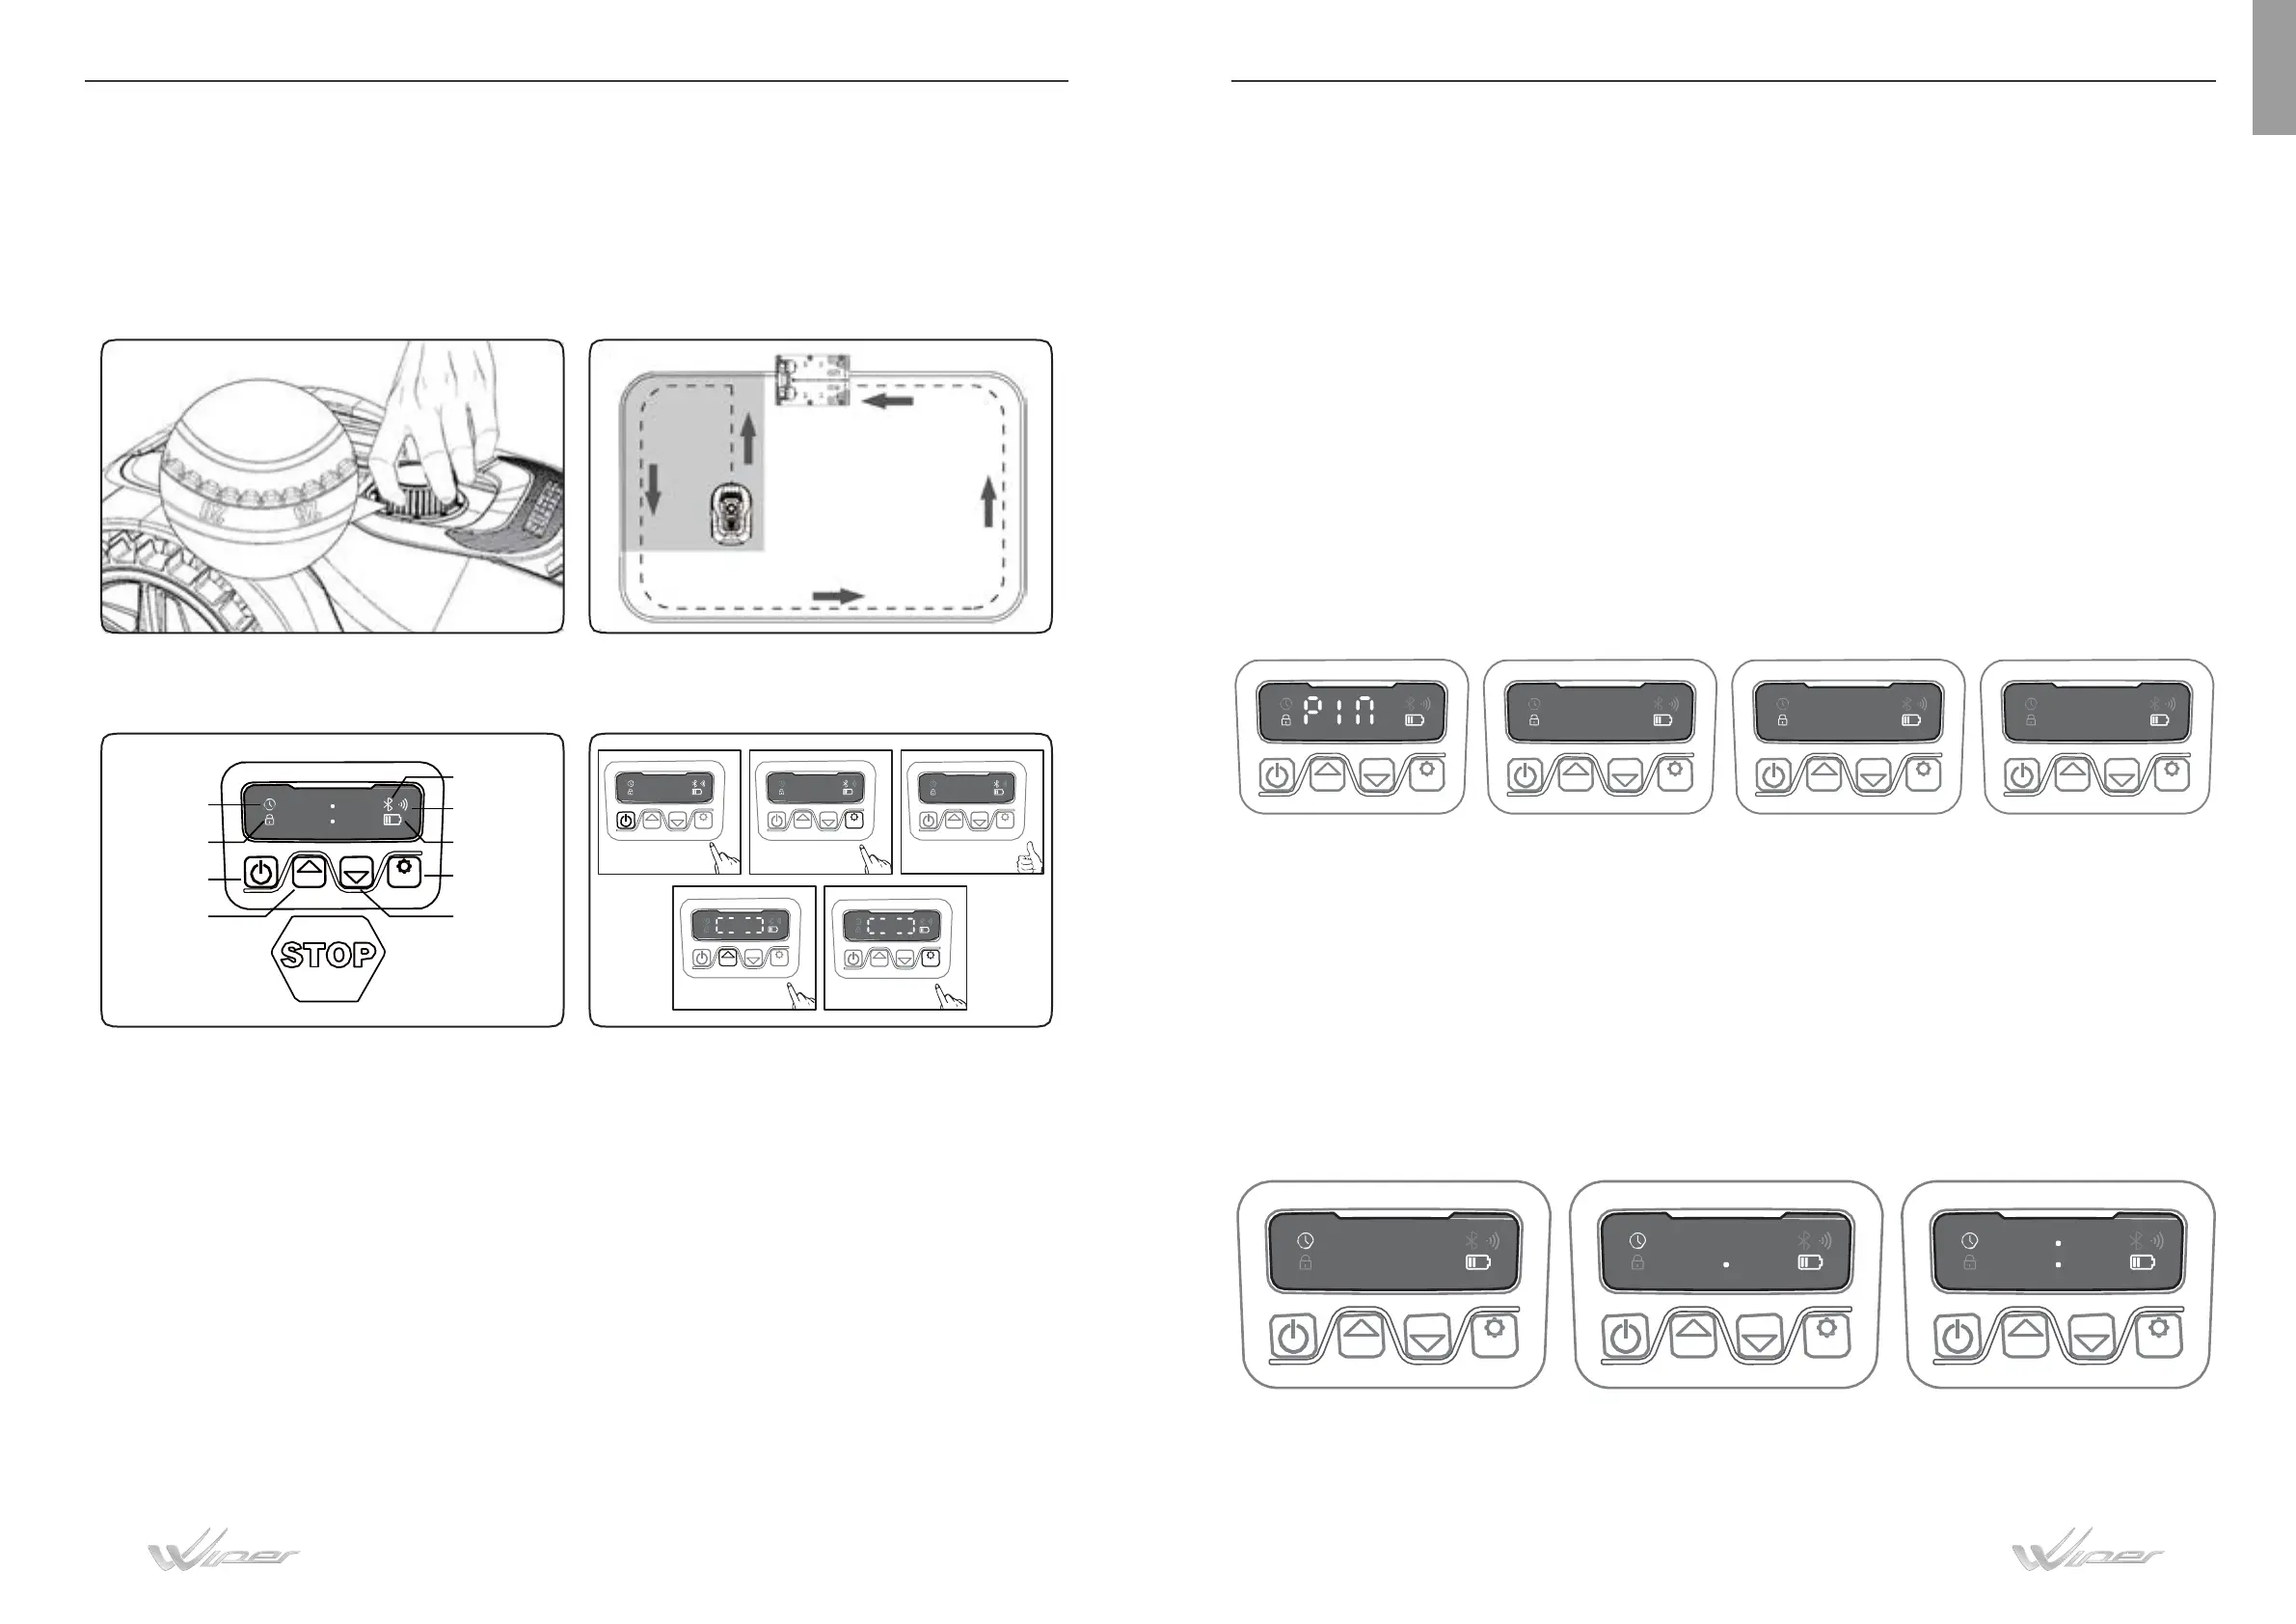
2) Press POWER ON/OFF until LAWNMOWER turns on. For the first use,
input the default PIN code 0000 by pressing OK for four times when the number 0 is
blinking. (The PIN code can be changed, please refer to “Setting” in the Installation
Guide).
NOTE: LAWNMOWER will turn off if it does not receive any input within 30
seconds after it is turned on.
If you enter wrong PIN code ten times, LAWNMOWER will raise a beeping alarm
and then turn off.
3) Press START, then press OK to start mowing.
4) Press HOME then OK the robot will back to charging station.
LAWNMOWER will work continuously until reaching low battery power level
and then it will return to the charging base. Once charging is completed,
HOME
START
OK
HOME
START
OK
0- --
HOME
START
OK
00 00
HOME
START
OK
88 88
HOME
START
OK
LAWNMOWER will automatically resume mowing or it stay in the charging
base according to the mowing schedule.
6.2 Set year, date and time
Set year, date and time are compulsory setting items. If you don’t set these items, it
will influence the schedule time in the following setting. These items should be set
in the order of year, date and time. For year, date and time setting, keep pressing
“START” button for 5 seconds until a number will blinking on the display. Use
“START an
d “HOME” buttons to selects year, date and hour and press “OK” to
confirm. Once you input all information’s requested press “OK” one more time and
“IDLE” will appear on the display, it means that you have correctly set year, data and
hour.
To change the PIN code, keep pressing START and HOME buttons at the same time for 3 seconds
than “PIN 1” will flash, that means you have to enter the OLD PIN. Use “START” and “HOME”
buttons to select the numbers and press “OK” to confirm. After you have confirmed your old PIN,
“PIN2” will flash on the display. Use the same method to input the new PIN and press one more time
“OK” to confirm, if “IDLE” will be on the display means that the new PIN is set correctly
START
START
START START
EN