INTRODUCTION
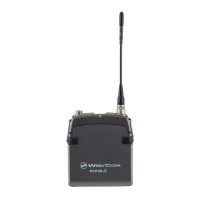
“MTP40S is an extremely small and light pocket transmitter especially designed for professional
wireless microphone applications”
Very easy and quick to use thanks to OLED display, dedicated buttons and a joggle selector.
MTP40S benefits also of the latest Wisycom RF technology along with an enhanced robustness
against noise and inter-modulation.
Fig. 1
Switch to enable wireless transmission, it
also indicates the battery status and
peak/mute operation (with PTT)
In order to allow front visibility same colour
information on (1) is replicated with this LED
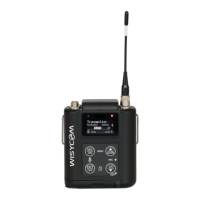
Oled display for transmitter setup
<ch>, <gain> and 3 positions <selector>
Cover (to open push side buttons)
1.
Turn on wireless:
Move the Wireless power switch in
“I” position.
Open MIC Body:
Push the side buttons and flip down the cover, to access
internal setup controls and batteries.
Turn on display:
Push <select switch> and hold it.
MTP40S-JB/41S-JBは、ワイヤレスマイク用に特別設計された極めて小型で軽量のボディパック型
トランスミッターです。
OLEDディスプレイやメニューに直接アクセスできる専用ボタン、ジョグダイヤル式セレクターにより操作や設定が非
常に早く、簡単に行うことができます。
ノイズや相互変調に対する安定性が強化されるとともに、最新のWISYCOMの無線技術を搭載しています。
サイドのボタンを押しながらカバーを手前に倒す
バッテリースペースやジョグダイヤル式セレクター、
メニュー専用ボタンがあります
RF送信/バッテリーステータス/AFピーク
/PTT(Push to talk)のステータス情報を
表示します
CH、GAINメニュー専用ボタン、ジョグダイヤル
式セレクター
MTP40S-JB/MTP41S-JB User Manual