17
5. .........................................Press to enter the phonebook operation.
6. DEL/SET...............................a. Press and hold for 3 seconds to bring up setup menu (on-hook).
b. Press to delete digits or letters when editing
phone book.
7. VOL........................................a. Press and hold to adjust ringer volume
(on-hook).
b. Press to delete digits or letters when editing phonebook.
c. Press to adjust handset / speaker volume (off-hook).
8. AUTO RD/
.........................a. Press to auto dial out the last dialed number
repeatedly till the phone is answered
on-hook).
b. Press and hold for 3 seconds to change the ring tone.
9. REDIAL/OUT/PAUSE..............a. Press repeatedly to review outgoing numbers (on-hook).
…………………………………….…b. Press to dial the last dialed number (off-hook).
……………………………..…….….c. Press to dial the last dialed number (speakerphone mode).
………………………………….…...d. Press for a break off for 1.2/2.4/3.6/ seconds.
10. FLASH…………………….…….For use behind a PABX to make a call transfer.
11. /IN USE/MESSAGE WAITING
………………………………........a. Light up when the unit is in use, flash when there is a
new incoming call, flash when on hold.
b. Press for hands-free dialing and speak without lifting
up the handset.
12. MUTE…………………………Press to mute the microphone. Turn tones off.
13. Dial Pad (0-9,*,#)..................Dial numbers and symbols.
14. CLID▲or▼............................Review history, also can be used within the menu to select
……………………………………….telephone setting.
15.Speaker………………………….Ring tone is transmitted from the speaker.
16. Wall mounting hook...............Turn 180 degrees to hang up the handset when the phone is
mounted on a wall.
17. Hook on/ off switch..................Press to end a call.
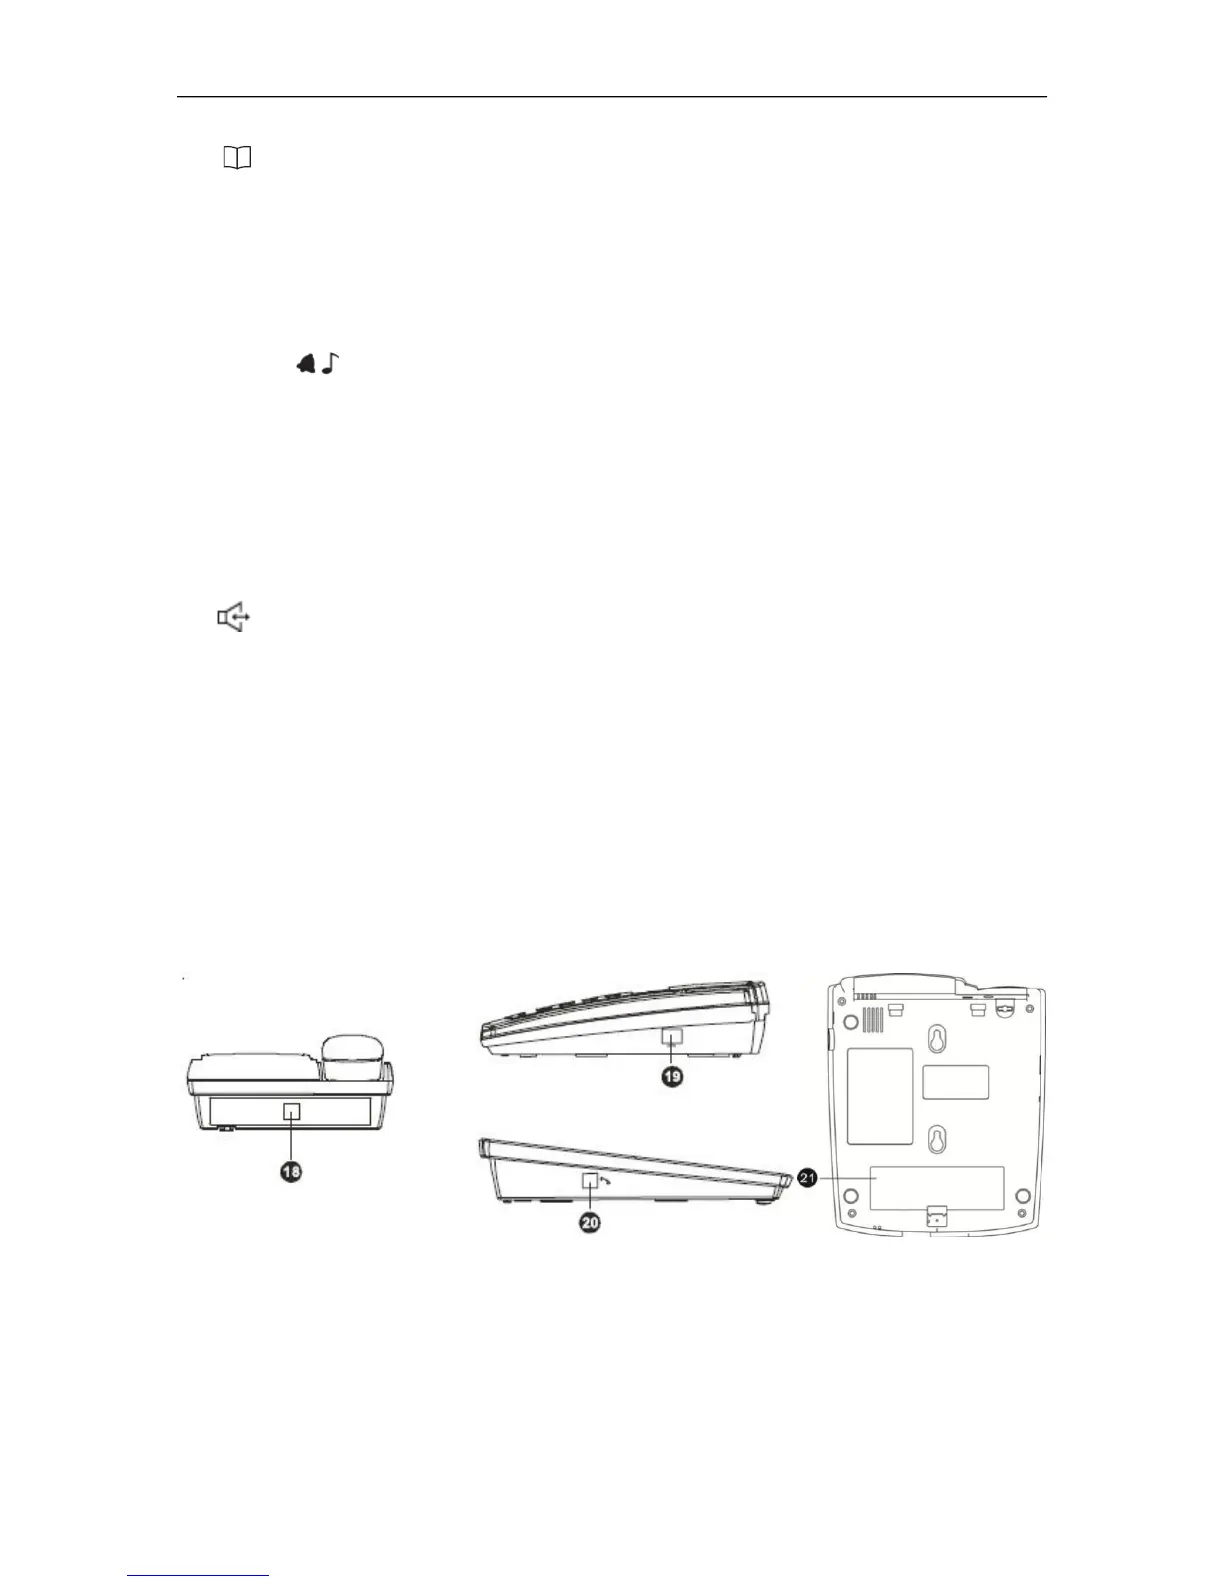
18. Line cord jack............................Connects telephone to wall jack.
19. DATA PORT(RJ11).....................Used to connect the phone to a computer.
20. Handset Jack ………………….. Connects the curly cord to the handset.
21. Battery compartment……………To place 4xAA batteries.

 Loading...