INSTALL BACKSPLASH
Optional Accessory:
If optional backsplash is used, attach
it to the finished wall. Secure the
hood mounting brackets to the wall
studs prior to installing backsplash.
4
C HIMNEY W ALL H OODS I NSTALLATION
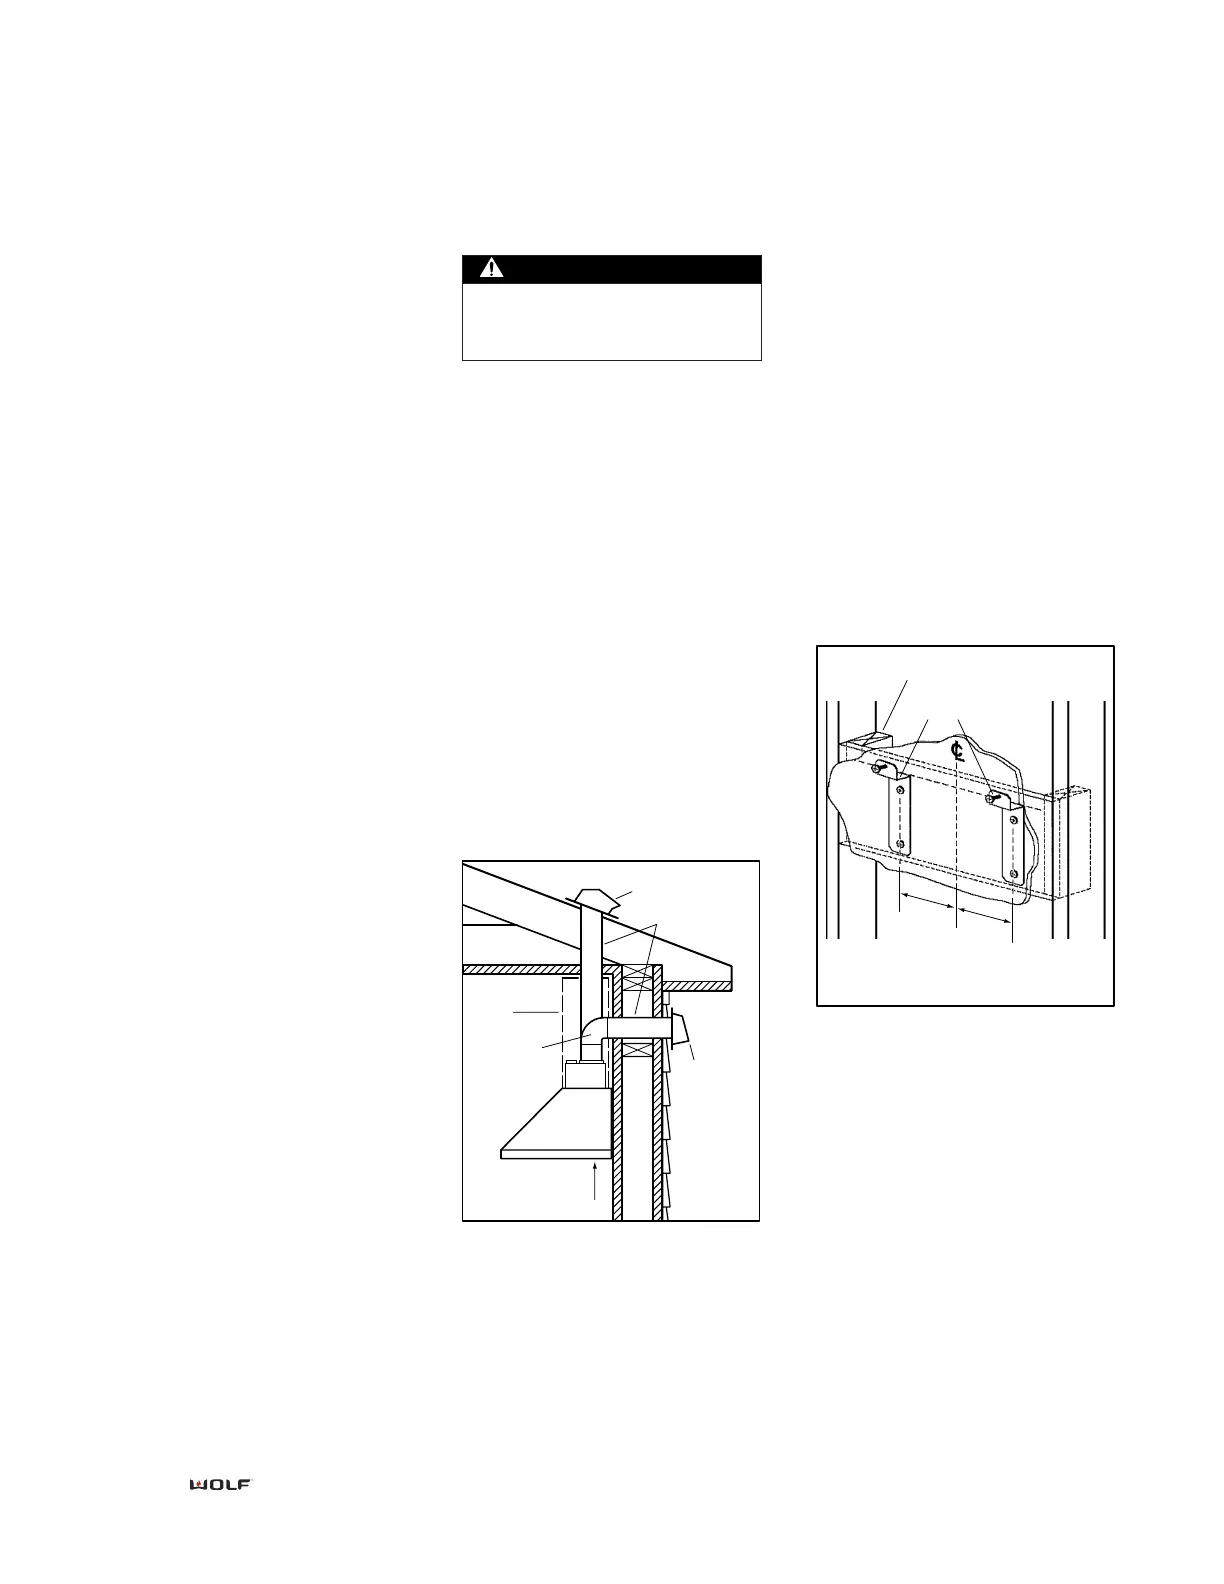
INSTALL DUCTWORK
• Decide where the ductwork will run
between the hood and the outside.
IMPORTANT NOTE: All hoods must
exhaust to the outdoors.
• A straight, short duct run will allow
the hood to perform more efficiently.
Try to limit the number of elbows
and transitions to as few as possible.
• Long duct runs, elbows and transi-
tions will reduce the performance of
the hood.
• Install a roof or wall cap. Connect
8-inch round metal ductwork to the
cap and work back towards the hood
location. Use duct tape to seal the
joints between ductwork sections.
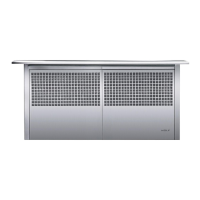
INSTALL MOUNTING
BRACKETS
• Construct wood wall framing that
is flush with the interior surface of the
wall studs.
• Make certain that the framing is
centered over the desired installation
location.
• Make certain that the height of the
framing will allow the mounting
brackets to be secured to the framing
within the dimensions shown.
• After wall surface is finished, secure
the mounting brackets to the framing
using dimensions shown.