6
C HIMNEY W ALL H OODS I NSTALLATION
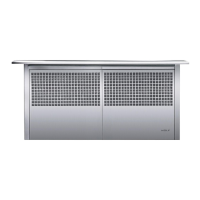
CONNECT DUCTWORK
Ducted Configuration
• Use screws and wall anchors to
secure the upper brackets to the ceil-
ing. Position upper brackets utilizing
dimension of decorative flue.
• Use an 8-inch metal duct to con-
nect the duct collar on the hood to
the ductwork above.
• Connect the upper section of the
decorative flue to the brackets with
the screws provided.
• Nest bottom of the decorative flue
into relief in the hood shell.
Upper bracket installation
Flue installation
upper
brackets
fasten upper brackets to ceiling and wall
with screws (and anchors if necessary)
screws
fasten flue to hood and upper brackets
and nest flue in hood relief
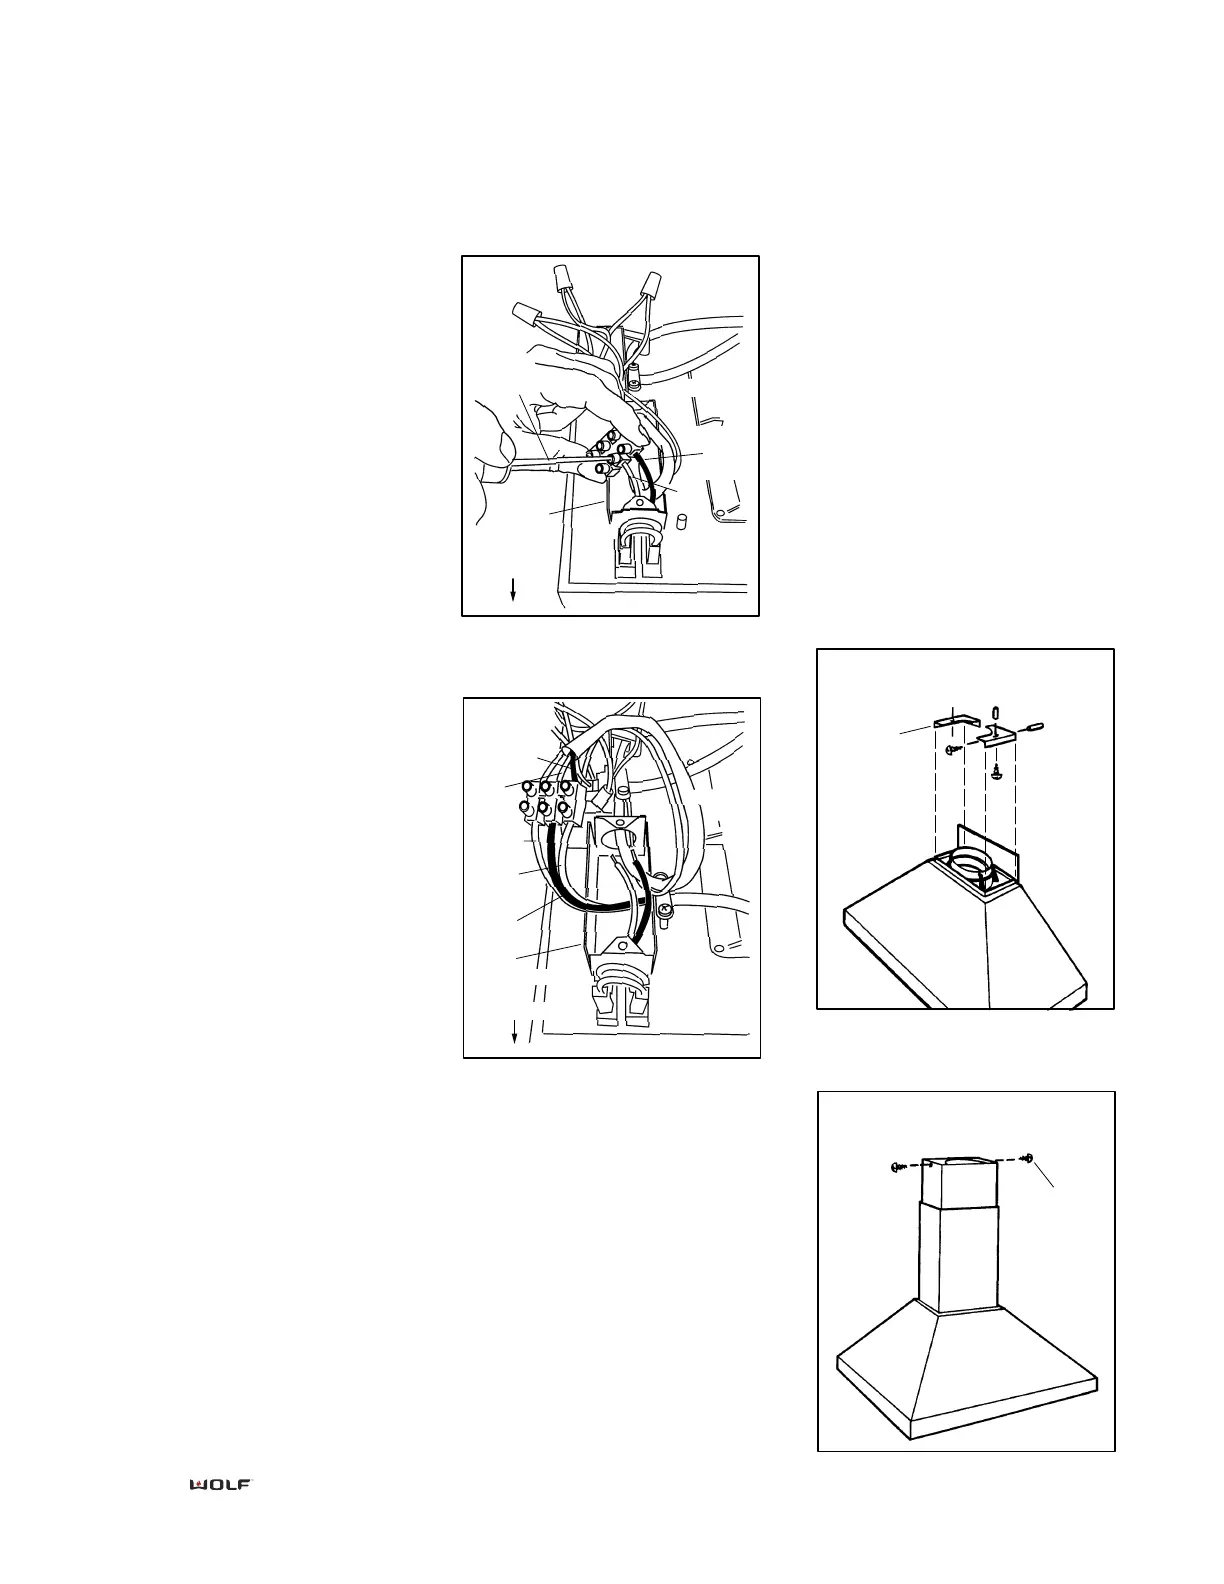
Additional Wiring
(for External Blowers only):
Refer to Figure 2
5) Remove cover from front wiring
box. Remove the wiring box knock-
out that faces the hood's discharge
collar.
6) Disconnect red and black or white
wires using a flat-blade screwdriver.
Refer to Figure 3
7) Feed 6 inches of the external
blower wiring through the knockout
opening. Secure the cable to the
wiring box with an appropriate con-
nector.
8) Attach external blower wiring
where wires were removed in step 6.
IMPORTANT: Note location of wire
colors.
9) Re-install wiring box cover and
screws. Make sure that all wires are
secure and that no wires are pinched
between cover and box.
Figure 2
small
flat-blade
screwdriver
front
wiring box
hood front
top of
hood shell
discharge
collar
red
black or
white
(neutral)
black or
white
(neutral)
hood front
top of
hood shell
discharge
collar
red
green/
yellow
white
(neutral)
black
front
wiring box
external
blower
wiring