7
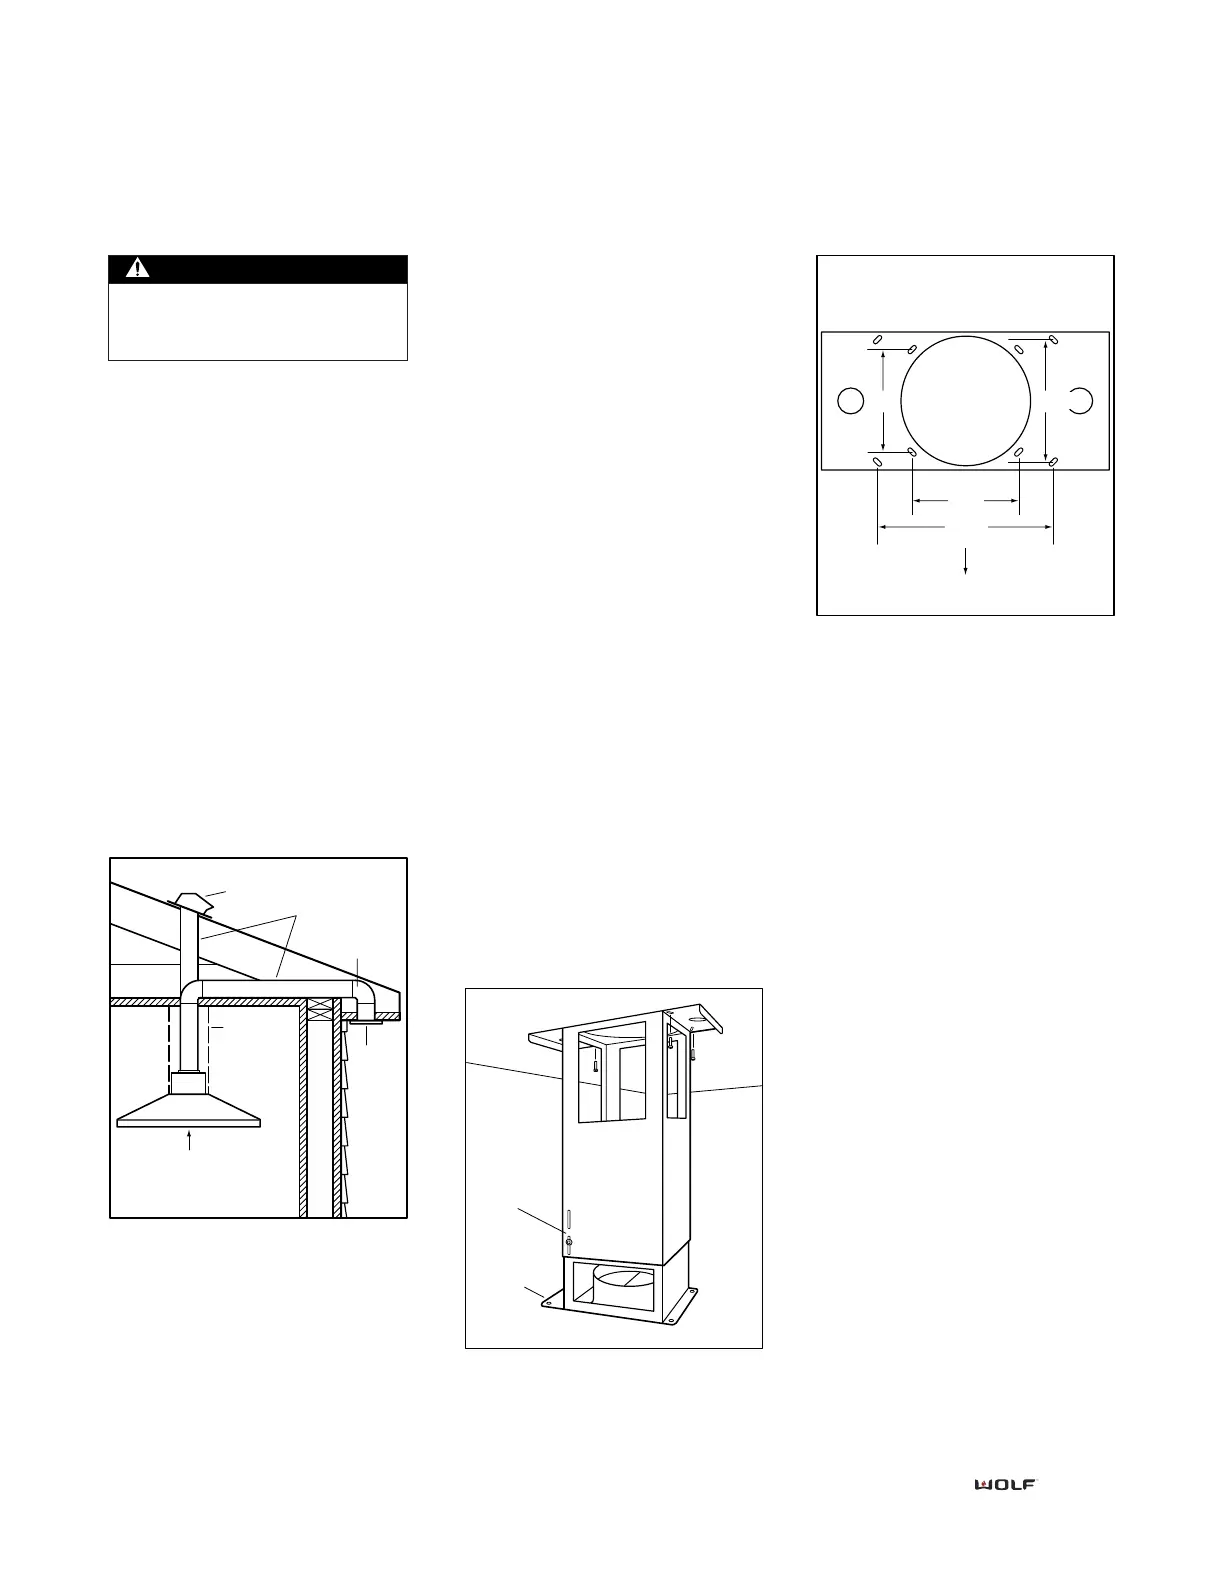
INSTALL SUPPORT
SYSTEM
• At desired hood location, install
2 x 4 or 3/4" plywood cross framing
between ceiling joists. Note mount-
ing pattern dimensions.
• Finish the ceiling surface. Be certain
to mark the location of the ceiling
joists and cross framing.
• Determine the desired orientation
of the hood. Note that the front des-
ignates the control side of the hood.
• Secure the upper half of the sup-
port frame to the joists and cross
framing with four screws provided
with your hood. Make certain screws
are driven into center of joists and
framing for maximum strength.
Ensure the correct oreintation of the
support frame.
• Adjust the overall height of the
support frame. Loosen and re-tighten
the screws in the height adjustment
slots as necessary. NOTE: The hood
height is 11-1/4" from the support
frame attachment point. The bottom
of the hood must be 24" minimum
and 30" maximum from the cooktop
surface.
C HIMNEY I SLAND H OOD I NSTALLATION
INSTALL DUCTWORK
• Decide where the ductwork will run
between the hood and the outside.
IMPORTANT NOTE: All hoods must
exhaust to the outdoors.
• A straight, short duct run will allow
the hood to perform more efficiently.
Try to limit the number of elbows
and transitions to as few as possible.
• Long duct runs, elbows and transi-
tions will reduce the performance of
the hood.
• Install a roof or wall cap. Connect
8-inch round metal ductwork to the
cap and work back towards the hood
location. Use duct tape to seal the
joints between ductwork sections.