Step 3: Hood Preparation
If installing a duct cover assembly, see
duct cover installation on page 18.
1) The hood assembly is shipped
with the rough-in plate and the tran-
sition attached. The transition is
shipped upside down in the top of
the hood assembly and must be
removed and reinstalled.
2) Detach the rough-in plate/ transi-
tion from the hood assembly by
removing the four (4) screws on the
top and the four (4) screws on the
back of the rough-in plate/ transition
assembly.
3) Detach the transition from the
rough-in plate by removing the four
(4) screws. DO NOT DISCARD
SCREWS. Shipping screws are needed
for reinstallation of transition to the
rough-in plate.
4) Attach transition to existing duct-
work with sheet metal screws. Use
duct tape or silicone to make all
joints secure and air tight.
5) If installing a remote blower, drill
7/8" hole through the wood framing
for conduit wires. See Connect
Remote Blower on page 17 for overall
dimensions and electrical require-
ments. See installation instructions
provided with blower for mounting
and installation information.
13
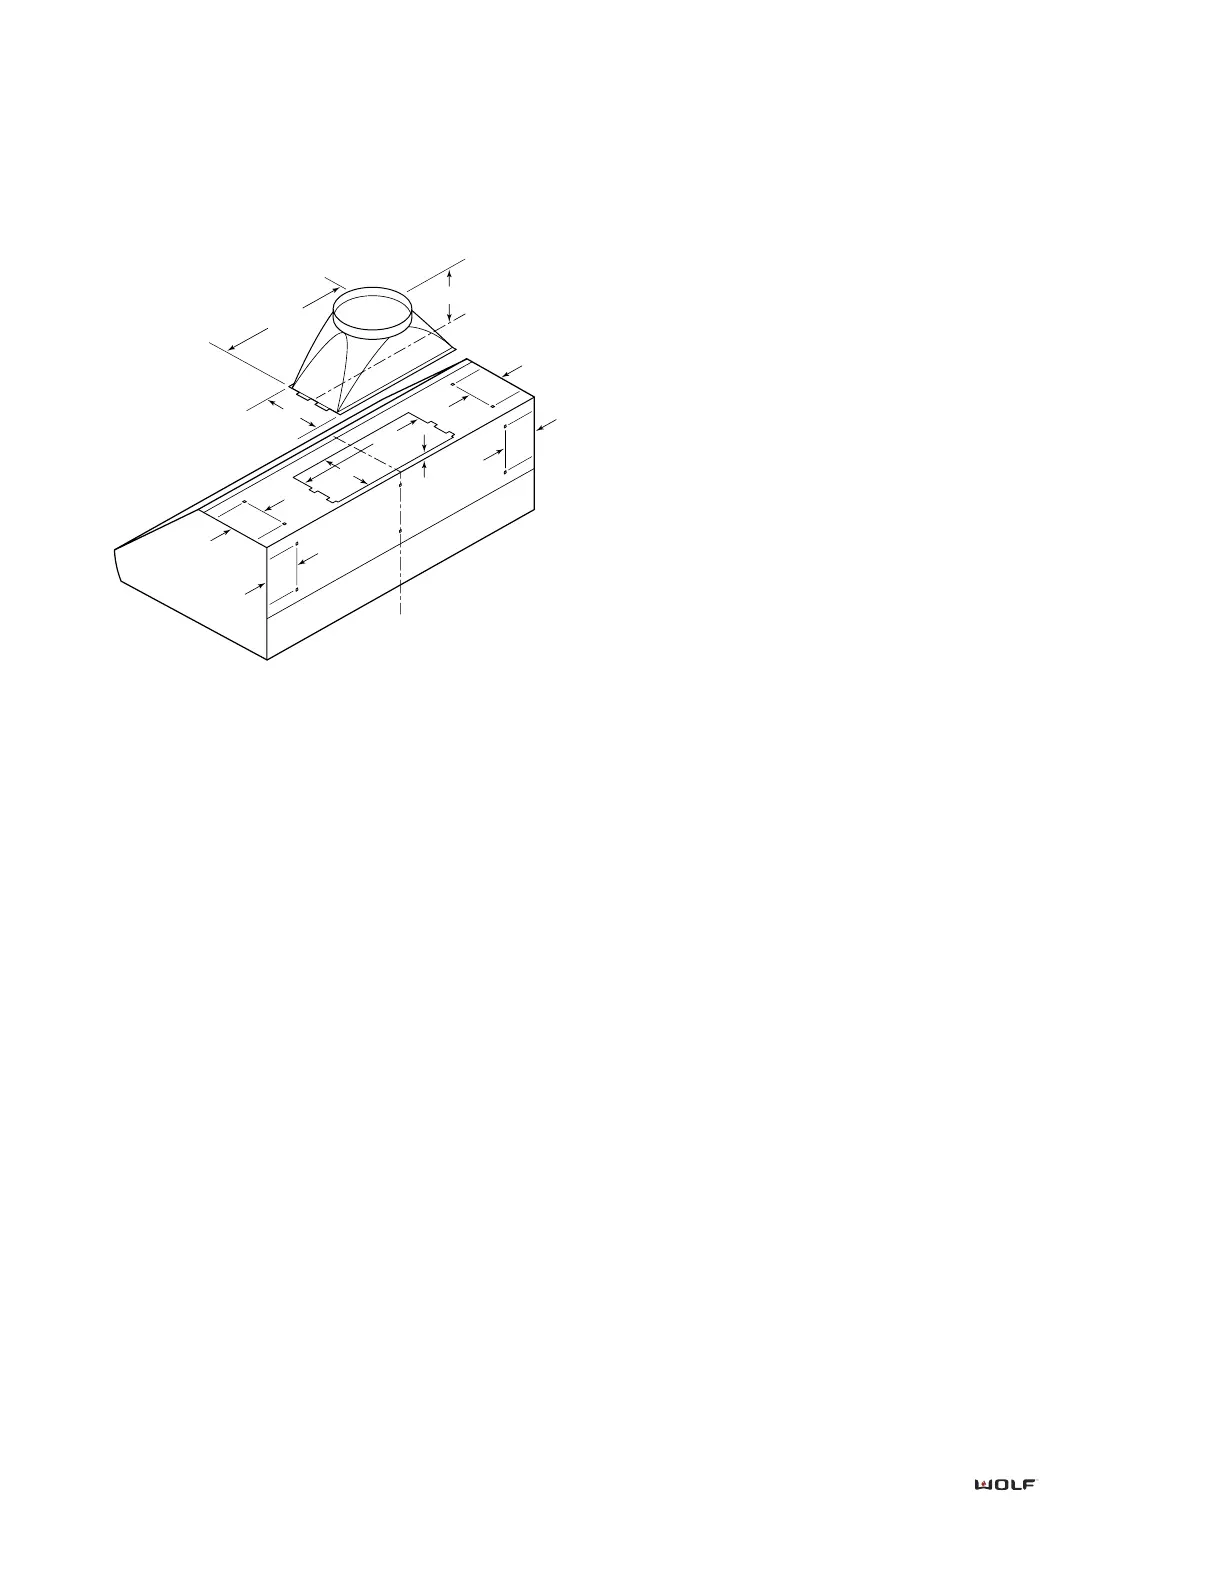
Location of mounting holes for 27-inch wall hood