Maxi-Sound Horns
Models 320-2T, 325-2T, X-2000, X-2005, X-2010 & X-2015
INSTALLATION INSTRUCTIONS
Your purchase of a Wolo horn is a perfect choice to compliment your vehicle. Wolo’s products are
manufactured with the finest materials. Each horn is tested to ensure it meets all manufacturing
specifications, before it is packaged. If you need help installing this product, our technicians are available to
answer your questions, Monday through Friday from 9 AM to 4 PM EST by calling 1-888-550-HORN (4676).
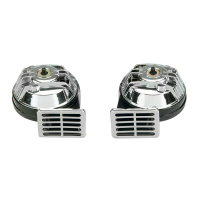
MOUNTING FIG. #1
1. Remove the factory horn, and install your new Wolo horn in the
same position with the opening of the horn facing downward to
prevent dirt and water from entering into the horn. Secure the horn
to the vehicle using the bracket and hardware provide.
IMPORTANT: For one (1) terminal factory horn system, the
grounding jumper wire needs to be secured under the mounting
bolt before securing horn to a metal body grounding surface.
Fig. #2-3
TWO (2) TERMINAL WIRING FIG. #2
2.
For vehicles where the factory
horn wires connect to two (2) horn terminals.Transfer the factory horn
wires to each new Wolo horn. It doesn’t make a difference which horn terminals are used on your new
Wolo horn when transferring the wires from your factory horn. IMPORTANT: Always make sure that there
is a 15 -amp fuse used in the horn circuit to protect the vehicle. If the wire terminals that were connected to
your vehicle’s factory horn doesn’t connect to your new Wolo horn, 1/4” push- on insulated terminals are
provided in the kit. The installation is complete and the horn is ready to be used.