Do you have a question about the Wolo OCEAN ALERT 160-24 and is the answer not in the manual?
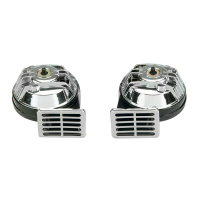
Find the optimal placement for the horn's trumpet for unobstructed sound projection.
Mark and drill holes using the provided gasket for a precise fit and seal.
Install the two chrome air inlet tubes into the base of the horn.
Fasten the horn using the base plate and nuts, ensuring a watertight seal.
Mount the compressor within 30 inches of the trumpet in a dry interior location.
Drill a 3/16" hole and mount the compressor vertically using hardware.
Use provided tubing and Y-connector to link compressor to horn air inlets.
Detailed wiring steps and diagram for integrating with a new horn button switch.
Summary of relay terminal connections for the new horn button switch setup.
Instructions for using the supplied relay with the boat's factory horn wiring.
Summary of relay terminal connections for integrating with the factory horn system.
Confirms compliance with US Coast Guard, NMMA, and ABYC safety standards.
Details on the 12-month product warranty, claim process, and contact information.
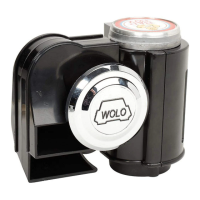
The Wolo Model 160-24 OCEAN ALERT® MINI is a 24-volt air horn system designed for marine use, offering both a functional horn and an added layer of safety for boats. Manufactured with high-quality materials, each horn undergoes rigorous testing to ensure it meets Wolo's manufacturing specifications before packaging. Wolo provides technical support for installation questions, available Monday through Friday, 9 AM to 4 PM EST, at 1-888-550-HORN (4676).
The OCEAN ALERT® MINI is an air horn system that produces a loud signal for marine vessels. It is designed to meet various maritime regulations and standards, including the U.S. Coast Guard's C.O.L.R.E.G.S. and U.S. Inland Navigation Rules, Annex III, for boats up to 20 meters (65 ft). It is also "type accepted" by the National Marine Manufacturers Association (NMMA) and meets the American Boat & Yacht Council (ABYC) A-23 standard for boats up to 20 meters (65 ft). The system comprises a trumpet (horn), a compressor, air inlet tubes, plastic tubing, a "Y" connector, a rubber gasket, and a relay. The horn's primary function is to provide an audible warning signal, crucial for safe navigation and compliance with maritime regulations.