6
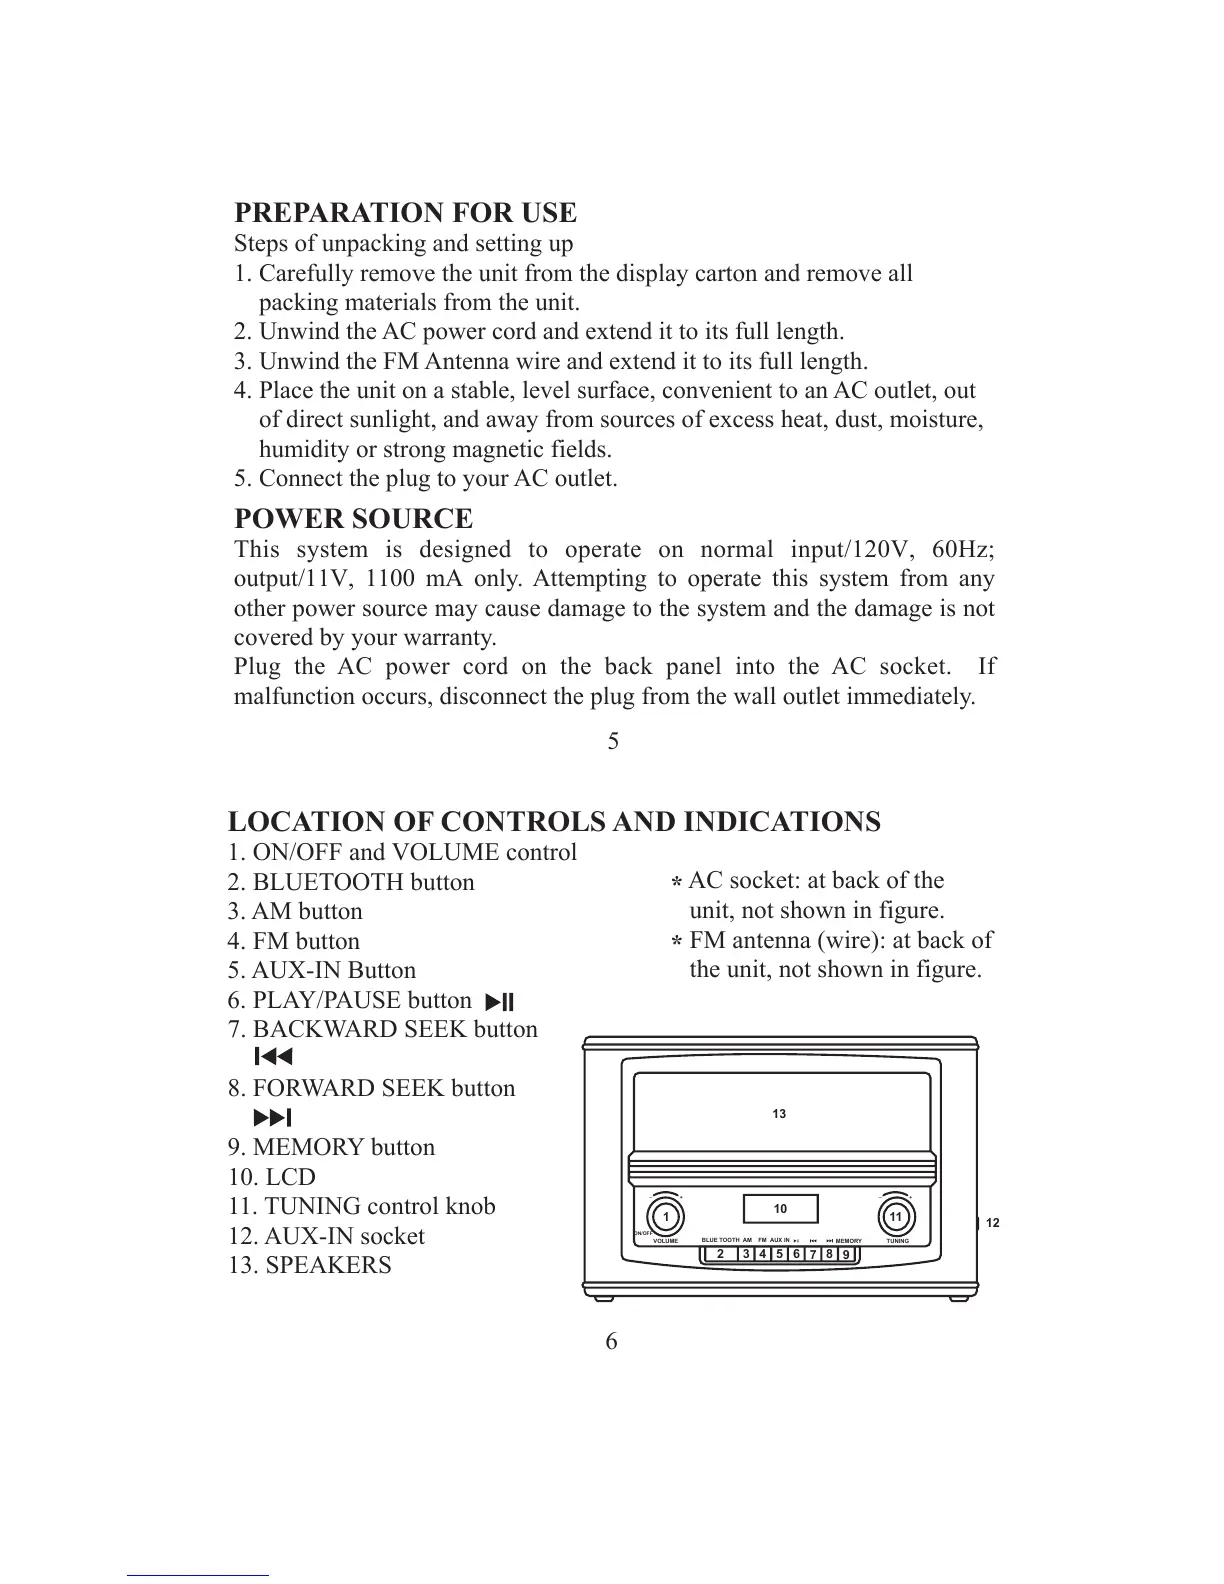
LOCATION OF CONTROLS AND INDICATIONS
1. ON/OFF and VOLUME control
2. BLUETOOTH button
3. AM button
4. FM button
5. AUX-IN Button
6. PLAY/PAUSE button
7. BACKWARD SEEK button
8. FORWARD SEEK button
9. MEMORY button
10. LCD
11. TUNING control knob
12. AUX-IN socket
13. SPEAKERS
ON/OFF
VOLUME
AM
FM
AUX IN
MEMORY
TUNING
BLUE TOOTH
+
_
+
_
1
2
3
4
5
6
7
8
9
10
11
12
13
*
AC socket: at back of the
unit, not shown in figure.
*
FM antenna (wire): at back of
the unit, not shown in figure.
5
PREPARATION FOR USE
Steps of unpacking and setting up
1. Carefully remove the unit from the display carton and remove all
packing materials from the unit.
2. Unwind the AC power cord and extend it to its full length.
3. Unwind the FM Antenna wire and extend it to its full length.
4. Place the unit on a stable, level surface, convenient to an AC outlet, out
of direct sunlight, and away from sources of excess heat, dust, moisture,
humidity or strong magnetic fields.
5. Connect the plug to your AC outlet.
POWER SOURCE
This system is designed to operate on normal i
nput/120V, 60Hz;
output/11V, 1100 mA
only. Attempting to operate this system from any
other power source may cause damage to the system and the damage is not
covered by your warranty.
Plug the AC power cord on the back panel into the AC socket. If
malfunction occurs, disconnect the plug from the wall outlet immediately.