03 04
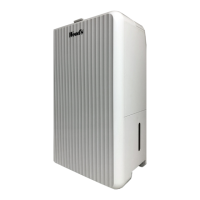
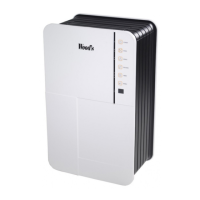
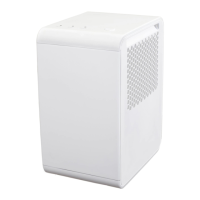
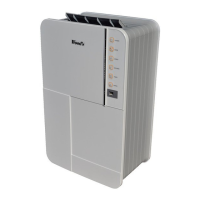
WOOD’S, THE WORLD’S
LEADING DEHUMIDIFIERS
Wood’s dehumidier products have
been known as market leaders for
many years. Their dehumidiers are
suitable for use in the most demanding
climates, where dehumidifying capacity
is good even at lower temperatures
and humidity levels. They are used with
good results in premises that become
damp such as cellars, garages or
summer-houses. They are also excellent
for drying washing, attics, pool rooms
and laundry. being ecient and low
on energy consumption. Does not wear
out clothes.
The amount of humidity that the
dehumidier removes depends on
temperature, humidity level and
placement. External weather conditions
may also aect the performance of the
dehumidier. In cold weather the actual
humidity, (in grams per cubic meter
air) decreases and thus the extraction of
humidity from the air by the
dehumidier is reduced. Therefore the
dehumidier is suitable for use in the
temperature range +5˚C to +35˚C.
Wood’s dehumidiers are safe in
operation and intended for continuous
use over many years.
EXCESSIVE AIR HUMIDITY A
DANGER
Condensation occurs when water
vapour in the air comes into contact
with a cold roof, window or wall.
When water vapour is cooled down,
condensation occurs, and water-drops
are formed. In high air humidity, the air
may get musty and mould is formed,
causing damage to a house and its
furnishings. This environment may even
cause illness for the residents, since
mites and other creatures thrive in a
damp environment. A dehumidier
with high performance creates a good,
healthy humidity level, and for greatest
eciency the doors and windows of
rooms that are being dehumidied
should be kept closed. Removes odours,
dries wood and removes moisture from
sportsware outdoors equipment.
A dehumidier may be used in cellars,
washrooms, garages, crawl spaces,
caravans, summer-houses and on boats.
If the Dehumidier is kept in colder
environments, you should study the
Hints at the end of the manual.
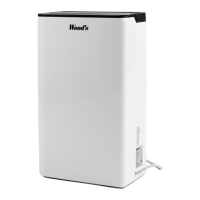
PLACEMENT OF DEHUMIDIFIER
Wood’s dehumidiers are easy to move
around, all you need to have is a power
source for 220/240V, but bear in mind
the following:
- The dehumidier should not be placed
near radiators or other heat sources
or exposed to direct sunlight, as it will
reduce performance.
- It is benecial to use a radiator or
heating fan to keep the temperature
above +5˚C.
- The dehumidier should stand at least
25cm from a wall or other obstruction,
for maximum air ow.
- Ideal is to put it in the center
of the room / area.
NOTE: When placed in a
shower or bathing area, the
dehumidier should be xed in
place. It is compulsory to check
and respect your local bathroom
regulations before use.
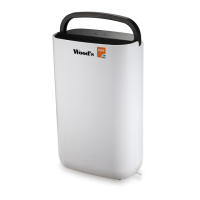
USING THE DEHUMIDIFIER
If the dehumidier is transported
horizontally, oil may have run out of the
compressor and into the closed piping
system. In such a case, let the dehumidi-
er stand for a few hours before being
used. It is very important that the oil
runs back into the compressor, other-
wise the dehumidier may be seriously
damaged.
Once the unit is plugged in, you will
hear 3 noise signals. The unit can be
switched on and o by pressing the
“ON/OFF” button.
You can select the humidity required
by pressing the “HUMID” button.
Select “continue” for a permanent use
or shift to 40% or 60% to maintain the
humidity in the room at these levels. The
compressor will switch o automatically
when the water container is full. When
the unit is reset, the compressor takes
around 3 minutes to switch on.
The air goes into the unit form the
back grill and is release on the top. To
maximize the performance of your
dehumidiers, to do not obstruct the
back grill.
To move the unit, unplug it and empty
the water tank. You can use the carry
handle sitting at the top of the
dehumidier.
NOTE: The unit is set to work
between 0
º
C and + 40
º
C. If the
temperature goes outside this
range it will automatically switch o.
To be restarted, you will need to reset
the dehumidier by unplugging the
cord and insert it again.
CONTROL PANEL
Please refer to FIG A:
• Power: The device is in operation
when power is on.
• Water full: Please remove water bucket
and empty it.
• Defrost: When the room temperature
is lower than 16°c, the compressor
will shut for 13 minutes and resume
operating for a cycle of 40 minutes.
WATER TANK
A noise will tell you when the water
tank is full and the light on the panel
will switch on. The compressor will stop
automatically which will stop the unit
dehumidifying.
1. Disconnect the dehumidier from the
power source.
2. Empty the water reservoir.
3. Put the empty reservoir back in its
position.
4. Connect the dehumidier to the power
source.
DRAINAGE OF WATER
The dehumidier is tted with a hose
connection: please refer to FIG C and
FIG D.
Using the hose:
1. Disconnect the dehumidier from the
power source and remove the water
reservoir to give access to the drip tray.
2. Attach the hose coupling to the thread
on the dehumidier and lead the hose
to a drainage outlet. Check that the
hose is not above the level of the drip
tray.
3. Connect the dehumidier to the power
source.
THE AIR FILTER
The air lter at the rear of the
dehumidier ensures that the cooling
coils are kept free of dust. It is important
that the lter is kept clean so that air can
ow freely through the dehumidier.
The lter should thus be cleaned when
required.
1. slide the lter up as shown if FIG C
2. Lift the lter out and wash it with warm
water and a mild cleansing agent.
Alternatively the lter may be vacuum-
cleaned.
3. Let the lter dry and put it back.
CLEANING AND MAINTENANCE
To clean the outside of the unit, use a
soft dry cloth. You can use a soft neutral
agent if the appliance is very dirty, but
avoid any abrasive tool or liquid. Do not
spray water on the unit.
If the dehumidier is not used for a long
period, unplug the unit, dry the water
container and clean the lter. Store the
unit in a box or cover it to avoid the
dust to build in.
NOTE: Always disconnect
the cord before cleaning.
HINTS:
- When the dehumidier is used in
extremely damp environments or when
the temperature is below +10˚C, the
dehumidier may stop working. A large
amount of ice builds up on the cooling
coil. Turn o the dehumidier and place
it a little above oor level so that the ice
will melt away.
- For maximum dehumidifying power in
a room, it is recommended that the air
supply from outside and from adjoining
rooms is minimized – close doors and
ventilators.
- Increase temp. for faster
dehumidication ( warm air carries
more water.)
- Higher dehumidication in Autumn /
Summer because outside air is warm
and humid.
WHEN THE DEHUMIDIFIER
REQUIRES SERVICING
If the dehumidier requires servicing,
you must rst contact the retailer. Proof
of purchase is required for all guarantee
claims.
GUARANTEES
2 years’ guarantee on the product.
Note that the guarantee is valid only on
production of a receipt.
This machine complies with EEC
directives 76/889 + 82/499
Recommended limits for use
Temp. DS & ED: 0˚C to +40˚C
Relative humidity: 0% to 80%
Recommended
humidity level: appr. 50% RH
IMPORTANT! - Wood’s
dehumidiers must be connected
to an earthed power source.
 Loading...