NOTE: Smooth side of the
wheel to the outside.
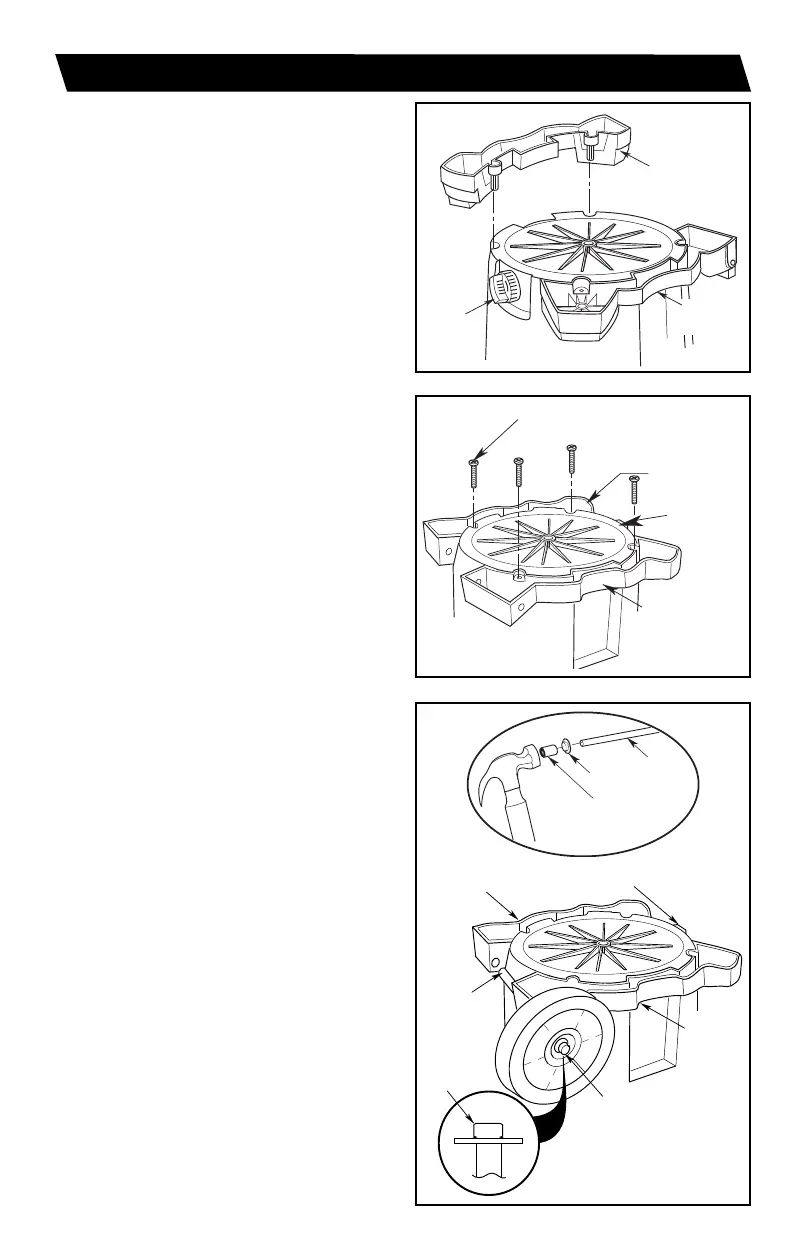
Caddy Left
Drain
Axle
w/Wheel
Caddy
Right
Open
End
Cap
Nut
6
DRUM/CADDY ASSEMBLY
3. Installing Cap Nut:
a. Place Cap Nut on end of Axle.
b. Tap gently with Hammer until fully
seated.
c. Place Wheel on the Axle with
smooth portion of Wheel facing
outward.
Caddy
Right
Drain
Caddy
Left
Right
Caddy
Assembly
Left Caddy
Assembly
Drain
#10 x 1-3/4" (44 mm)
Screws (4)
Do not assemble Vac until you have all
the parts.
1. Insert Caddy Left and Caddy Right
into the bottom of Drum, as shown.
Light taps with a Mallet or Hammer
may be needed to fully seat both
Caddies.
2. Install Four (4) #10 x 1-3/4” (44 mm)
Screws into matching Holes on both
Right and Left side of Caddy, securing
them to the bottom of the Drum.
Tighten Screws until just snug.
Do not over tighten as this may
tend to deform the Caddies.
*TIP - Use a 5/8" (1.58 cm) Socket to
hold the Cap Nut in a stable position
when hammering.
Cap Nut
Axle
5
/8
"
5/8" (1.58 cm)
Socket
(optional)
SP6852-2 Workshop 14 Gallon.qxp_WS1400CA0 8/27/18 3:37 PM Page 6