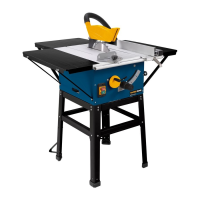
Preparation and assembly
20
support@coreservice.co.uk
GB
20
IRE
AFTER SALES SUPPORT
GB
IRE
0190 226 05
0190 472 0501
NOTICE!
Risk of damage
Only use saw blades that fit the dimensions and maximum permis-
sible speed for this saw. Never use grinding wheels with this saw.
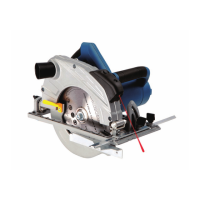
To remove a saw blade, proceed as follows:
1. Loosen the parallel fence locking knob
7
and remove the parallel
fence
9
. Loosen the cutting depth adjustment lever
26
and set the depth of
cut to the minimum position “0 mm” (see figures A and B).
2. Re-tighten the cutting depth adjustment lever
26
.
3. Loosen the mitre angle locking
knob
6
of the mitre scale
5
and set the mitre angle to “0°.”
Re-tighten the mitre angle
locking knob.
4. Place the saw so that the blade re-
taining screw
20
is accessible.
5. Move the saw blade
17
back
and forth slightly as you press the
spindle lock
27
until it clicks into
place.
6. Whilst pressing the spindle lock,
loosen the blade retaining screw
by turning it counterclockwise us-
ing the included Allen wrench
21
.
7. Remove the blade retaining screw, outer washer
19
, and the clamping disk
18
.
8. Pull back the saw blade guard
10
using the saw blade guard lever
12
and care-
fully remove the saw blade.
To fit a saw blade, proceed as follows (see figure C):
1. The fitting of a saw blade is done in the reverse order of the removal instructions.
2. Move the saw blade
17
back and forth slightly as you press the spindle lock
27
until it clicks into place.
3. Tighten the blade retaining screw
20
by turning it clockwise using the included
Allen wrench
21
.
5
27
6