22 23
Operation Maintenance
This should ensure the locking pin on the exible hose (17) aligns with the
ridge in the exible hose outlet – blowing (8). Rotate the exible hose (17)
to the left to secure the hose into position (Fig AF)
3. Select and attach additional extension tubes if required (Refer page 16).
4. Before turning ON, ensure you are rmly holding the end of the exible
hose (17), or extension tube/s (18) if added (Fig AF).
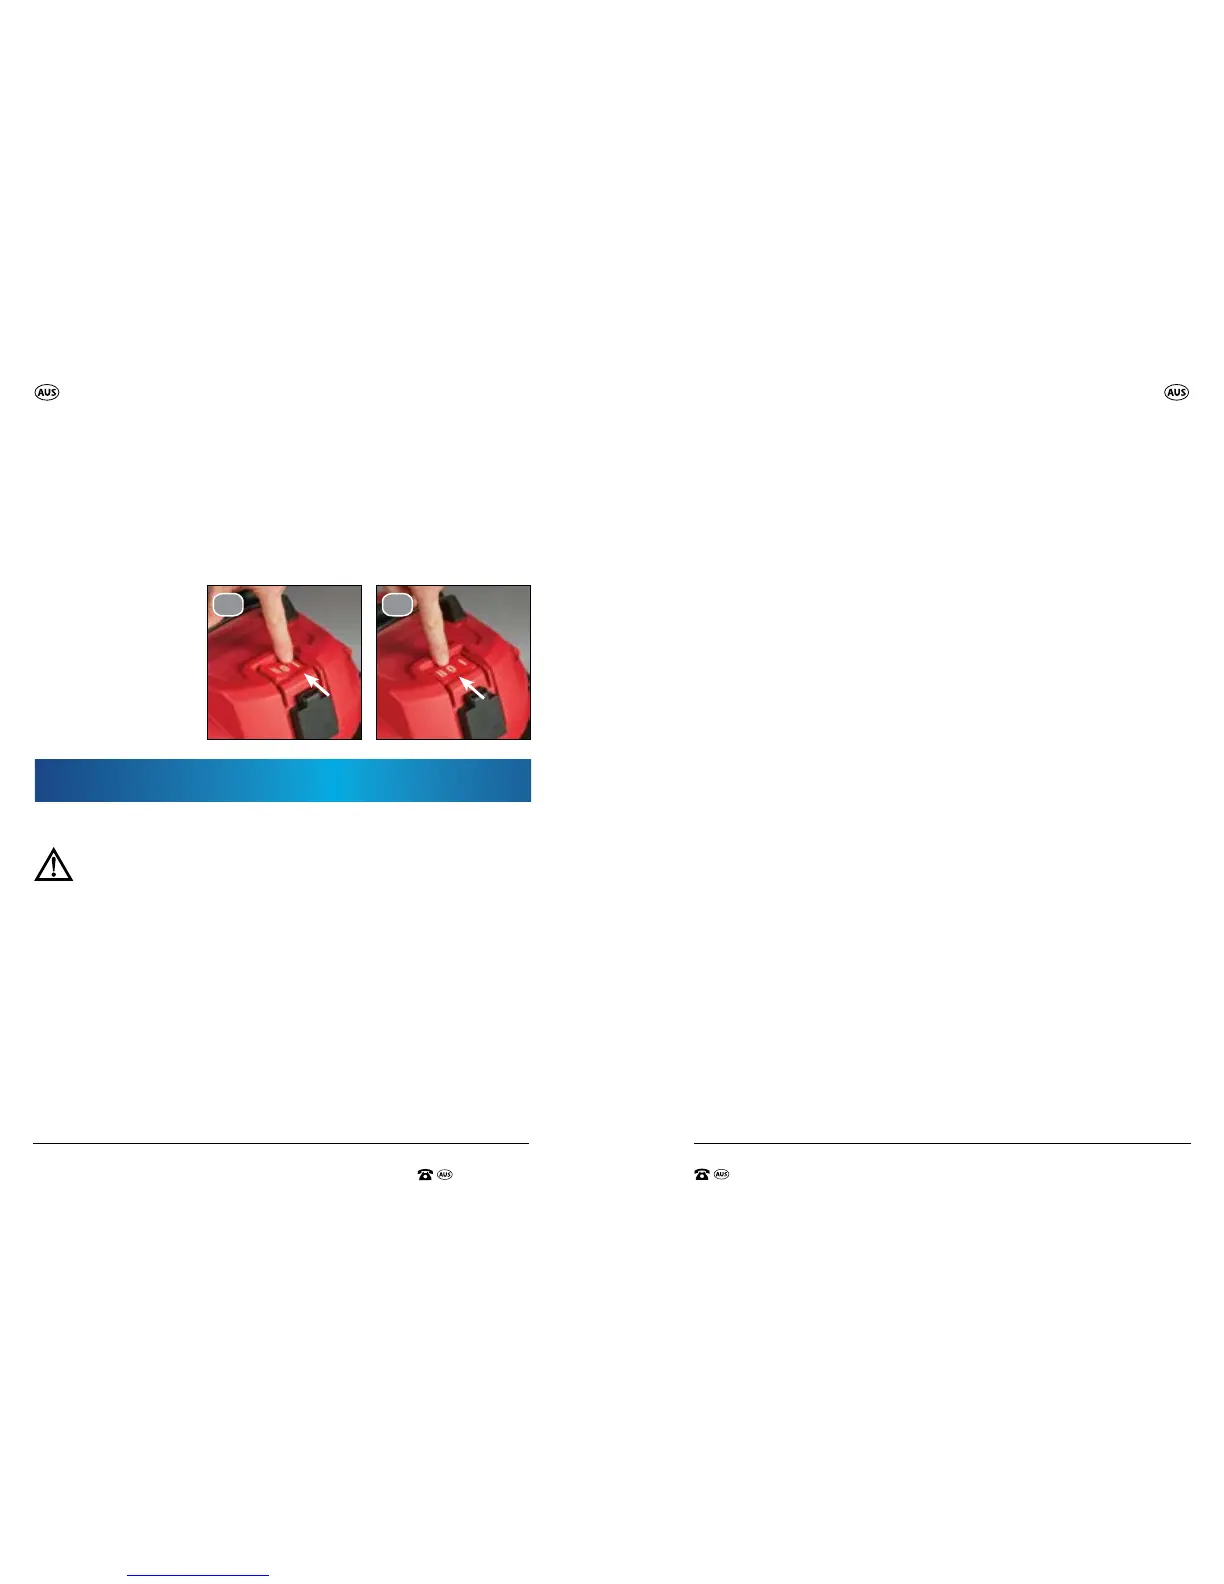
5. Press the “I” on the
ON/OFF Switch (3)
to turn ON (Fig AG).
To turn OFF, press the
“O” on the ON/OFF
switch (Fig AH).
AH.AG.
Cleaning
WARNING! You must pull out the power plug from the mains outlet
before commencing any cleaning, maintenance or inspection work
procedures on the appliance.
• Keep all safety devices, air vents and the motor housing and appliance
head (2) free of dirt and dust.
• We recommend that you clean and dry the appliance immediately after
each use.
Cleaning the Appliance Head
• Clean the appliance head (2) regularly with a damp cloth and some soap
followed by wiping down and drying before storing away.
• Do not submerse the appliance head (2) in water or allow water to enter
the appliance head (2).
• Do not use cleaning agents or solvents. These may be aggressive to the
plastic parts on the appliance.
Cleaning the Tank
• The tank (10) can be cleaned with a damp cloth and soap or rinsed under
running water depending on the amount of dirt. Wipe down and dry
before storing away.
Cleaning the HEPA Filter
• Clean the HEPA lter (16) regularly by carefully patting it and cleaning it
with a ne brush or hand brush (not supplied).
• Do not submerse the HEPA lter in water. Do not use a damp cloth to
clean.
Cleaning the Foam Filter
• Clean the foam lter (19) with a little soap under running water.
• Allow the foam lter (19) to completely air-dry before reinstalling or
storing away. Do not wring dry.
Check the Floating Safety Valve
• Check the oating safety valve (15) often to ensure it moves freely within
the lter basket (14). To do this, take the appliance head (2) by the handle
and tip it carefully so that the lter basket (14) is facing upwards. The
oating safety valve (15) should move freely up and down.
General Maintenance
• Before each use, inspect the general condition of the appliance and check
for the following:
• Loose hardware or screws.
• Misalignment or binding of moving parts.
• Damaged or electrical wiring.
• Check lters are securely tted.
• Damaged or cracked tank.
• Any other condition that may aect safe operation
If the supply cord is damaged, it must be replaced by the manufacturer,
its service agent or similarly qualied persons in order to avoid a hazard.
Maintenance
 Loading...