12 13
WARNING:
• To prevent serious injury from accidental operation, turn the
power switch of the vacuum o and unplug the appliance from its
electrical outlet before performing any procedure in this section.
• Before you connect the vacuum to a mains supply, make sure that
the data on the rating / technical label is identical to the mains data.
• The Wet and Dry Vacuum should only be connected to a mains
power supply socket; an RCD (Residual Current Device) is
recommended.
The Wet and Dry Vacuum requires some assembly prior to use. This includes
assembly of the wheels, and dependent upon the use of the product, the
exible hose, tubes, lters, and accessories. The following detail covers the
assembly required for each function of the Wet and Dry Vacuum.
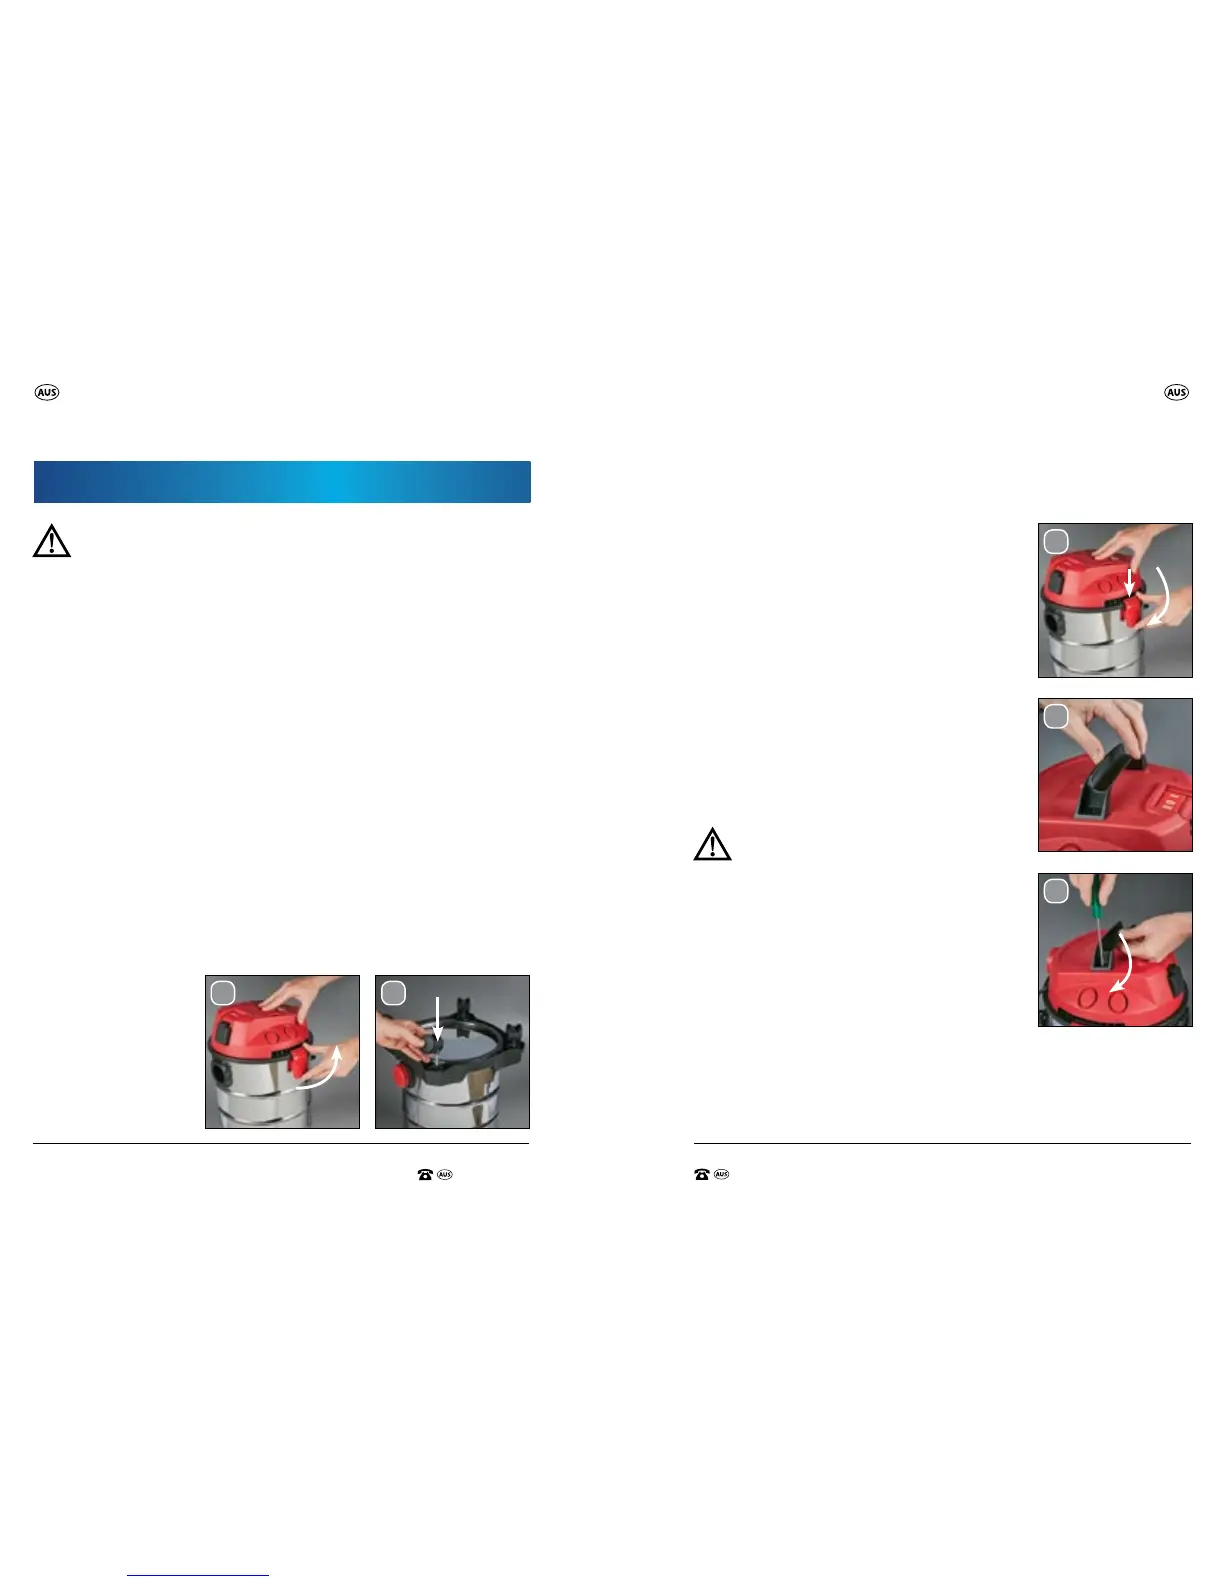
Assembly of the wheels
1. Remove the appliance head (2) from the tank (10) by unlocking the
2 x side locking handles (6) pulling them outwards, then upwards (Fig A).
Then turn the tank (10) upside down.
2. Fit the 4 x castor wheels (13) by inserting the mounting pin on the castor
wheel (13) into the designated mounting hole on the underside of the
base (12). Firmly push the castor wheels (13) into the mounting holes
(Fig B).
NOTE: Take care not to damage the castor wheel.
They do not need to be forced into position.
3. When all 4 castor wheels (13) are tted, turn
the product the right way up, and re-attach
the appliance head (2) ensuring you align the
notches on the ridge of the tank lip with the
side locking handles, and secure the 2 side
locking handles (6) in position (Fig C).
Assembly of the Carry Handle
1. Place the carry handle (1) in the grooves on
the top of the appliance head (2) so that they
are tted and align correctly (Fig D).
2. Using a phillips screwdriver, insert and secure
the screws through each side of the handle until
secure (Fig E).
Assembly for Dry Vacuuming –
HEPA Filter
WARNING: Never use the vacuum without
a lter. Check that the lter is securely tted
at all times.
The Wet and Dry Vacuum is tted with the HEPA
lter (16) used for dry vacuuming upon purchase.
To continue assembly for dry vacuuming, continue
to the ‘Fitting the exible hose’ section on page 15.
Assembly Assembly
Assembly
B.
D.
A.
C.
Notch
E.
Tighten
 Loading...