Do you have a question about the Worx Landroid WR130E and is the answer not in the manual?
Read safety warnings and instructions to prevent injury.
Crucial safety guidelines for handling and using the battery pack.
Checklist and steps for connecting the smartphone app to the Landroid.
Steps to download the app and initiate connection with Landroid.
Safety precautions and instructions for maintaining sharp blades.
Instructions for cleaning the mower's body and underside.
Step-by-step guide for replacing the Landroid battery.
Details on causes and actions for various error codes (E1 to E9).
Common issues, causes, and solutions for Landroid operation problems.
Further common issues, causes, and solutions for Landroid operation.
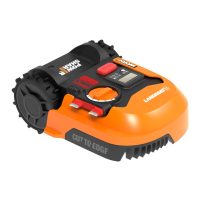
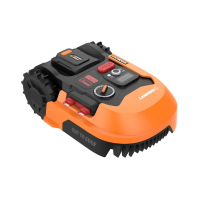
The WORX Landroid is an unmanned robotic lawnmower designed for domestic lawn mowing, offering a care-free approach to maintaining a healthier and better-looking lawn. It operates autonomously, making it an ideal solution for homeowners seeking to automate their yard work.
The Landroid's primary function is to mow grass within a defined boundary. It operates by choosing its direction at random, ensuring even coverage of the entire lawn without leaving unattractive mowing paths. This intelligent navigation system allows the Landroid to work independently, returning to its charging base when its battery is low or when it detects rain. The mower is equipped with a blade turning disc that rotates to cut grass, and its off-centered design (on some models) allows for a clean cut with the narrowest distance to the boundary or wall, minimizing the need for manual trimming. A protective cover underneath the blade disc prevents objects from touching the turning blades and helps prevent injury.
The Landroid is designed to operate within a boundary set by a boundary wire. It uses sensors at its front to detect this wire, ensuring it stays within the designated mowing area. When the Landroid needs to recharge, it follows the boundary wire in an anti-clockwise direction back to its charging base. It is pre-programmed to mow near the boundary wire once a week after being powered on, though this feature can be deactivated via the smartphone app.
Rain sensors are integrated into the Landroid, allowing it to detect rain and automatically return to its charging base. After a set delay time (default 180 minutes, adjustable via the app), it will resume mowing once the sensors are dry. Users can also manually override the rain delay by drying the sensor area and performing a power cycle.
The Landroid can be controlled and monitored via a smartphone app, which allows users to change general settings, view the machine's status, and receive error messages. This connectivity enhances the user experience by providing remote control and real-time information.
Starting the Landroid involves turning it on and inputting a four-digit PIN code. Once started, it can be commanded to begin mowing or return to its charging base via the control panel buttons. The Landroid will continue to mow until its battery level is low, at which point it automatically returns to the charging base. After charging, it will either resume mowing or remain in the base, depending on the programmed schedule.
The cutting height of the Landroid is adjustable, allowing users to set their desired grass level. For the first use, it is recommended to cut the grass with a manual lawnmower to a height no more than 9 cm, and then set the Landroid's cutting height to its maximum setting.
The Landroid is designed to work best in dry weather. Wet grass can accumulate on the blade turning disc and within the motor, potentially causing loose traction and slippage. In case of lightning storms, it is advised to protect the Landroid by unplugging the charging base, disconnecting the boundary wire, and ensuring the Landroid is not allowed to charge.
The device also features a "Cut to Edge" technology on some models, which utilizes an off-centered blade turning disc to provide a clean cut close to boundaries, reducing the need for manual trimming.
Setting the year, date, and time is a compulsory step as these settings influence the mowing schedule. The work area can also be set, with the working time automatically adjusted based on the lawn size. The default start time of 8:00 can be changed by simultaneously pressing specific buttons on the control panel.
The Landroid's software can be updated via USB or through the smartphone app, ensuring access to the latest features and improvements.
Regular maintenance is crucial for the Landroid's longevity and performance. This includes keeping the blades sharp and the machine clean.
Blade Maintenance: The cutting blades are razor sharp and designed to rotate in both directions for maximum cutting capacity. Each blade has two cutting edges. The blade turning disc rotates in forward and reverse at random to utilize both cutting edges and minimize blade replacement frequency. Blades should be checked regularly for chips or damage and replaced if necessary. It is recommended to replace all blades simultaneously to maintain balance. When replacing blades, protective gloves should be worn, and new screws should always be used to ensure proper blade retention and balance. After screwing the blade to the blade disc, ensure it spins freely.
Cleaning: Before cleaning, the Landroid must be turned off, and protective gloves should be worn, especially when cleaning the blade turning disc. The Landroid should never be rinsed or flushed with water, nor should a high-pressure washer be used, as it is an electric machine. A spray bottle filled with water, a soft brush, or a clean cloth is recommended for cleaning the machine body. Solvents or polishes should be avoided. All accumulated grass clippings and debris should be removed.
The underside of the Landroid, including the blade disc, chassis, front wheel, and driving wheels, should be cleaned thoroughly with a soft brush or moist rag. It is important to rotate the blade disc to ensure it rotates freely and to check that the blades spin freely around the fixing screws. Any obstructions or lodged debris should be removed to prevent cracks in the blade disc, which can decrease mowing output.
Contact Pins and Charging Strips: The contact pins on the charging base and the charging strips on the Landroid should be cleaned periodically with a cloth to remove grass clippings and debris, ensuring successful charging.
Battery Life: The Landroid uses a 20V Li-Ion battery. For proper storage, the battery should be fully charged and kept in a cool, dry place. The battery's lifespan is influenced by mowing season length, daily mowing hours, and maintenance during storage. The Landroid can be charged manually by connecting the charging base to a power supply and docking the Landroid while it is off. The green light on the charging base will turn red, indicating charging.
Winter Hibernation: To maximize the Landroid's lifespan, it is recommended to store it in a shed or garage during winter. Before hibernation, the Landroid should be thoroughly cleaned, its battery fully charged and removed, and the power turned off. The underside of the Landroid must be protected from water, and it should never be stored upside down outdoors. The boundary wire can be left in the ground, but its ends should be protected. If the charging base is left outside, the boundary wire should remain connected. After winter hibernation, the charging strips and contact pins should be cleaned, and the date and time should be checked via the app before resuming operation.
Battery Replacement: To replace the battery, the Landroid must be powered off. The battery pack protection cover should be opened, the release button pressed to remove the old battery, and a new, fully charged battery pack inserted until a click is heard, ensuring it is fully secured.
| Battery Voltage | 20 V |
|---|---|
| Cutting Width | 18 cm |
| Maximum Lawn Size | 300 m² |
| Noise Level | 67 dB |
| Power Source | Battery |
| Battery Capacity | 2.0 Ah |
| Operating Time | 60 min |
| Cutting Height Adjustment | Manual |
| Area Capacity | 300 m² |
| Weather Resistance | IPX4 |
| Cutting Height Range | 20-50 mm |
| Charging Time | 90 min |