OPERATING INSTRUCTIONS
WARNING! Do not use the product without
attaching the guard and front handle.
INTENDED USE
This machine is intended to be used domestically for
cutting and trimming hedges and bushes.
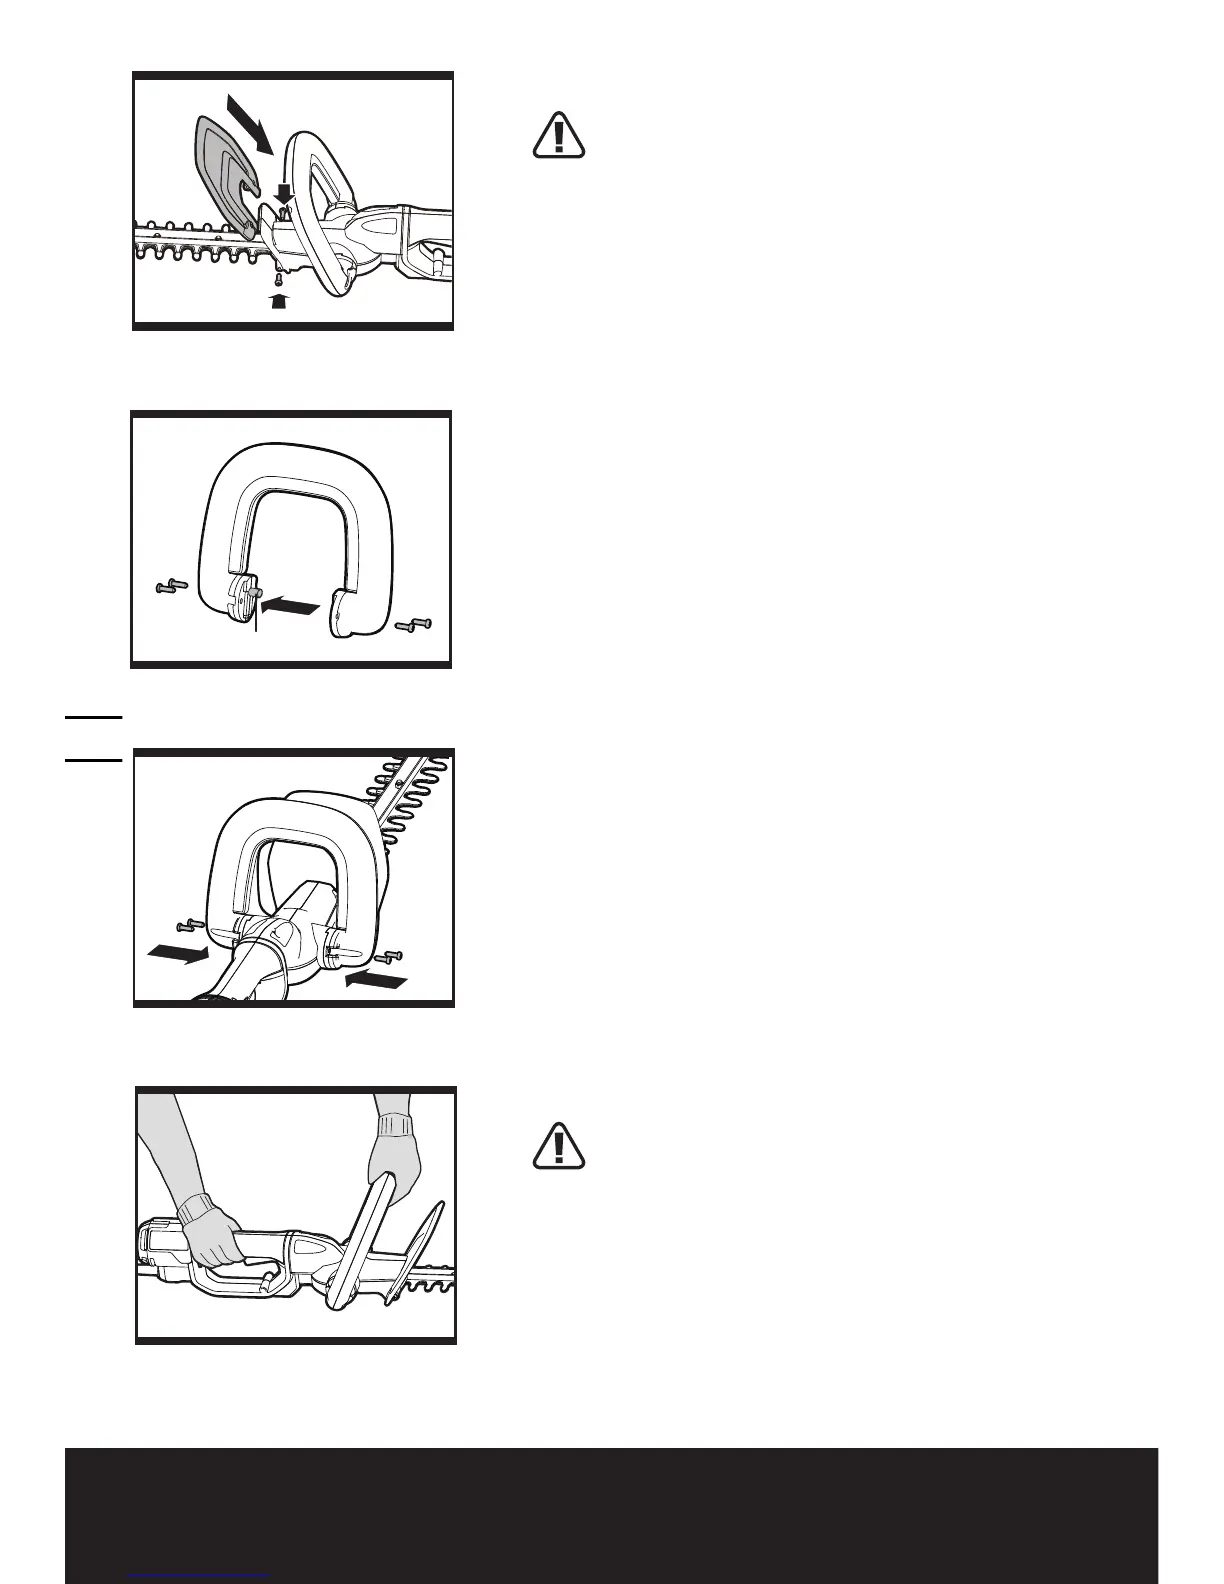
1.ASSEMBLY OF THE GUARD (See Fig. A)
Insert the Safety Guard(5) into the slot as illustrated in Fig A.
Use two screws to fix the guard securely; making sure it
is securely attached.
2. FRONT HANDLE ASSEMBLY
The Front Handle (4) must be assembled before
use:
1) Attach the Front Handle to the housing. Push the
small button (a) inside first. Make sure the protruding
marks on the Front Handle fit perfectly into the
matching indentation on the housing. (See Fig. B & C)
2) Insert and tighten the 4 screws.
3) Check whether handle is firmly secured, if not
retighten the screws.
Make sure the handle is securely attached in
place.
3. STARTING AND STOPPING (See Fig. D)
BEFORE STARTING YOUR HEDGE TRIMMER
Remove Blade Sheath (7).
TO START YOUR HEDGE TRIMMER
There are two switch levers fitted in your Hedge trimmer
(2&3).
Both switch levers need to be depressed for the product
to START. Depress and hold the Front Switch Lever (3)
and depress the Rear Switch Lever (2). (See Fig. D)
TO STOP YOUR HEDGE TRIMMER
Move Hedge trimmer away from cutting area before
stopping.
To STOP, release one of the switch levers.(See Fig. E)
WARNING: If any parts are missing, damaged or
broken, do not operate your Hedge trimmer until
all damaged parts have been replaced or repaired.
Failure to do so could result in serious personal injury.
DO NOT USE WITHOUT HANDLE AND GUARD
A
C

 Loading...