INTENDED USE
The vacuum blower is intended for picking up debris
into the debris collector or blow debris it’s not intends
for use indoors for water suction cleaning and animal
grooming.
ASSEMBLY
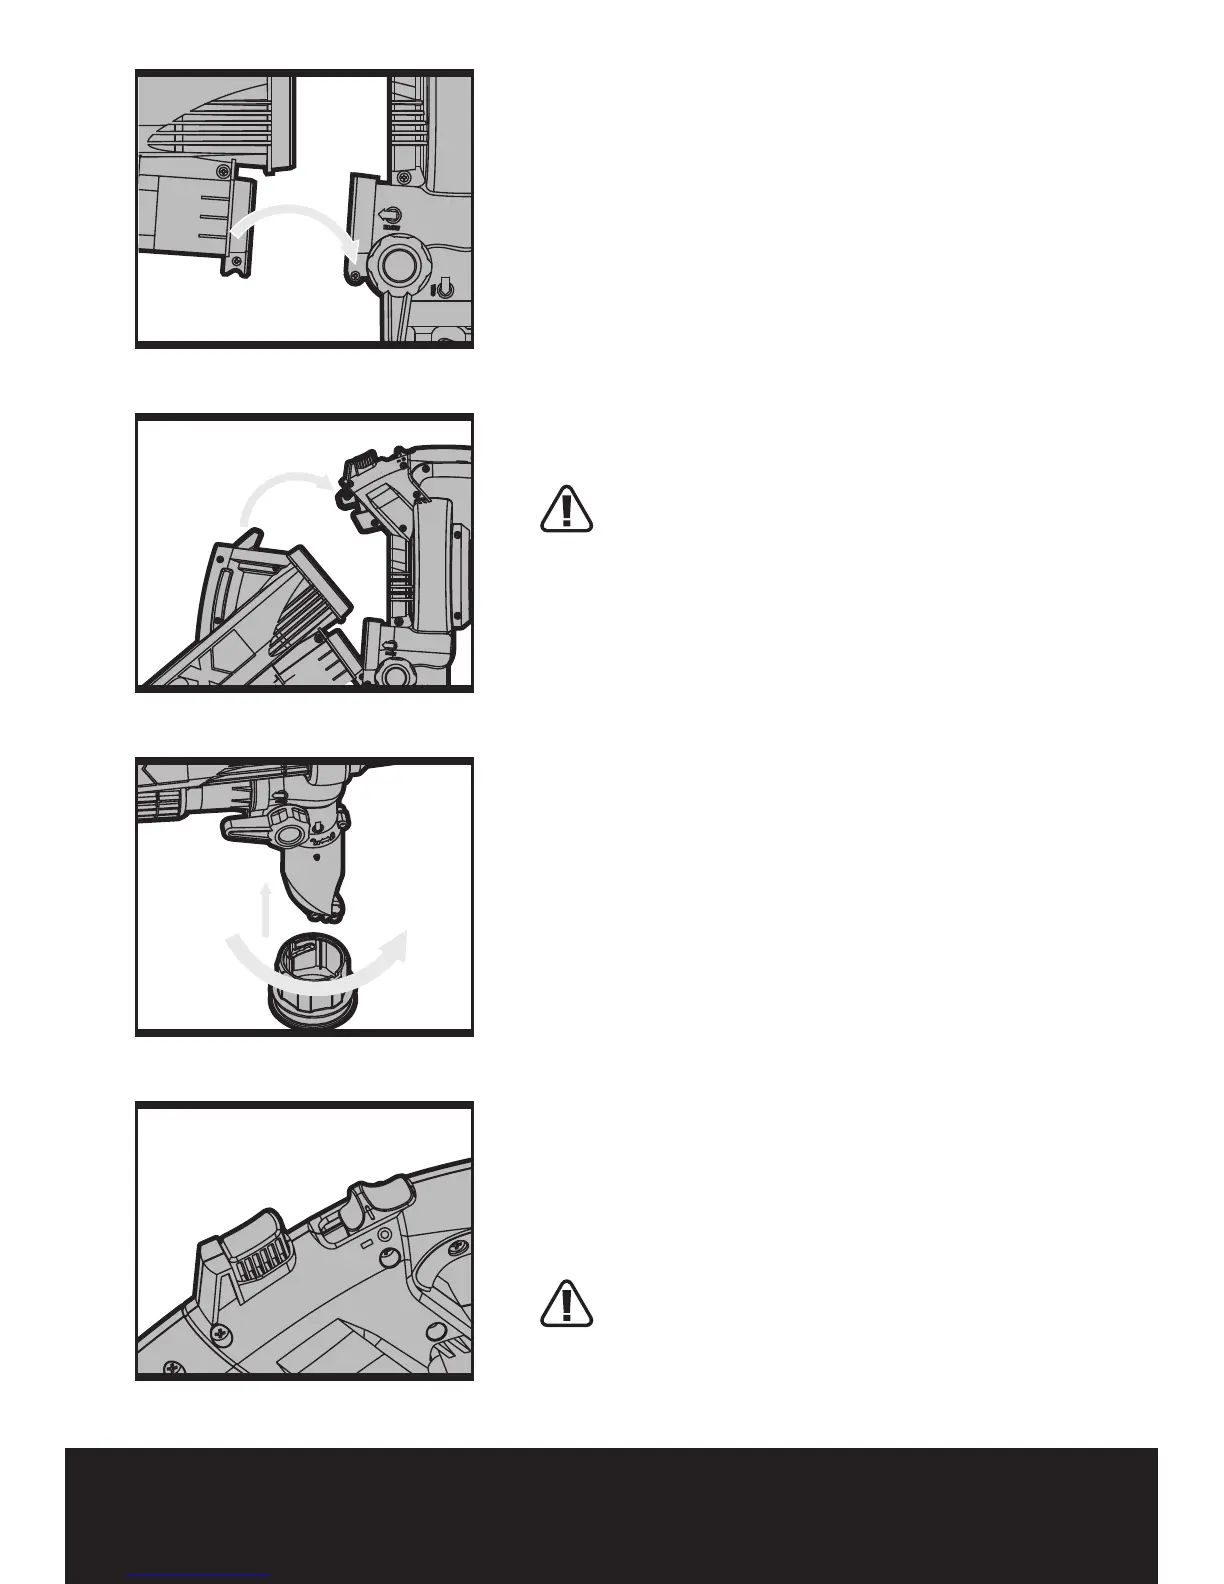
ASSEMBLING THE BLOWER/VACUUM TUBE (Fig
A, B)
Before assembling the Blower/Vacuum Tube, be sure
the on/off switch (2) is in ‘’0’’ position.
Fit the Blower/Vacuum Tube to the motor housing as
shown in Fig. A and B. Check the Blower/Vacuum Tube
is firmly secured.
WARNING! Do not attempt to operate or disable
the safety switch by any means other than the
normal assembly or removal of the cover.
NOTE: After assembling the Blower/Vacuum Tube, you
maydisassembletheblowerbymovingtheOn/Off
switch (2) to ‘’0’’position. Then press the Release Button
(3), so that you can separate the tube. Do not try to
separate the tubes by force or by using tools.
ATTACHING THE LEAF COLLECTION BAG (Fig C)
The vacuum is equipped with a Leaf Collection Bag
(10), which is designed for collecting leaves and debris.
To attach the bag, make sure that the protruding point
on the dust outlet of vacuum is aligned with the gap in
the Bag Holding Frame; insert the Bag Holding Frame
(6) of the Leaf Collection Bag into the rear dust outlet
of vacuum and then turn it clockwise to ensure the leaf
collection bag is secured firmly.
OPERATION
STARTING/STOPPING (Fig D)
IMPORTANT: The unit will not run unless the
Bower/Vacuum Tube is assembled in place.
Starting
ConnecttheplugtothepoweroutletandswitchON.
MovetheOn/Offswitch(2)tothe“1”position.
Stopping
MovetheOn/Offswitch(2)tothe“0”position.
WARNING! The tool runs for a few seconds after
it has been switched off. Let the motor come to a
complete standstill before setting the tool down.
A
C
B
D

 Loading...