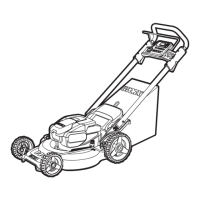
Cordless Lawn Mower EN
1110
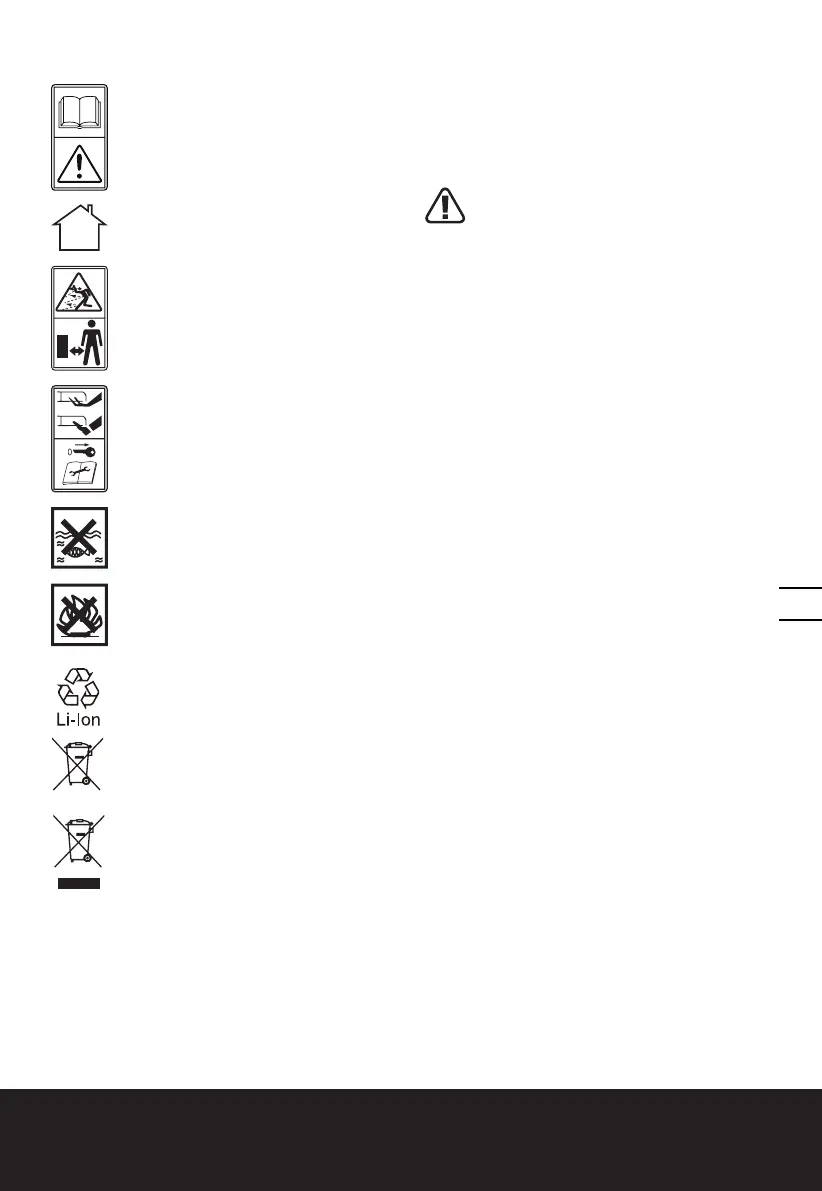
SYMBOLS
Read instruction handbook before
operation this machine
Only use the battery charger
indoors
Keep bystanders away
Beware of sharp blades. Blades
continue to rotate after the motor
is switched off- Remove disabling
device before maintenance
Do not expose to rain or water
Do not burn
Do not dispose of batteries. Return
exhausted batteries to your local
collection or recycling point.
Slip on slope.
Waste electrical products must not
be disposed of with household
waste. Please recycle where
facilities exist. Check with your local
authorities or retailer for recycling
advice.
xINR18/65-y: Cylindrical lithium
Ion battery cells with max diameter
of 18mm and max height of
65mm; “x” represents a number
cells serial connected, blank if 1;
“-y” represents a number of cells
paralleled connected, blank if 1.
INTENDED USE
This product is intended for domestic lawn
mowing.
ASSEMBLY
IMPORTANT! Before you assemble
the lawn mower, check the accessories
according above information, make sure the
accessories are completed.
1. FITTING THE HANDLE (See Fig. A1- A5)
1) Remove the screws (a) on the both side of
deck. (See Fig. A1)
2) Insert the Lower Handle Bar into the holes
on the deck. Be sure to carefully align the
screw holes found on the Lower Handles
with the screws holes found on the deck.
(See Fig. A1 A2)
3) Secure the Lower Handle Bars to the deck
with the screws provided (See Fig A2) .
4) Attach the Middle Handle (9) to the Lower
Handle with the Handle Knobs Assembly
(11). After this is complete, attach the Upper
Handle (7) to the Middle Handle with the
upper Handle Knobs (8) (See Fig. A3).
5) Tightening the two Handle Knobs. Check
that the handle is FULLY secured.
The cam lever pressure can be adjusted
by rotating the upper or the lower Handle
Knobs clockwise/counterclockwise (See Fig.
A4). DO NOT OVER TIGHTEN.
NOTE: Ensure that the bolts are fully
inserted through the handles before
adjusting or tightening the Handle Knobs.
6) First, insert the cable into the Cable Clips
(2) provided ensuring there is enough slack
cable to allow the handlebars to collapse
for storage. After inserting the cable, attach
the Cable Clips to the Upper and Middle
Handle bars (See Fig. A5)
NOTE: Make sure the cable is routed
underneath the Middle Handle Bar
(See Fig.A5).
2. GRASS COLLECTION BAG ASSEMBLY
Connect the grass box handle to the box top
as shown in Fig B1-B4.
Step 1. Press the front of the handle briefly.

 Loading...